


6
www.observint.com
© 2018 Observint Technologies. All rights reserved.
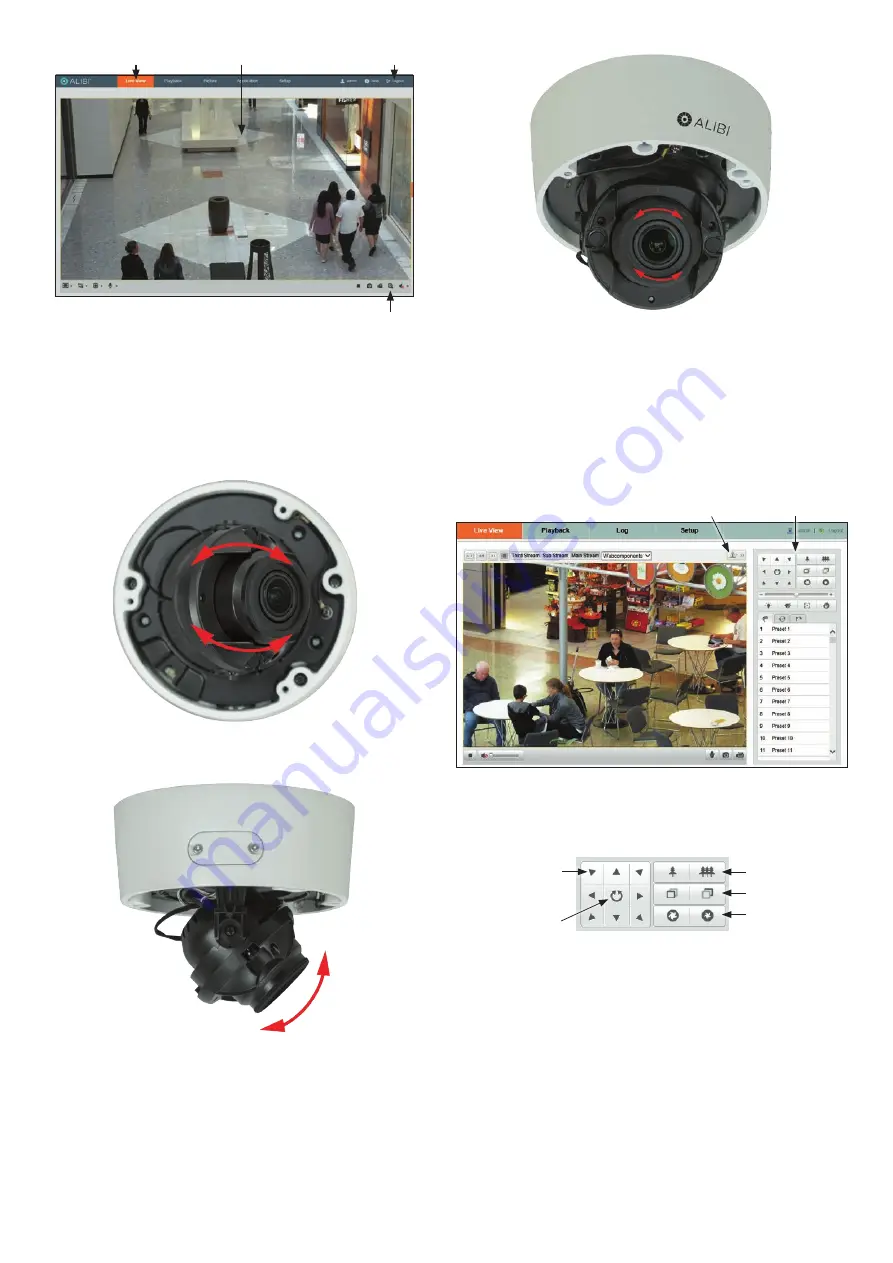
Capture, Record, Zoom icons
Screen select tabs
Logout button
Live View image
Step 7. Adjust camera pan, tilt and rotation
Adjust the camera pan, tilt and rotation to point the camera at your surveillance target. When pointing
the camera, use the
Live View
display on a recorder or remote login. You can also attach the BNC video
maintenance cable to the connector on the maintenance panel, and then attach it to CVBS monitor to
see a live view video from the camera.
1.
While observing live video from the camera, grasp the camera gimbal at the pivot points on both
sides, and then rotate it to point in the direction of your surveillance target.
Pan range:
0˚ ~ 355˚
To adjust the tilt, grasp the camera head and tilt as needed for the image height in the Live View
display.
Tilt range:
0˚ ~ 75˚
To adjust the rotation, grasp the soft ring around lens and turn as needed to produce a horizontal
image.
Rotation range:
0˚ ~ 355˚
2.
Ensure the inside of the dome assembly is clean and dust free, and then reinstall it.
Step 8. Verify PTZ functionality
Use the PTZ control panel to exercise the zoom and focus functionality of the camera. Accessing to the
control panel depends on whether the camera is installed as a device on a LAN or if it is connected to a
NVR. Select the installation type below for your camera to complete this step.
For cameras installed on a LAN
1.
Log into the camera and then open the
Live View
window.
Open / Close PTZ Control Panel
PTZ Control Panel
2.
Click the joystick icon to open the PTZ control panel. See above.
3.
In the PTZ control panel, click each
zoom
and
focus
button shown in the graphic below. Verify
that the camera performs as expected. Refer to the
Specifications
section of this document for
zoom range.
Direction buttons
Zoom In / Out
Focus In / Out
Iris Open / Close
Continuous
pan
For cameras connected directly to an NVR
Refer to the firmware manual for your NVR for specific instructions to perform the following:
1.
Log into the NVR at the NVR console.
2.
In the
Live View
display, find the PTZ camera you installed. Click on the camera to open the
Quick Setting toolbar.


