The Mirage can use 3 or 5
gallon water bottles. This
unit also easily converts to
a direct water line. Please
see page 7 for instructions
on installing this unit direct
to a water line and filtration
system.
Installing the Water Bottle
oasiscoolers.com
Page 5
IMPORTANT: Always wash your hands first before handling water bottle! Clean the top of the water bottle
with a clean cloth. Water bottles can be purchased from your local retailer.
1. Make sure the lower door (bottle storage compartment) is open. The water pump cannot operate as
long as the door is in the open position.
2. Remove the protective label from the top of the bottle. Do not remove the Bottle Cap. s
3. Most water bottles have a puncturable membrane in the top cap. To puncture the membrane, insert
the straw into the cap and push downward until the membrane opens. Insert the straw all the way into
the bottle until the bottom of the straw touches the bottom of the water bottle. NOTE: The water bottle
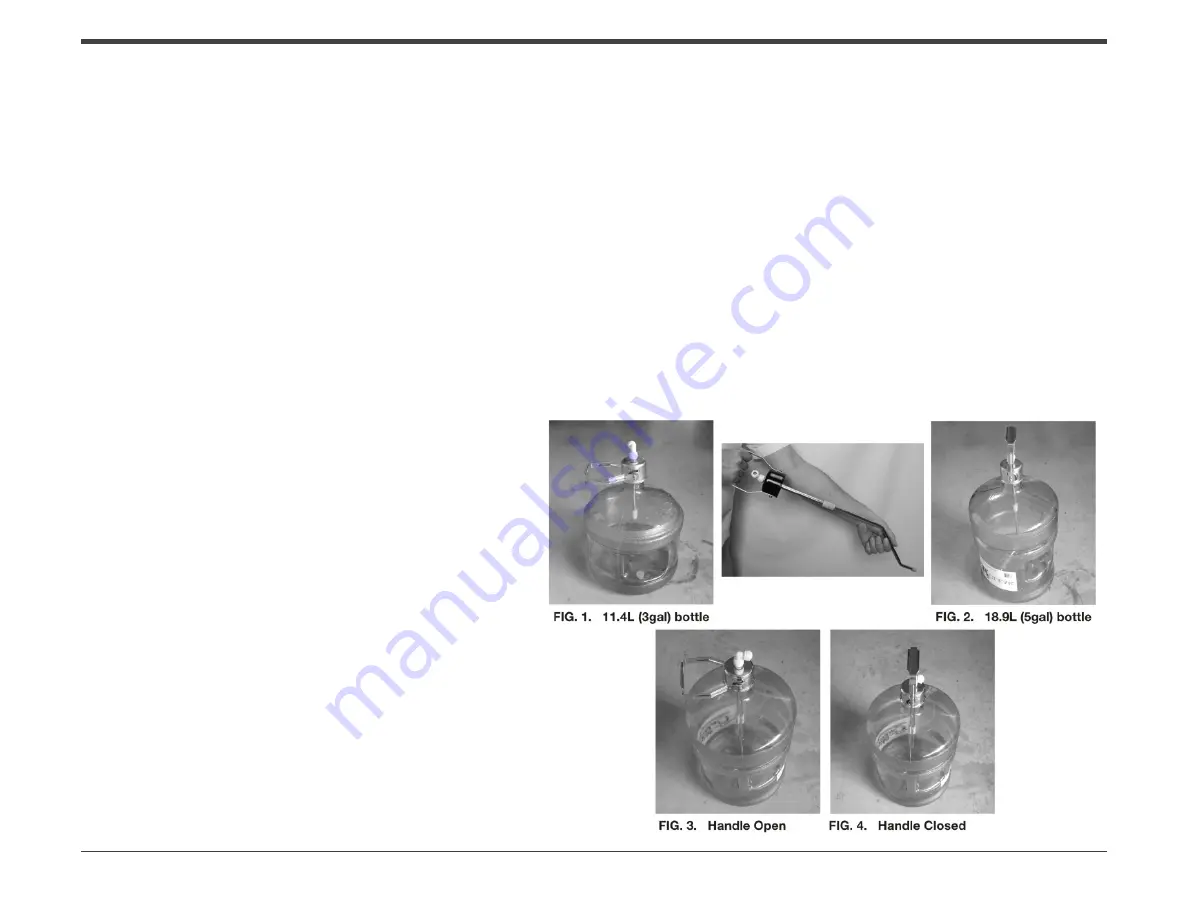
drinking straw features an exclusive telescopic design for use with either 18.9L (5gal) and 11.4L (3gal)
water bottles.(See Fig. 1 & Fig. 2) To adjust the length of the water bottle drinking straw, hold the upper
portion of the straw and simply pull/push the lower portion of the straw to the desired length.
4. To attach the water
bottle straw onto the
neck of the water
bottle, make sure the
handle is positioned
“horizontally” and
press firmly onto the
top of the bottle neck.
(See Fig. 3) When the
handle is in the “verti-
cal” (locked) posi-
tion, (See Fig. 4) it is
possible to lift/carry
the water bottle (the
Bottle Cap must be
in place to lift). How-
ever, when installing
the 18.9L (5gal) water
bottle inside the stor-
age compartment, the
handle must be in the
“horizontal” position.
(See Fig. 3)


