background image

16

(58)

Maint

enanc

e Ov

ervie

w

To ensure a maximum product and consumables lifespan 

we recommend that you should always follow the cleaning 

and maintenance instructions in this manual closely. To 

decrease your risk of infection or disease follow the cleaning 

and maintenance instructions in this manual and at the 

recommended frequency.

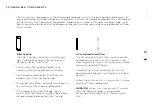
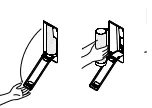
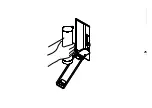
•  When cleaning the bathroom, make a habit of lifting the  

  Grating and wipe the top of the Funnel clean.

•  Quartz Glass needs to be cleaned when notified that the 

   performance of the UV application is reduced.

•  Sensor Tank Unit cleaning should be performed weekly.

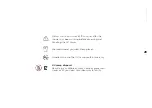
•  Do not use any corrosive detergents during the cleaning 

   and maintenance of the Oas shower system. 

•  Do not use abrasive pads or cloths as these may damage 

   the product.

Summary of Contents for Indo

Page 1: ...Oas Indo Operation Maintenance Oas Indo EU 190528...

Page 2: ...2 58 Introduction Safety Messages This manual applies to model OS8732 Ei2...

Page 3: ...ntial of the shower please read and follow the procedures in this manual Make sure that you fully understand how to operate this shower and make sure that it is properly maintained in accordance with...

Page 4: ...lead to scalding and risk of injury Never permit or operate electrically connected devices in or within 15 cm of the shower system Cleaning and user maintenance shall not be completed by children Do...

Page 5: ...system or damage the shower system Do not drink the shower water The system has several functions for cleaning the water as well as intelligent hygiene operation modes but drinking water quality cann...

Page 6: ...All electrical installations must conform to local regulations and be performed by a licensed electrician All plumbing installations must conform to local regulations and be performed by a licensed pl...

Page 7: ...ty does not cover Defects arising out of materials or a design specified by the Client or by any alterations carried out without our consent Defects that appear under conditions of operation not provi...

Page 8: ...lable to assist you should you require product advice experience any problems need to purchase spare parts or to set up a service visit We recommend your first point of contact should be your installe...

Page 9: ...OF CONTENTS Operating the Oas Shower 10 Maintenance Overview 15 Changing the Filter Capsule 22 Changing the UV Lamp 27 Cleaning the Quartz Glass 35 Cleaning the Sensor Tank Unit 41 Running the Cleani...

Page 10: ...10 58 OPERATING THE OAS SHOWE R...

Page 11: ...OWER The Oas shower performs a short startup sequence to fill up the system and adjust water temperature before water starts pouring out of the shower head Similarly it also performs a short shutdown...

Page 12: ...12 58 ADJUST T EMPERATURE Operating the Oas shower...

Page 13: ...13 58 M ENU Long press to access the menu Turn to navigate Push to select action Operating the Oas shower...

Page 14: ...14 58 OP E RAT ING THE HAND SHOWER Operating the Oas shower...

Page 15: ...15 58 MAINTENANCE OVERVIEW...

Page 16: ...ructions in this manual and at the recommended frequency When cleaning the bathroom make a habit of lifting the Grating and wipe the top of the Funnel clean Quartz Glass needs to be cleaned when notif...

Page 17: ...e components essential in the UV treatment and cleansing of water The UV Lamp has an estimated lifespan of up to 8 000 hours Changing the UV Lamp and Quartz Glass can be performed either by the custom...

Page 18: ...ch as hair The Recirculation Mesh will require replacement if not cleaned regularly Descaling tablet The descaling tablet is essential when running the Cleaning Program Use a standard descaling tablet...

Page 19: ...58 1 2 3 4 5 3 2 1 4 5 Maintenance Overview M A INT E NANCE OVERVIEW Changing the Filter Capsule Changing the UV Lamp Cleaning the Quartz Glass Cleaning the Sensor Tank Unit Running the Cleaning Progr...

Page 20: ...20 58 2 7 4 1 5 8 6 3 1 2 3 4 5 6 7 8 Maintenance Overview M A INT E NANCE COMPONENT OVERVIEW Filter Capsule Filter Bay Filter Clamp UV Lamp UV Cover UV Connector Quartz Glass M3 2mm driver x2...

Page 21: ...21 58 Maintenance Overview OP E N T HE INDO PANEL...

Page 22: ...ule Model No OS C1050085A10 Use only Orbital Systems Filter Capsule OS C1050085A10 in the shower system For further assistance or to order any replacement consumable components contact support orbital...

Page 23: ...23 58 Changing the Filter Capsule...

Page 24: ...24 58 Changing the Filter Capsule...

Page 25: ...25 58 Changing the Filter Capsule...

Page 26: ...26 58 Make sure Filter Capsule is inserted correctly or leakage may occur Click Changing the Filter Capsule...

Page 27: ...Lamp Model No OS1040019 Use only Orbital Systems UV Lamp OS1040019 in the shower system For further assistance or to order any replacement consumable components contact support orbital systems com wa...

Page 28: ...r the shower has been running before accessing and handling the UV Lamp We recommend you wear clean gloves Handle with care the UV Lamp contains mercury UV Lamp disposal Recycling is available at many...

Page 29: ...29 58 Changing the UV Lamp...

Page 30: ...30 58 2 1 1 Changing the UV Lamp...

Page 31: ...31 58 Changing the UV Lamp Mercury Handle with care...

Page 32: ...32 58 Changing the UV Lamp Insert new UV Lamp...

Page 33: ...33 58 Changing the UV Lamp...

Page 34: ...34 58 Changing the UV Lamp...

Page 35: ...35 58 watch video https bit ly 2QPQga1 CL EANING THE QUARTZ GLASS...

Page 36: ...um of 10 minutes after the shower has been running before accessing and handling the Quartz Glass We recommend you wear clean gloves Quartz Glass disposal Recycling is available at many home improveme...

Page 37: ...37 58 30 29 31 Cleaning the Quartz Glass...

Page 38: ...38 58 Cleaning the Quartz Glass...

Page 39: ...39 58 Cleaning the Quartz Glass...

Page 40: ...40 58 Cleaning the Quartz Glass Hand tighten only or leakage may occur...

Page 41: ...41 58 CLEANING THE SENSOR TANK U NI T watch video https bit ly 2VVKfw6...

Page 42: ...42 58 Use non abrasive cleaning agents only Cleaning the Sensor Tank Unit...

Page 43: ...43 58 Cleaning the Sensor Tank Unit...

Page 44: ...44 58 Cleaning the Sensor Tank Unit...

Page 45: ...45 58 Use non abrasive cleaning agents Make sure to clean all surfaces of each component including the built in Drain Unit Cleaning the Sensor Tank Unit...

Page 46: ...46 58 Cleaning the Sensor Tank Unit...

Page 47: ...47 58 Cleaning the Sensor Tank Unit...

Page 48: ...48 58 Cleaning the Sensor Tank Unit...

Page 49: ...49 58 Cleaning the Sensor Tank Unit Make sure Smart Sensor Unit is inserted correctly The O ring should not be visible...

Page 50: ...50 58 Cleaning the Sensor Tank Unit...

Page 51: ...51 58 Cleaning the Sensor Tank Unit...

Page 52: ...52 58 RUNNING THE CLEANING PROGRAM watch video https bit ly 2sxw5nm...

Page 53: ...ne of the following ingredients Citric acid Sulfamic acid Sodium carbonate Recommended suppliers for cleaning tablets Ambidelux AmbiClean descaling tablets Entkalkungstabletten Urnex RINZA Milk frothe...

Page 54: ...54 58 Running the Cleaning Program Place the Descaling Tablet directly under the Shower Head...

Page 55: ...55 58 Running the Cleaning Program Long press to access the menu...

Page 56: ...56 58 Running the Cleaning Program...

Page 57: ...57 58 Running Cleaning Program Exit the shower area 04 58 Make sure water is running through all shower nozzles Running the Cleaning Program...

Page 58: ...58 58 Running the Cleaning Program Cleaning program successful...

Page 59: ...C E R T I F I E D S PA C E T E C H N O L O G Y...

Reviews: