


10
11
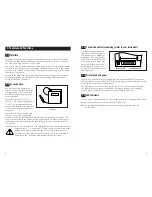
4. Setting up printer parameters
Selecting Meter Type and Communication Parameters
When shipped, the printer is set to print output from the OAKTON 200 series
pH hand-held meter. If you are using the OAKTON pH 2000 or pH 2500 benchtop
meter, or the CON 100 hand-held conductivity meter, follow steps 1-4 below.
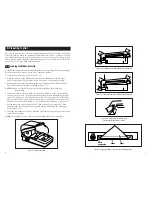
Selecting Meter Type
1. Switch the printer off (ON/OFF switch is located on right side of printer).
2. Press down and hold the FEED key, then switch the printer on. Release the
FEED key after the printer head stops moving. The printer has now entered Select
Print mode. This mode lets you select the correct printer configuration for your
meter type (i.e. printer configuration for a hand-held meter or benchtop meter).
3. Use the SEL key to change the print mode. Each time you press the SEL key, the
printer scrolls to the next meter type. You can select from the following meter
types: HH pH meter, Benchtop pH meter, HH Cond meter, General.
NOTE:
Use the General print mode for non-OAKTON instruments and to print the
pH benchtop meter calibration parameters (see page 12 for directions).
4. Press the FEED KEY to confirm the print mode and to move into baud rate
selection mode.
NOTE:
Unless you have changed the communication parameter settings on your
OAKTON meter, you do not need to make further changes to the printer.
Turn printer off and then on again to begin printing. If you changed the set-
tings on your OAKTON meter, go to step 5 under “Selecting Communication
Parameters” on page 11.
4.1
Selecting Communication Parameters
The printer’s factory default communication parameter settings are 9600 baud,
8 data bits with one stop bit and even parity. This matches the default setting on the
OAKTON products and should not need to be changed.
IMPORTANT:
For optimum performance, make sure your meter is set to 9600 baud,
even parity (2), and 2 stop bits, and that the printer is set to 9600 baud,
even parity (2), and 1 stop bit.
If you want to change the communication parameters, complete steps 1-4 on page 10
and then go to step 5 below:
5. Use the SEL key to change the baud rate to desired setting. Each time you press
the SEL key, the printer scrolls to the next baud rate. You can select from a baud
rate of 9600, 4800, 2400 or 1200.
6. Press the FEED key to confirm the baud rate and move into parity selection
mode.
7. Use the SEL key to change the parity setting. Each time you press the SEL key,
the printer scrolls to the next parity setting. You can select from Even, Odd, or
None parity settings.
8. Press the FEED key to confirm the parity setting and move into the data bit
selection mode.
9. Use the SEL key to change the data bit setting. Each time you press the SEL key,
the printer scrolls to the next data bit setting. You can select from 7 or 8 data bits.
10. Press the FEED key to confirm the data bit setting.
11. Once the you select the data bit, the stop bit is set automatically. If you selected
a data bit of 8, then stop bit will be 1. If you selected a data bit of 7, then stop bit
will be 1 or 2 depending on the parity. The printer then automatically moves into
auto line-feed mode.
12 After all desired settings have been made, turn printer off.
13. Turn printer on again for operation.
NOTE:
After each selection has been made, always press FEED once to record the
selection before turning printer power off.


