


24
Warning!
Mixture adjustments (whether via the
Metering Needle, or the Needle-Valve)
cannot be made accurately under 'no-load'
conditions, which, in any case, are not
advised, since such operation carries the
risk of seriously damaging the engine
through over-revving and overheating.
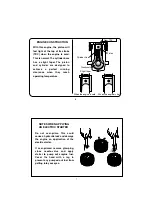
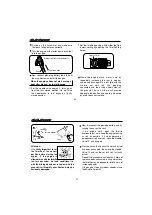
With the engine running, close the throttle
and allow it to idle for about five seconds,
then reopen the throttle fully. If, at this point,
the engine puffs out an excessive amount of
smoke and the vehicle does not accelerate
smoothly and rapidly, it is probable that the
idle mixture is too rich.
Carry out adjustments patiently, under actual
running conditions, until the engine responds
quickly and positively to the throttle control.
In this case, turn the Metering Needle
clockwise 15˚. If, on the other hand, the
engine tends to speed up momentarily and
then cut out abruptly when the throttle is
opened, the idle mixture is too lean. Correct
this by turning the Metering Needle
counter-clockwise 15˚.
With the optimum mixture control position,
light smoke is visible during high speed
running,and the engine rpm increases
smoothly during acceleration. Remember
that, if the engine is operated with the fuel/air
mixture slightly too lean, it will overheat and
run unevenly. As with all engines, it is
advisable to set both the needle-valve and
metering needle slightly on the rich side of
the best rpm setting, as a safety measure.
25
If the engine runs too fast with the throttle
closed, the throttle stop screw should be
turned counter-clockwise to allow the throttle
opening to be reduced.
Finally, beyond the nominal break-in period,
a slight readjustment toward a leaner needle
setting may be required to maintain
maximum performance.
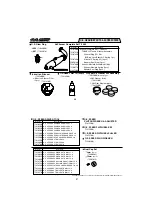
REALIGNMENT OF METERING NEEDLE AND
MIXTURE CONTROL VALVE
In the course of making carburetor
adjustments, it is just possible that the
Metering Needle and the Mixture Control
Valve may be inadvertently screwed in or out
too far and thereby moved beyond its
effective adjustment range.
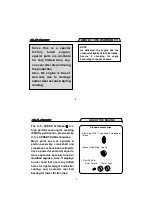
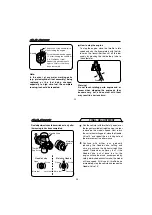
The basic positions can be found by rotating
the Metering Needle until its slotted head is
flush with the ball link body.
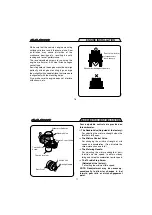
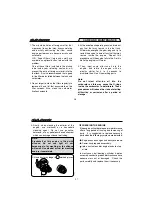
Mixture Control Valve
Carburetor Body
Slide Valve
Carburetor Body
Metering Needle
Rotate the Metering Needle
until its slotted head is flush
with the ball link body.
This is the basic position.
Ball Link
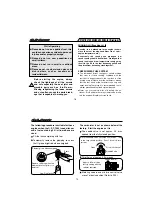
Rotate the Mixture Control
Valve until its slotted head is
flush with the carburetor body.
This is the basic position.


