background image


14


Chapter 4 

USEFUL HELP 

4-1 HOW TO UPDATE BIOS                                             


STEP 1.

 Prepare 

a boot disc

. (You may make one by click START click RUN type SYS A:   


click OK)


STEP 2.

 Download upgrade tools and the latest BIOS files of the motherboard from official 

website and then make a copy of it to your bootable 

floppy 

disk after 

decompressing these files 

STEP 3.

 Insert the disk into A: ,start your computer and then type in 

“A:\xxxxxx.BAT”(xxxxxxx being the file name of the latest BIOS ) 

STEP 4. 

Type Enter to update and flash the BIOS. The system will restart automatically 
when BIOS is upgraded. 


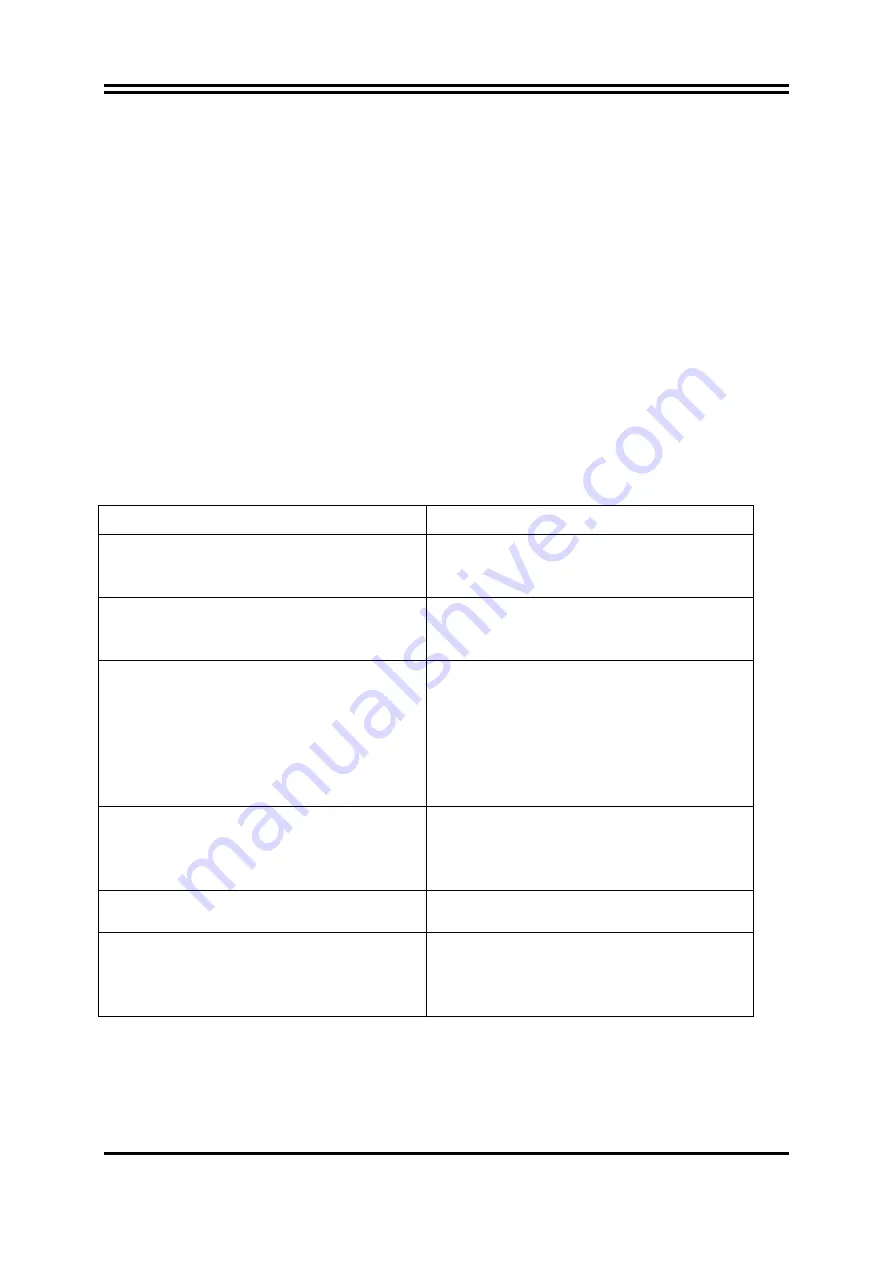
4-2 Trouble Shooting 

Problem  

Solution  

No power to the system to the all power 
light don’t illuminate, fan inside power 
supply doesn’t turn on.   

1. Make sure power cable is security 
plugged in. 2. Replace cable. 3. Contact 
technical support.   

System inoperative. Keyboard lights are 
on , power indicator lights are lit, and hard 
drive is spinning.   

Using ever pressure on both ends of the 
DIMM , press down firmly until the 
module snaps into places.   

System doesn’t boot from hard disk drive, 
can be booted from optical drive.   

1. Check cable running from disk to disk 
controller board. .Make sure both ends are 
securely plugged in, check the drive type 
in the standard CMOS setup. 2. Backing 
up the hard drive is extremely 
important .All hard disks are capable of 
breaking down at any time.   

System only boots from optical 
drive .Hard disk can be read and 
applications can be used but booting from 
hard disk is impossible.   

1. Back up date and applications files. 2. 
Reformat the hard drive. Reinstall 
applications and date using backup disks. 

Screen message says “Invalid 
Configuration” or “CMOS Failure”   

Review system ‘s equipment .Make sure 
correct information on is in setup.   

Can not boot system after installing second 
hard drive.   

1. Set master /slave jumpers correctly. 2. 
Run SETUP program and select correct 
drive types. Call the drive manufacture for 
compatibility with other drives.   


Summary of Contents for nF6100-430

Page 1: ...Core AMD Processor NO G03 M26GT4 F Rev 3 0 Release date July 2009 Trademark Specifications and Information contained in this documentation are furnished for information use only and are subject to ch...

Page 2: ...1 INSTALL SOCKET AM2 SUPPORTED AMD PROCESSOR 5 2 2 INSTALL MEMORY 5 2 3 EXPANSION CARDS 6 CHAPTER 3 CONNCTORS HEADERS JUMPERS SETTING 3 1 CONNECTORS 7 3 2 HEADERS 10 CHAPTER 4 USEFUL HELP 4 1 HOW TO U...

Page 3: ...ions and meet the demanding usage of computing now and future The motherboards incorporate the integrated NVIDIA GeForce 6100 Graphics Core which is fully compatible with Microsoft DirectX 9 0C and Sh...

Page 4: ...Thermal Throttling Technology will force CPU to enter partially idle mode from 87 5 to 12 5 according to preset CPU operating temperature in BIOS from 40 to 90 When the system senses the CPU operating...

Page 5: ...ULTRA DMA 33 66 100 133 functions that deliver the data transfer rate up to 133 MB s Four Serial ATA2 ports provide 300 MB sec data transfer rate with RAID 0 1 0 1 5 functions LAN Integrated 10 100 LA...

Page 6: ...nector SATAII1 2 PCI Slot PS2 KB Mouse Port CPU FAN Audio Connector RJ45 Over USB Connector PCI Express x16 by 16lane Front Panel Audio DDR2 Socket x 2 SFAN1 ATX 12V Power Connector 6 CH HD Audio Code...

Page 7: ...he ZIF socket and open it by first pulling the level sideways away from the socket then upward to a 90 degree angle Insert the CPU with the correct orientation as shown below The notched corner should...

Page 8: ...DDR SDRAM modules to your motherboard is very easy you can refer to figure 2 4 to see what a 240 Pin DDR2 400 533 667 800 SDRAM module looks like NOTE When you install DIMM module fully into the DIMM...

Page 9: ...fication 2 0 compliant power supply unit PSU with a minimum of 350W power rating This type has 24 pin and 4 pin power plugs If you intend to use a PSU with 20 pin and 4 pin power plugs make sure that...

Page 10: ...or The connectors are 4 pin connector that connects USB devices to the system board 5 LAN Port connector UL1 This connector is standard RJ45 connector for Network The USBLAN1 support 10M 100Mb data tr...

Page 11: ...mary IDE connector You may also configure two hard disks to be both Masters using one ribbon cable on the primary IDE connector and another ribbon cable on the secondary IDE connector Two hard disks c...

Page 12: ...bminiature female connector it is for the display devices such as the CRT monitor LCD monitor and so on 3 2 Headers 1 Line Out MIC Header for Front Panel 9 pin AUDIO1 This header connects to Front Pan...

Page 13: ...cator light on the case 6 Reset switch lead RESET This 2 pin connector connects to the case mounted reset switch for rebooting your computer without having to turn off your power switch This is a pref...

Page 14: ...he red wire should be positive while the black should be ground Connect the fan s plug to the board taking into consideration the polarity of connector 9 CD Audio In Headers 4 pin CDIN CDIN are the co...

Page 15: ...he BIOS SETUP 11 SPDIF Out header SPDIF Out The SPDIF output is capable of providing digital audio to external speakers or compressed AC3 data to an external Dolby digital decoder Use this feature onl...

Page 16: ...ights are lit and hard drive is spinning Using ever pressure on both ends of the DIMM press down firmly until the module snaps into places System doesn t boot from hard disk drive can be booted from o...

Reviews: