


User´s Manual
English
DTR 126
16
SETUP
This menu has six sub -menus :
-Installation
-TV Setup
-Password
-Advance Timer
-SW Update
-Set Default
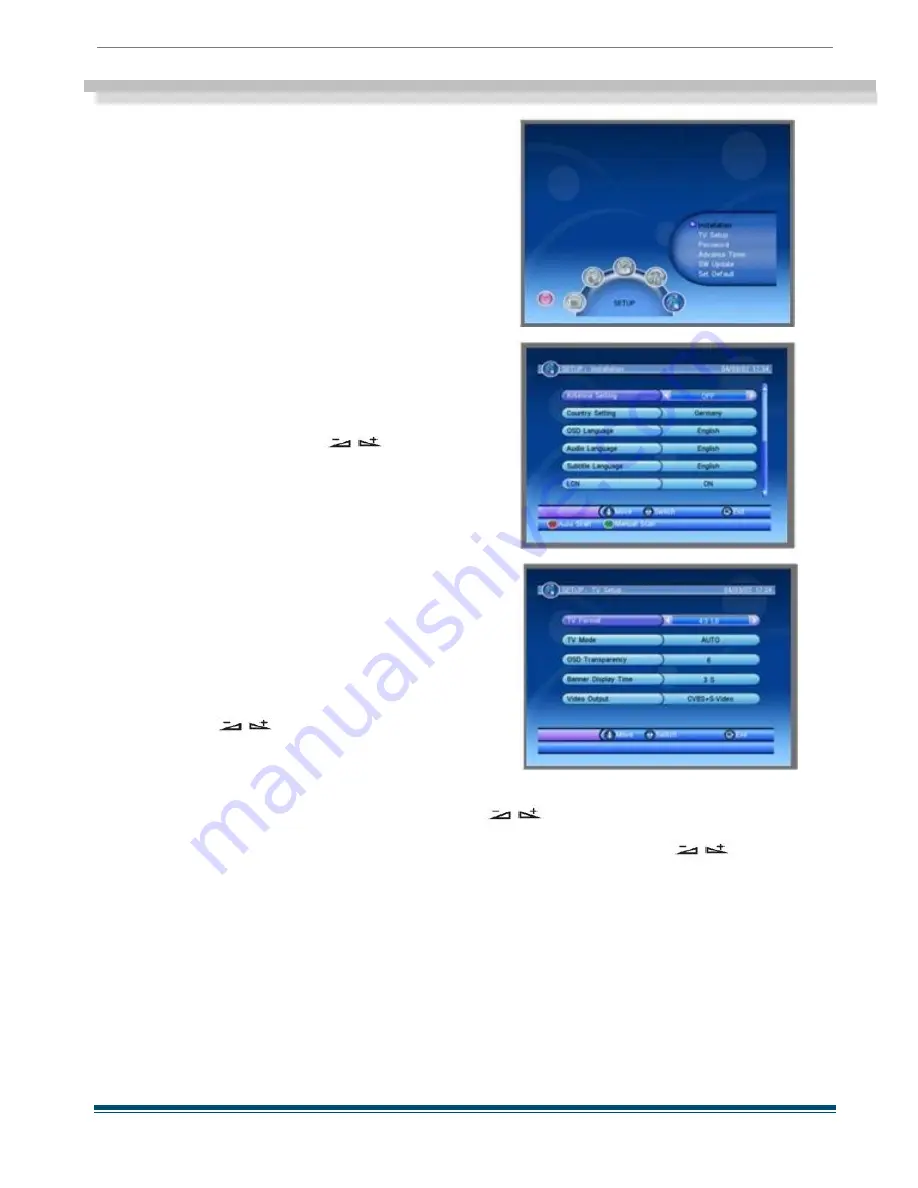
5.1 Installation
When you enter the Installation menu , the screen
will display as beside .
In this menu , you can press PR + ,PR - keys to
select sub -menus and press
keys to
move highlight to choose your choice .
Press red key to enter Auto Scan menu , and press
green key to enter Manual Scan.
5.2 TV Setup
When you enter TV Setup, you will see the
screen as beside .
1) TV Format: TV Format is used for switching
the screen aspect ratio mode. Now we provide
several options: 4:3LB/4:3PS/16:9LB/16:9FIT.
You can press
keys to select each mode
circularly.
2) TV Mode : TV Mode is used for select the screen -
displaying mode . Now we provide
three mode : Auto , PAL and NTSC . You can press
keys to select each mode .
3) OSD Transparency : You can set the transparency of all the menus . Press
keys to select the values . There are eight levels of the transparency , The lowest value 1
means the most transparent , the highest value 8 means opacity.
4) Banner Display Time : When you adjust volume , Banner time can also adjust the
time for the volume bar appearing on the screen . When you switch the channels ,
Banner time can adjust the time for the program information appearing on the screen .
These two items for adjustment can reduce the disturbance of the menu overlaying
while watching programs , and let you feel more convenient to watch TV .
5) Video Output : Video Output is used for switching the video output
mode . Now we provide two modes : CVBS + S -Video and CVBS
+RGB . You can press keys to choose


