All rights reserved © AAT SYSTEMY BEZPIECZEŃSTWA SP. Z O.O.
N Control 6000
-
User
’
s manual ver. 1.1
22
BASIC FUNCTIONS
In the displayed window, select the
Main Stream
option to display and rip the main stream.
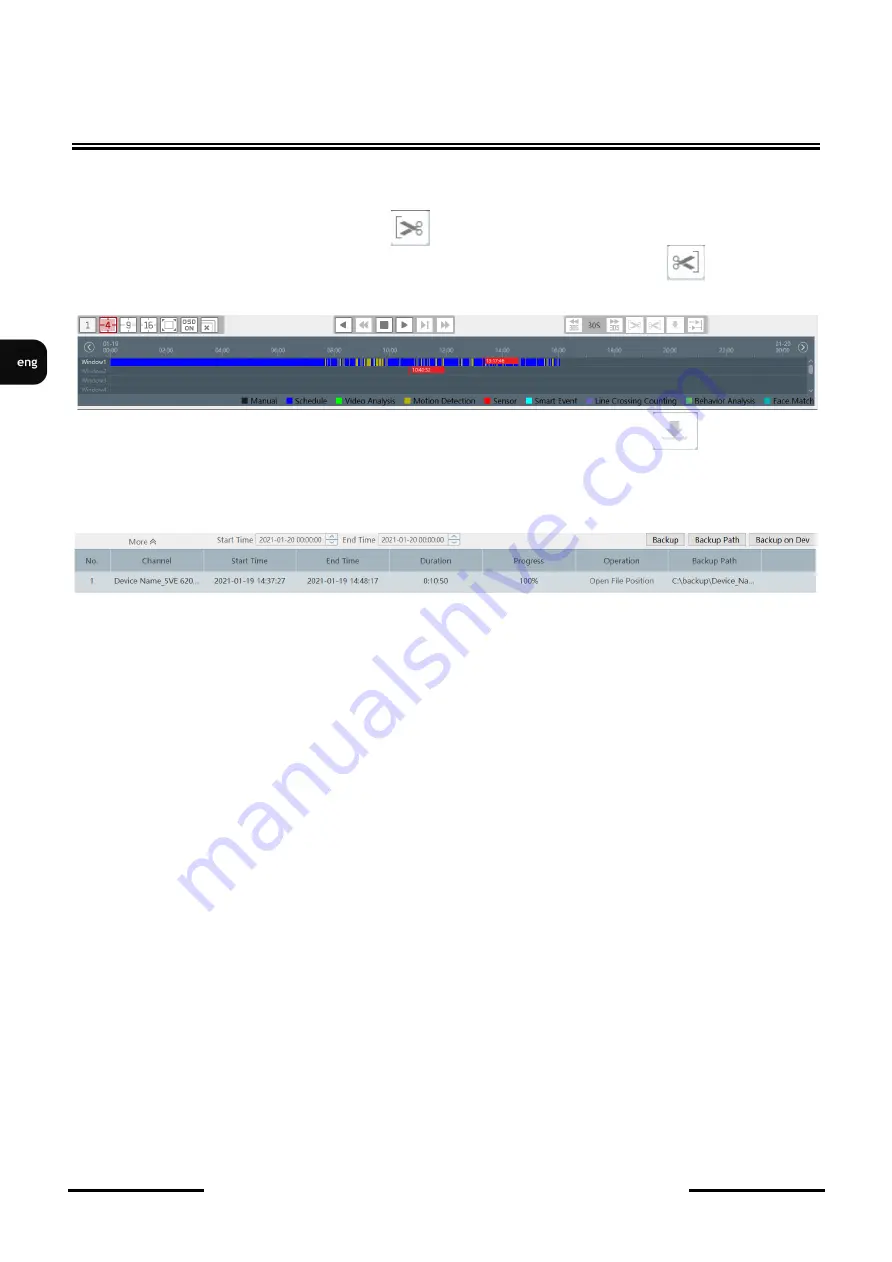
After loading the recordings bar, click on the bar at the point in time from which you want to start
copying recordings and click on the button .
Then select the point in time you want the recording to end and press the button
a white bar
will be displayed on the time bar indicating the time of the clip to be copied.
Then select the point in time you want the recording to end and press the button .
After clicking the button, the
Backup
panel opens with information about the backup being made.
The saving path is displayed in the
Backup Path
column. Clicking the
Open File Position
item in the
Operation
column opens the window in which the files are saved.
The
Start Time
and
End Time
fields contain information about the start and end time of the
recording file. The Progress column shows the percentage of the copy performed. If the field in the
Progress
field displays a value of 100%, it means the backup is completed.
4.4. Copying recordings to the remote device
The program enables remote backup of recordings to a USB flash drive in the recorder. The copying
process can be started without the necessity to log into the recorder by a local user.
To start remote copying, select
Backup
in the
Storage Playback
section.
In the menu that opens, double
-
click on the selected channel from the list on the left to load the bar
showing the type and time of recordings. The selected time range of recordings should be marked by
clicking in the selected place on the bar and holding the left mouse button, select the end of the
recording and then release the mouse button. The copying process will start after clicking the
Backup
on Dev
button. (Be sure to connect the disk recorder to the USB port.) The
Progress
column shows
the percentage of the copying process. 100% means copying the material.


