background image

33

ENGLISH

INTRODUCTION:

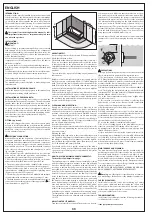
Whirlpool baths must be installed by trained personnel able 

to demonstrate to the relevant authorities their knowledge 

and ability in the application of health and safety regulations, 

i.e. electricity and water supplies and waste water disposal. 

The manufacturer provides training for technical assistance 

staff and therefore you are advised to contact an authorised 

technical assistance centre for the purposes of installation.

 This symbol is used throughout this manual to indi-

cate important instructions or important safety informa-

tion about the product.

INSTALLATION:

 IMPORTANT!

IMPORTANT!

Before starting to assemble and install the product, carefully 

read through all the instructions. Unpack the components 

and check that nothing is missing and that there are no da-

maged or faulty components; remove the transparent pro-

tective film, where present.

All components requiring maintenance (e.g. pump, electrical 

components, etc.) must remain accessible once the final in-

stallation is complete.

Do not use the hoses to support the bath during transport. 

N.B.: This product is designed for installation on finished walls 

and floors.

For all warranty claims, the purchase invoice/receipt must be 

produced along with the product assembly instructions.

The drawings and illustrations in this manual are provided for 

information purposes only.

The manufacturer reserves the right to make changes and 

improvements.

INSTALLATION OF BATH WITH FRAME:

Follow the sequence of drawings given in this manual very 

carefully when installing a bath with frame.

INSTALLATION OF ENCLOSED BATH:

Before building the enclosing walls, it is best to position the 

bath and make the required connections. The wall can extend 

inwards under the lip of the bath by not more than 1.5 cm. 

The drain must be connected in such a way that the bath can 

be pulled out of the enclosure for maintenance, when ne-

cessary. To facilitate this operation, do NOT fix enclosed type 

baths to the floor. In this case, fix the bath by applying silicone 

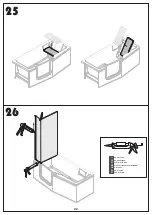
on all four sides (see siliconing illustration on page 22).

Inspection panel required.

FITTINGS (optional):

A pack of finishing profiles can be ordered on request, which 

are easy to install and make the joint between the wall and 

the edge of the bath both aesthetically elegant and functio-

nal (please contact your retailer). These profiles are suitable 

for use on baths of any size.

 ELECTRICAL CONNECTION:

With the CE mark and the declaration of conformity, the ma-

nufacturer guarantees that the product complies with cur-

rent health and safety standards. All items and components 

are factory tested according to reference standards and in-

house quality procedures. To ensure that the bath continues 

to be safe even after installation and throughout its useful 

life, check the following:

1.The electrical system to which the bath is to be connected 

must conform with current regulations and standards. Re-

member that the system must be properly earthed.

2. All electrical fittings (power outlets, switches, etc) must be 

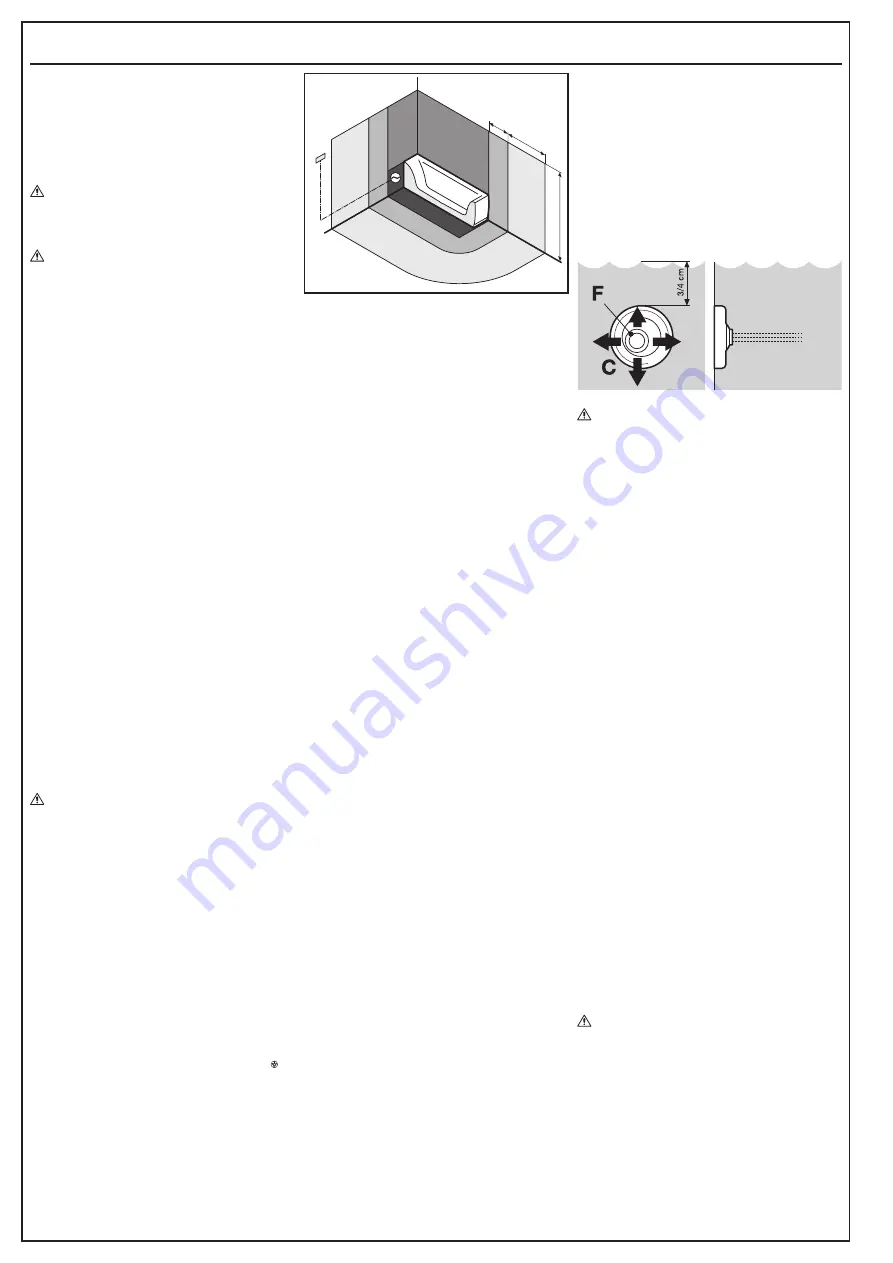
at least 60 cm from the bath or at a height of 225 cm.

3. The power supply line must be suitable for the power re-

quirement of the bath (see technical specifications, page 2).

4. The point where the bath is connected to the electrical 

system must be suitably protected against splashing water 

(degree of protection IP55 or greater).

5. The whirlpool system must be fitted with a 30 mA switched 

circuit breaker with a minimum contact opening of 3 mm.

6. The bath frame has an earth terminal that must be properly 

connected to the earthing system of the supply circuit,   (re-

fer to illustrations on page 5/12).

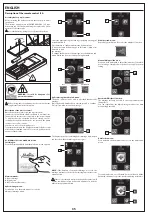
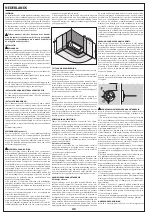
ted in any direction. Make sure that the nozzles are not clog-

ged and are not directed upwards (otherwise water will be 

splashed out of the tub when the system is switched on). Fill 

the tub until the water is well over the level of the jet nozzles 

(see illustration). After getting into the bath, the water level 

must be as shown in the illustration, otherwise the jets sy-

stem may not start. The system features a level sensor which 

prevents the jets from switching on if there isn’t enough wa-

ter in the bath. When the jets system is on, do not use foa-

ming agents such as bubble baths, soap, etc.

In some types of bath, each whirlpool jet can be individual-

ly adjusted to control the massaging intensity according to 

taste.

 PRECAUTIONS:

Although hydromassage has been proved to have beneficial 

effects, always bear in mind the following simple rules:

1) The temperature of the bath water must never exceed 

45°C. Always fill the bath with hot and cold water mixed. Do 

not fill with boiling hot water first and then cold water. Re-

member that the most relaxing effects are obtained by kee-

ping the bath water temperature at 36°C/37°C.

2) A whirlpool bath should not last more than 20/30min at 

most. The higher the temperature, the less the bath should 

last (ideally 36/37°C for approximately 15/20min). Remember 

that the dilation of the blood vessels

due to the water temperature usually causes a slight reduc-

tion in blood pressure. 

3) Persons with serious heart problems or suffering from 

hypertension or other serious illnesses should consult with 

their doctor before using the whirlpool bath.

4) Children must only use the whirlpool bath under the su-

pervision of an adult.

5) Elderly and disabled people as well as those with move-

ment difficulties should use the whirlpool bath with care. It is 

recommended that you seek medical advice.

6) Since the whirlpool provides relaxation, it is best used after 

sports activities or at the end of a day’s work. 

Do not use the whirlpool immediately after a meal.

7) Do not use foaming agents in the bath while the jets sy-

stem is in operation as the foaming effect is increased 

by pump pressure. Use soap or shampoo only after you have 

turned off the jets system.

8) If you really want to use bath salts or other products provi-

ding relaxing, tonic, slimming or other desirable effects, make 

sure that they do not produce foam and that they are well 

dissolved in the water before turning on the pump.

9) Keep this manual in a safe place so that it can be consulted 

by those using the whirlpool bath.

MAINTENANCE AND CLEANING:

The bath is made of acrylic and must be cleaned using a li-

quid detergent and a soft cloth or sponge. Use a good quality 

household liquid detergent. To prevent scale deposits, wipe 

dry using a chammy leather or a soft lint-free cloth that re-

moves stubborn deposits without leaving traces. Limescale 

deposits may be removed using specific detergent products. 

To restore shine to the acrylic surface polish with an ordinary 

wax polish such as for car bodywork.

DO NOT USE ABRASIVE CLEANERS, ALCOHOL OR ALCOHOL-

BASED PRODUCTS, ACETONE OR OTHER SOLVENTS.

 Warning: use of detergents other than those recommen-

ded may damage the bath and/or the whirlpool equipment.

SURFACE SCRATCHES:

Small surface scratches can be removed using wet emery 

paper (grade 1000) and then smoothing the surface with 

abrasive paste. Once the scratch has been removed, restore 

surface shine using wax polish. For the best results, contact 

your nearest authorised service centre.

TROUBLESHOOTING:

In the event of a problem, perform the following checks befo-

re calling the service centre.

If the jet system does not start:

(I)

600

1

2

3

2400

2250

OPERATING TEST:

An operating test must be performed following installation. 

Check that the bath is clean.

Fill the bath with water at an infeed temperature of 40 °C (± 5 

°C) up to a level above the highest nozzle to allow the system 

to function.Switch on the system and run it for 10 minutes. 

Switch OFF the whirlpool function but do not empty the bath 

and after 10 minutes check all the hoses, couplings, etc. for 

any leaks.

The test should be repeated following any adjustments or 

substitutions.

Backflow of water towards the mains water supply must be 

avoided to ensure conformity with EN 1717 when filling the 

bath. Therefore if the taps are fitted so that the water fills the 

bath from above the top of the bath then the taps must be 

positioned (at least in terms of height) in accordance with the 

diagrams shown on page 5.

If the system involving a combined water inlet and overflow 

outlet is used to fill the bath, a water outlet spout consisting 

of a non-return valve (not supplied) must be fitted between 

the combined tap water inlet point and the delivery system 

located on the discharge column.

CLEANING AND DISINFECTING:

During use, small organic particles are deposited in the 

whirlpool pipes and if not treated may lead to proliferation 

of bacteria in the system. For optimum hygiene, you should 

treat the system with specific products available from our 

Service Centres (see updated list on our site www.novellini.

com under the heading “Service”) or dealers specialising in 

products for whirlpool baths. For temporary treatment you 

can use a liquid disinfectant (e.g. Dettol).

How to disinfect the bath:

If the bath has an automatic disinfection facility, please refer 

to the disinfection menu using the remote control, otherwise 

proceed as follows.

Cleaning the bath:

Fill the bath with clean water, to the level used during normal 

use. Then add 80 grammes of disinfectant to the water. Set 

the whirlpool running for a few minutes so that the disinfec-

tant circulates throughout all the pipes. Then turn it off, wait 

for 15-20 minutes, and empty the bath.

You should also perform a specific treatment if the bath is 

left unused for long periods. If the bath is used by more than 

one person consecutively, you are recommended to disinfect 

after each cycle.

HOW TO USE YOUR WHIRLPOOL BATH CORRECTLY:

The benefits of a whirlpool massage:

The swirling water of a whirlpool bath is naturally soothing 

and offers many therapeutic benefits. In spas, hydrotherapy 

is used to stimulate blood circulation, relax muscles and re-

store tone to the skin. Basically, it consists in injecting air into 

controlled jets of water of varying intensity directed at the 

body. The jet of warm water and air bubbles against the body 

dilates blood vessels and increases the flow of blood to the 

heart. In addition, the continuous jet of water has a massa-

ging effect on the muscles and dilates skin pores, promoting 

the removal of toxins and helping to hydrate the surrounding 

tissue. Hydromassage is widely used by sports people to re-

lieve tired muscles after strenuous physical activity, produ-

cing a pleasant sense of relaxation and well-being. The jet 

nozzles can be adjusted to direct the jets at the parts of the 

body where you want to concentrate the massaging action. 

The temperature of the bath water must never exceed 45°C. 

The maximum benefits are obtained with a temperature of 

36°-37°C.

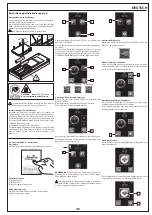
ADJUSTING THE JET NOZZLES:

Turn the jet nozzles (C) as required. The nozzles can be poin-

Summary of Contents for IRIS dx 600/20

Page 1: ...LATION UTILISATION ET ENTRETIEN INSTALLATION USE AND MAINTENANCE MANUAL AUFBAU GEBRAUCHS UND WARTUNGSANLEITUNG HANDLEIDING VOOR INSTALLATIE GEBRUIK EN ONDERHOUD MANUAL DE INSTALACIÓN USO Y MANTENIMIENTO MANUAL DE INSTALAÇÃO USO E MANUTENÇÃO IT FR EN DE NL ES PT ...

Page 2: ...essaires au montage non fourni 3 Caracteristiques techniques 4 Démontage du panneau 7 Mise à niveau de la baignoire 8 Raccordement hydraulique 10 Vérification de l étanchéité 13 Montage du panneau 14 Avant propos 27 Description de la télécommande 30 29 ES ÍNDICE Contenido del kit de montaje 3 Herramientas y materiales necesarios para la instalación no suministrado 3 Características técnicas 4 Extr...

Page 3: ...n not supplied Für die Montage benötigte Werkzeuge und Hilfsmittel nicht mitgeliefert Benodigde gereedschappen en materialen voor de installatie niet meegeleverd Herramientas y materiales necesarios para la instalación no suministrado Ferramentas e materiais necessários para a instalação não fornecidos IT FR EN DE NL ES PT Contenuto del kit di montaggio Contenu du kit de montage Contents of the in...

Page 4: ...za max assorbita Puissance absorbée Absorbed power Aufgenommene Leistung Geabsorbeerd vermogen Potencia absorbida Potência máx absorvida Whirlpool Whirlpool Airpool IRIS sx 600 20 600 30 1 390 kg m2 265 220 230 V 50 60 Hz 550 W 880 W 1350 W 1680 W IRIS dx 600 20 600 30 1 390 kg m2 265 220 230 V 50 60 Hz 550 W 880 W 1350 W 1680 W 1 2 1 5 1 2 2 6 IP55 IT Acqua calda Acqua fredda Allacciamento elettr...

Page 5: ...5 10 620 165 240 315 A A 3 max 200 D A 2 B B B A A 70 70 72 70 480 510 595 E 4 0 B 4 0 100 700 100 100 400 3 4 A A A 400 400 200 300 1000 15 max 45 5 6 B B 100 450 200 123 IRIS sx Mod A B C D E 160x70 80 1600 700 1130 850 800 170x70 80 1700 700 1235 850 800 180x75 85 1800 750 1345 860 850 ...

Page 6: ... A A 3 max 200 D A 2 B B B A A 70 70 72 70 470 E 510 595 4 0 B 4 0 100 700 100 100 400 4 3 A A A 400 400 200 300 1000 15 max 45 5 6 B B 100 450 200 123 165 240 193 A 1 2 3 IRIS dx Mod A B C D E 160x70 80 1600 700 1130 850 800 170x70 80 1700 700 1235 850 800 180x75 85 1800 750 1345 860 850 ...

Page 7: ...7 Smontaggio del pannello Démontage du panneau Removing the panel Ausbau der Schürze Verwijderen van de panelen Extracción del panel Desmontagem do painel IT FR EN DE NL ES PT 1 2 ...

Page 8: ... cm Livellamento della vasca Mise à niveau de la baignoire Levelling the bath Ausnivellieren der Wanne Stellen bad Nivelación de la bañera Nivelação da banheira IT FR EN DE NL ES PT 1 2 3 4 1 2 mm 0 mm C17 620 mm ...

Page 9: ...9 630 mm 1630 mm X mm X 55 mm ø9 mm ø9 mm X mm X 55 mm 5 6 x2 C10 x2 A A A A A B B B B 3 9x19 15 mm A B 1 2 3 ...

Page 10: ...ater connection Wasseranschluss Hydraulische aansluiting Conexión hidráulica Ligação hidráulica IT FR EN DE NL ES PT 1 2 IT FR EN DE NL ES PT non fornito non fourni masonry bit not supplied nicht im Lieferumfang niet bijgeleverd no incluida não incluída 1 1 2 ...

Page 11: ...11 12mm CLACK 6mm 30 mm 30 mm Optional G3 8 G1 2 9 Service HYDRO ...

Page 12: ...12 B A 10 No OK IT FR UK DE NL ES PT non forniti non fourni not supplied nicht im Lieferumfang niet bijgeleverd no incluida não incluída 0 0 A B ...

Page 13: ...2 Collaudo tenuta acqua Vérification de l étanchéité Waterproof test Prüfung der Dichtheit Waterdichtheidstest Prueba de estanqueidad al agua Verificação da estanquidade à água IT FR EN DE NL ES PT No A C D B ...

Page 14: ...14 3 5x25 ø2 75 Montaggio del pannello Montage du panneau Fitting the panel Einbau der Schürze Montage panelen Colocación del panel Montagem do painel IT FR EN DE NL ES PT 13 14 1 1 2 3 OPEN ...

Page 15: ...15 IRIS sx 516 427 193 620 1500 A B E 240 70 70 298 516 70 72 539 100 ...

Page 16: ...16 IRIS dx 516 427 193 620 1500 A B E 240 70 7 0 298 516 70 72 539 100 ...

Page 17: ...17 15 16 ø6 mm ...

Page 18: ...18 S6 ø6 ø6 4x35 4x35 S6 17 18 ...

Page 19: ...19 19 20 150 mm 150 mm 150 mm ø 2 75 mm x2 150 mm 3 5x9 5 x2 ...

Page 20: ...20 21 22 ...

Page 21: ...21 23 24 ø6 S6 4x35 ...

Page 22: ...22 25 26 non acetico non acétique acetic acid free nicht essigsäurevernetzend niet zuur no acético não acético IT FR EN DE NL ES PT ...

Page 23: ...ri Centri Tecnologici trovate l elenco aggiornato sul sito www novellini com alla voce Assistenza o presso rivenditori specializzati in prodotti per l idromassaggio Per un trattamento temporaneo potete utilizzare un liquido disinfettante Procedura disinfezione Se la vasca è provvista della disinfezione automatica vedere menù disinfezione da telecomando se la vasca non è provvi sta di disinfezione ...

Page 24: ...cibili a difettosità di produzione e non ad incuria o uso improprio Sono altresì escluse dalla garanzia tutte le parti ed i componenti che dovessero risultare difettosi o danneg giati a causa di negligenza o trascuratezza nell uso di errata installazione o manutenzione di interventi da parte di per sonale non autorizzato di danni dovuti al trasporto ovvero di circostanze non riconducibili a difett...

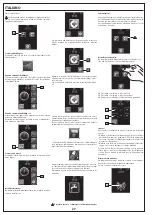
Page 25: ...mere il tasto 6 per confermare e avviare l idromassaggio Se si vuole fare un idromassaggio uguale a quello fatto l ulti ma volta è sufficiente premere il tasto 6 per avviare l idromassaggio Nel caso si voglia cambiare la durata dell idromassaggio è ne cessario accedere al sotto menù durata premendo il tasto 4 AUTOMATICO MANUALE SPENTO 5 4 6 Sotto menù durata idromassaggio Con i tasti e è possibile...

Page 26: ...usa del mancato avvio della disinfezione può esse re il livello dell acqua insufficiente all interno della vasca In tal caso compare sullo schermo la figura sotto indicata Ripristinare il livello dell acqua nella vasca per avviare la di sinfezione È proibito fare uso o immergersi nell acqua usata per la disinfezione Se per qualsiasi ragione la disinfezione viene interrotta il sim bolo della disinf...

Page 27: ...to indicata e la disinfezione non parte è necessario ripristi nare il livello del disinfettante Un altra causa del mancato avvio della disinfezione può esse re il livello dell acqua insufficiente all interno della vasca In tal caso compare sullo schermo la figura sotto indicata Ripristinare il livello dell acqua nella vasca per avviare la di sinfezione È proibito fare uso o immergersi nell acqua u...

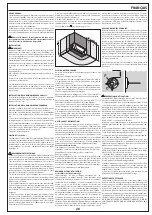
Page 28: ...u froide La détente maximale s obtient avec une température constante maintenue entre 36 37 C 2 La durée du bain ne doit jamais dépasser 20 à 30 minutes maximum De plus il est conseillé de réduire cette durée lorsque la température de l eau est supérieure la durée idéale à 36 37 est d environ 15 20 min Attention la vasodilatation due à la température de l eau entraîne généralement une légère baiss...

Page 29: ...es Le rem placement complet du produit est exclu Sont exclus de la garantie les lampes les voyants les fusibles les parties en verre les miroirs et les parties esthétiques sauf si celles ci présentent des vices de fabrication et non des défauts dus à un manque de soin ou à une mauvaise utilisation Sont aussi exclus de la garantie toutes les pièces et tous les composants rendus défectueux ou abîmés...

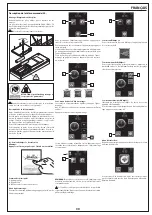
Page 30: ... touche concernée 5 Pour valider votre choix et démarrer l hydromassage appuyer sur la touche 6 Si vous souhaitez utiliser le même programme d hydromassa ge qu auparavant appuyez simplement sur la touche 6 pour lancer l hydromassage Si en revanche vous souhaitez modifier la durée de l hydro massage appuyez sur la touche 4 pour accéder au sous me nu de durée AUTOMATIQUE MANUEL ÉTEINT 5 4 6 Sous men...

Page 31: ...ran enfoncée jusqu à ce que le sous menu de réglage s affiche 14 Utilisez les touches et pour régler l heure 15 Utilisez les touches et pour régler les minutes 16 Appuyez pour confirmer votre réglage et revenir au menu principal 14 15 16 Alarme Communication 17 Absence de dialogue entre l unité centrale et la télécom mande Vérifier que la centrale électrique est sous tension Dans le cas contraire ...

Page 32: ...figure ci dessous s affiche sur l écran et que la désinfection ne démarre pas il vous faudra rétablir le niveau du désinfectant Une autre cause de non démarrage du cycle de désinfec tion peut provenir du niveau d eau insuffisant à l intérieur de la baignoire Dans ce cas la figure ci dessous s affiche sur l écran Rétablir le niveau d eau dans la baignoire pour lancer le cycle de désinfection Il est...

Page 33: ...e su pervision of an adult 5 Elderly and disabled people as well as those with move ment difficulties should use the whirlpool bath with care It is recommended that you seek medical advice 6 Since the whirlpool provides relaxation it is best used after sports activities or at the end of a day s work Do not use the whirlpool immediately after a meal 7 Do not use foaming agents in the bath while the...

Page 34: ...mponents which are faulty or damaged due to negligence or carelessness du ring use incorrect installation or maintenance operations carried out by non authorised personnel damage caused during transport or any other circumstances not due to pro duct manufacturing defects such as sudden electricity jolts lightning electrolysis corrosion and in general any causes related to the nature of the water a...

Page 35: ...hydromassage desired by repeatedly pressing the relevant button 5 Press button 6 to confirm and start the hydromassage To have the same hydromassage as last time simply press button 6 to start the massage To change the duration of the massage use the duration sub menu which can be accessed by pressing button 4 AUTOMATIC MANUAL OFF 5 4 6 Hydromassage duration sub menu The and buttons can be used to...

Page 36: ...on process to fail to start may be that there is insufficient water in the bath In this case the image below will be displayed Top up the bath with water to restart the disinfection process Do not bathe in or use the water that has been used for disinfection If the disinfection process is interrupted for any reason the disinfection symbol on the main menu lights up to warn that disinfection has no...

Page 37: ...ss the and buttons to adjust the hours 17 Press the and buttons to adjust the minutes 18 Press to confirm and return to the main menu 16 17 18 Draining In order to empty the pipes the bath is equipped with a drai nage system After a hydromassage about 30 minutes after the bath has been emptied the blower is automatically activated for about a minute to expel the water that has remained in the pipe...

Page 38: ...ich in den Leitungen der Wanne kleine organische Teilchen ab die zur Vermehrung von Bakterien in der Anlage führen können wenn sie nicht beseitigt werden Für eine zuverlässige Desinfektion muss die Anlage mit Spezialprodukten behandelt werden die über unsereTechnologiezentren die aktuelle Liste ist auf der Web site www novellini com unter Kundendienst zu finden oder bei Ihrem Fachhändler für Whirl...

Page 39: ...ktions und Materialfehler lediglich wenn diese von vom Unter nehmen befugtem Personal festgestellt werden für eine Dauer von 24 Monaten ab Datum des Erwerbs und unter Vorlage der Quittung bzw des Kassenzettels Die Garantie umfasst die Reparatur und oder den Ersatz der als defekt betrachteten Teile Die Garantie umfasst nicht den kompletten Ersatz des Produkts Von der Garantie ausge schlossen sind f...

Page 40: ...on Whirlpool ausgewählt werden Manuelle Whirlpool Funktion Wenn die Taste 10 gedrückt gehalten wird kann die Inten sität derWhirlpool Massage eingestellt werden Bei Loslassen der Taste bleibt die Einstellung erhalten 10 Automatische Whirlpool Funktion Die Intensität der Massage wird geändert um einen ange nehmen modulierenden Effekt zu schaffen Im Menü Hydromassage kann man durch Drücken der Taste...

Page 41: ...Tasten und werden die Minuten eingestellt 16 Zur Bestätigung und Rückkehr zum Hauptmenü drücken 14 15 16 KOMMUNIKATIONSALARM 17 Fehlender Dialog zwischen Zentraleinheit und Fernbedie nung Prüfen dass die Spannungsversorgung eingeschaltet ist Andernfalls den Kundendienst kontaktieren 17 02 Version Whirlpool Airpool Desinfektion Einschalten Das Display gedrückt halten bis die Einführung erscheint Ha...

Page 42: ... werden Ein weiterer Grund für das Ausbleiben des Starts der Desin fektion kann ein unzureichender Wasserstand in der Wanne sein In diesem Fall erscheint die unten gezeigte Abbildung auf dem Bildschirm Um die Desinfektion zu starten den Wasserstand wieder her stellen Es ist untersagt das für die Desinfektion benutzteWa sser zu verwenden oder darin einzutauchen Falls die Desinfektion aus irgendeine...

Page 43: ...eidin gen van de hydromassage kleine organische deeltjes af die bacteriegroei in de installatie kunnen veroorzaken als ze niet worden behandeld Voor een perfecte ontsmetting moet de installatie worden behandeld met specifieke producten die verkrijgbaar zijn bij onzeTechnologische centra zie de meest recente lijst op onze website www novellini com onder het punt Service of bij speciaalzaken voor hy...

Page 44: ... indien deze worden vastgesteld door personeel dat door het bedrijf is geautoriseerd gedurende een periode van 24 maanden vanaf de aankoopdatum die blijkt uit het betaalbewijs of de kassabon De garantie bestaat uit de reparatie en of vervanging van de onderdelen waarvan wordt geconstateerd dat ze defect zijn Een volledige vervanging van het product is uitgesloten Buiten de garantie vallen de lampe...

Page 45: ... om de hydromassage te starten Als dezelfde hydromassage van het vorige gebruik moet gestart worden moet op toets 6 gedrukt worden om de hydromassage te starten Als de duur van de hydromassage moet gewijzigd worden moet het submenu van de duur be reikt worden door op toets 4 te drukken AUTOMATISCH MANUEEL UIT 5 4 6 Submenu duur hydromassage Met de toetsen en kan de tijdsduur van de hydromassa ge g...

Page 46: ...inuten uitgeschakeld en wordt na 1 minuut weer ingeschakeld Na deze tijdsduur verschijnt op het beeldscherm een symbo ol dat aanduidt dat het bad moet leeggemaakt worden Als bij de start van de ontsmetting de onderstaande afbeel ding op het beeldscherm verschijnt wordt de ontsmetting niet gestart en moet het peil van het ontsmettingsmiddel hersteld worden Een andere oorzaak van het niet starten va...

Page 47: ...erstaande afbeel ding op het beeldscherm verschijnt wordt de ontsmetting niet gestart en moet het peil van het ontsmettingsmiddel hersteld worden Een andere oorzaak van het niet starten van de ontsmet tingscyclus kan een onvoldoende waterpeil in het bad zijn In dat geval verschijnt de onderstaande afbeelding op het beeldscherm Herstel het waterpeil in het bad om de ontsmetting te kun nen starten H...

Page 48: ...erías del hidroma saje se depositan pequeñas partículas orgánicas que si no se tratan adecuadamente pueden generar la proliferación de bacterias en la instalación Para una higienización perfecta es necesario tratar la instalación con productos específicos que se pueden comprar en nuestros Centros Tecnológicos la lista actualizada se encuentra en nuestro sitio www novellini com en el apartado Asist...

Page 49: ...eda excluida la sustitu ción completa del producto La garantía no cubre las lámpa ras los testigos los fusibles las partes de cristal los espejos las partes estéticas a no ser que resulten defectuosas por fa bricación y no debido a descuido o uso impropio Asimismo quedan excluidas de la garantía aquellas partes y compo nentes que resulten defectuosos o dañados por negligencia o uso inadecuado inst...

Page 50: ...tecla correspondiente 5 Pulsarla tecla 6 para confirmar y activar el hidromasaje Si se quiere realizar un hidromasaje igual al efectuado la últi ma vez es suficiente pulsar la tecla 6 para activar el hidromasaje En el caso en que se desee cambiar la duración del hidroma saje es necesario acceder al submenú duración oprimiendo la tecla 4 AUTOMATICO MANUAL APAGADO 5 4 6 Submenú duración hidromasaje ...

Page 51: ...parición del submenú de regulación 14 Es posible regular la hora con las teclas y 15 Es posible regular los minutos con las teclas y 16 Pulsar para confirmar y retornar al menú principal 14 15 16 Alarma comunicación 17 Falta de comunicación entre la unidad central y el teleco mando Controlar que la unidad de potencia esté alimentada En caso contrario contactar el servicio de asistencia 17 02 Versi...

Page 52: ...cada más abajo y la desinfección no parte es necesario restablecer el nivel de desinfectante Otra causa de la no activación de la desinfección puede ser el nivel de agua insuficiente en el interior de la bañera En tal caso aparece sobre la pantalla la figura indicada más abajo Restablecer el nivel de agua en la bañera para activar la de sinfección Está prohibido usar o sumergirse en el agua utiliz...

Page 53: ...icas que se depositam nas tubagens da hidromassa gem e que se não forem tratadas podem dar origem à proli feração de bactérias na instalação Para uma higiene perfeita é necessário fazer um tratamento à instalação com produtos específicos que poderá adquirir num dos nossos Centros Tecnológicos encontrará uma lista actualizada dos Centros no site www novellini com sob o item Assistência ou em revend...

Page 54: ...brico e de material só se estes forem comprovados por pes soal autorizado pela empresa por um período de 24 meses a partir da data de compra comprovada por recibo ou factura correspondente A garantia consiste na reparação e ou substituição das peças que se considerem defeituosas Fica excluída a substituição completa do produto A garantia não cobre as lâmpadas os fusíveis as partes de vidro os espe...

Page 55: ... 5 Prima o botão 6 para confirmar e activar a hidromassagem Caso pretenda executar uma hidromassagem igual à realiza da da última vez basta premir o botão 6 para activar a hidro massagem Caso pretenda alterar a duração da hidromassagem é ne cessário aceder ao submenu duração premindo o botão 4 AUTOMÁTICO MANUAL DESLIGADO 5 4 6 Submenu duração da hidromassagem Com os botões e é possível alterar a d...

Page 56: ...botões e 15 É possível regular os minutos com os botões e 16 Premir para confirmar e voltar ao menu principal 14 15 16 Alarme de Comunicação 17 Falha de comunicação entre a unidade central e o coman do remoto Verifique se a unidade de potência está alimentada Caso contrário contacte o serviço de assistência 17 02 Versão Whirlpool Airpool Desinfecção Activação Mantenha premido o ecrã até surgir a a...

Page 57: ...a figura indicada abaixo e a desinfecção não é iniciada é necessário preencher o nível de desinfectante Uma outra causa para a falha do arranque da desinfecção pode ser um nível de água insuficiente no interior da banhei ra Nesse caso surge no ecrã a figura indicada abaixo Reponha o nível de água da banheira para activar a desin fecção É proibido utilizar ou banhar se na água utilizada para a desi...

Page 58: ...58 Note ...

Page 59: ...59 Note ...

Page 60: ...60196IST_05 05 2015 NOVELLINI S p A Via della Stazione 2 46030 Romanore di Borgo Virgilio Mn Tel 39 0376 6421 Fax 39 0376 642250 e mail novellini novellini it www novellini com ...

Reviews: