


32
ProPak6 Installation and Operation User Manual Rev 4
Chapter 2
Installation
2.7.3
Connect the CAN Bus
OEM6 family receivers incorporate a CAN Bus controller that supports physical layer signals and low
level messages specified in the appropriate sections of the J1939 and ISO11783 standards.
Manufacturers can also create messages specific to their application without violating these standards.
To facilitate manufacturer messages, NovAtel provides an Application Program Interface (API). To obtain
information about this API, contact NovAtel Customer Support.
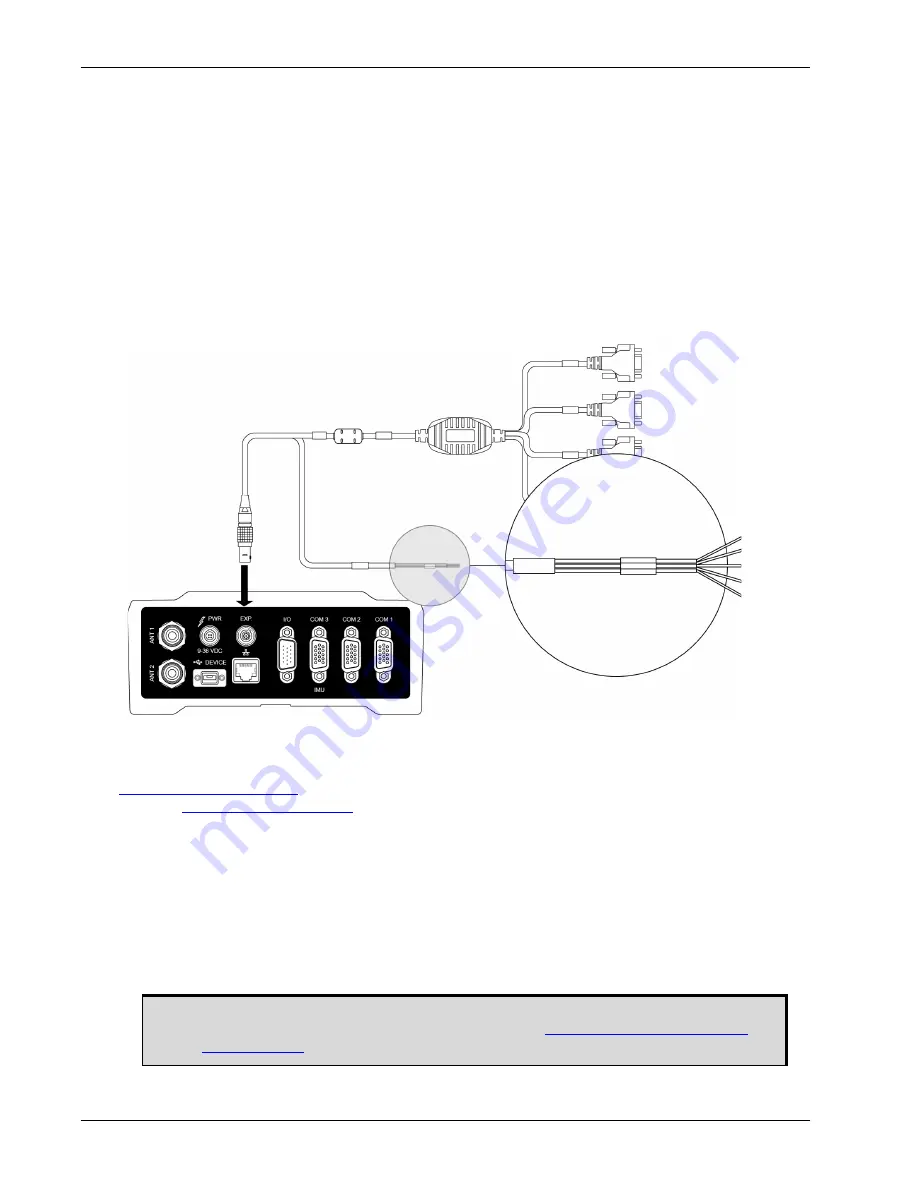
The ProPak6 receiver has two CAN Bus ports, CAN1 and CAN2, which are available on the EXP port. To
access these signals, use the ProPak6 Expansion Cable (see
Figure 13, CAN Bus ports on the
). For information about the ProPak6 Expansion Cable, see
Section A.5.5, ProPak6 Expansion
Cable (NovAtel part number 01019154)
. For information about the EXP port, refer to
Section 3.1.15, Expansion Port
of this manual.
Figure 13: CAN Bus ports on the ProPak6
2.7.4
Mounting the ProPak6
For general applications, the supplied mounting brackets may be used to install the receiver, refer to the
(GM-14915125) provided with the receiver or download the guide from our
For high vibration installations, NovAtel recommends mounting the ProPak6 directly using 1/4” 20-UNC
threaded screws (4 locations). Vibration dampeners or isolators (user supplied) for additional vibration
reduction may be used. Refer to
on page 113 for mounting hole
locations.
2.8
Installing NovAtel Connect PC Utilities
The NovAtel Connect PC Utilities contain a number of utilities that can be used with the ProPak6 along
with complete instructions for installation and use of the NovAtel PC utilities.
CAN1+
CAN1-
CAN2+
CAN2-
DGND
Download the latest PC Utilities software including NovAtel Connect™ PC Utilities
along with the necessary user documentation from:
.


