


NorthEast Monitoring, Inc. NEMM019-Rev-O
Page 10 of 35
DR200/HE & DR300 Operator’s Manual
Holter Recording: The Holter Recording Procedure
4.
Attach an electrode at each of the patient’s
prepared sites. As you attach electrodes, be
careful to not let any unattached electrode
come in contact with other conductive
objects, including ground. Be sure to refer
to the diagrams on the previous page for
correct placement of each colored lead. The
electrodes should be placed over bone at
each of the sites. Press the center of each
electrode against the patient’s skin, then rub
the outer circle of each electrode to secure
it.
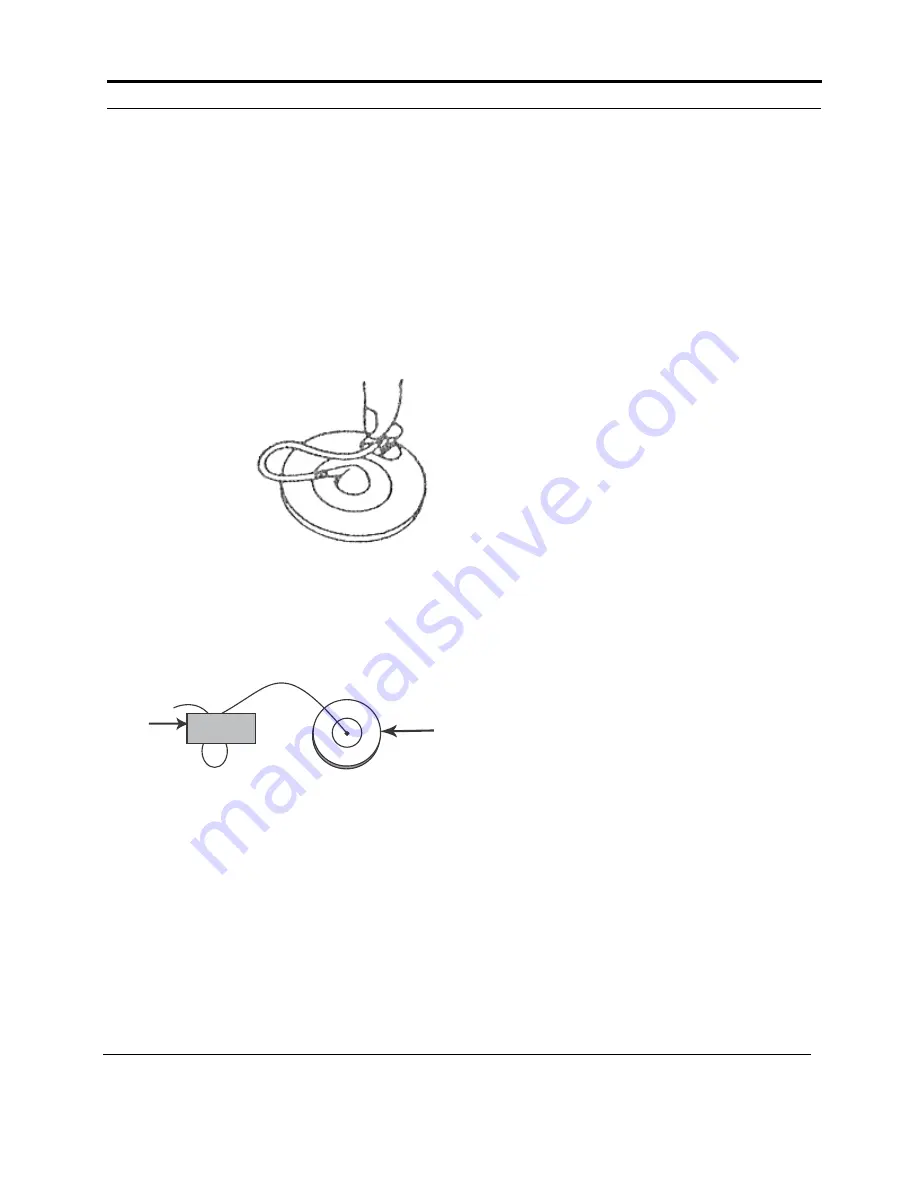
5.
If you use
lead lock
or clip
lock elec-
trodes, be
sure to use
the lock or
clip to
relieve
stress on
each lead
wire; refer
to the dia-
gram at right for proper use. Otherwise,
tape each lead wire into a stress loop (see
the diagram below) to help prevent move-
ment of the electrode.
Step 2: Prepare the Recorder
After connecting the patient to the recorder,
follow these steps to prepare the recorder:
1.
Remove the battery cover from the back of
the recorder. The battery compartment and
the SD Card slot are now exposed.
2.
With the recorder front facing up and away
from you, insert an SD Card into the slot.
The SD Card should have the connector
contacts down and toward the recorder as
you gently push it in. Be sure to use the SD
Card you formatted for this patient.
If the card pops out slightly when you push
it in, try again.
Pushing gently on the card
both inserts it and allows you to remove
it. Never pull the card out as it will dam-
age the recorder.
Note: The SD Card should slide in easily.
Make sure you do not force the card in; if
you force the card in upside-down or force
the card out by pulling, it can damage the
connector inside the recorder.
3.
Insert a fresh 1.5 volt AA battery into the
battery compartment, being sure to orient it
as indicated in the diagram inside the com-
partment. See Appendix B for details about
battery choices.
4.
Replace the battery cover by sliding it into
the card slot until it clicks.
5.
“DR200/HE” or “DR300” will first appear
on the screen and then the NorthEast Moni-
toring information will appear. Press
ENTER to continue.
6.
If you did not erase the previous patient’s
data from the SD Card, you will now be
prompted to Erase memory. Use the green
arrows to select “*Yes” and press ENTER.
7.
You will see ERASE DONE when erasing
is complete.
Note: If at any time you need to restart the
set up process, just remove the battery to
begin again.
Note: If your recorder is in Event mode, the
15-second countdown will begin when you
put in a new battery. To interrupt the 15-
second countdown, quickly press ENTER,
down arrow, up arrow and then EVENT, in
that order. You should now see the NorthEast
Monitoring screen. Press ENTER to continue
to the main menu.
Using a clip lock electrode
Electrode
Tape
Stress Loop