background image

23

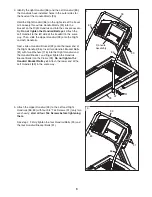
HOW TO CONNECT YOUR VCR

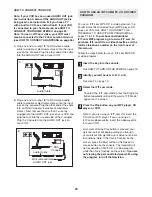
Note: If your VCR has an unused AUDIO OUT jack,
see instruction A below. If the AUDIO OUT jack is
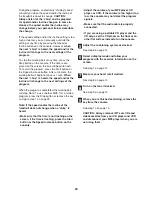
being used, see instruction B. If you have a TV
with a built-in VCR, see instruction B. If your VCR
is connected to your home stereo, see HOW TO
CONNECT YOUR HOME STEREO on page 22.
Note: To use an iFIT.com video, your VCR must
also be connected to the 75 ohm antenna terminal
(see HOW TO CONNECT AN ANTENNA on page 26).

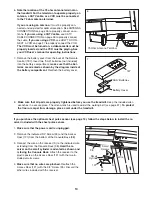
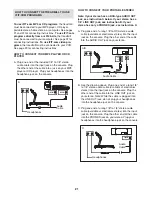
A. Plug one end of a long 1/8” to RCA stereo audio

cable (available at electronics stores) into the input
jack on the console. Plug the other end of the cable
into the AUDIO OUT jack on your VCR. 

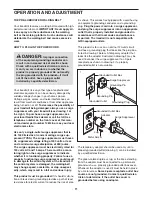
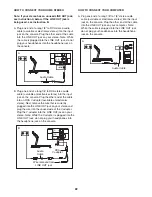
B. Plug one end of a long 1/8” to RCA stereo audio

cable (available at electronics stores) into the input
jack on the console. Plug the other end of the cable
into an RCA Y-adapter (available at electronics
stores). Next, remove the wire that is currently
plugged into the AUDIO OUT jack on your VCR and
plug the wire into the unused side of the Y-adapter.
Plug the Y-adapter into the AUDIO OUT jack on
your VCR.

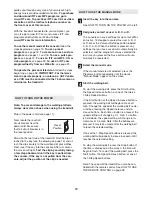
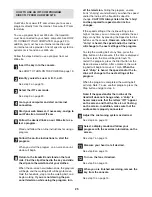
HOW TO USE AN IFIT.COM MP3, CD, OR VIDEO 
PROGRAM

To use an iFIT.com MP3, CD, or video program, the
treadmill must be connected to your MP3 player, CD
player, or VCR. See HOW TO CONNECT THE
TREADMILL TO USE IFIT.COM PROGRAMS on
pages 21 to 23. 

To purchase and download

iFIT.com MP3 programs, go to www.iFIT.com. To
purchase iFIT.com CDs or videocassettes, call the
toll-free telephone number on the front cover of
this manual.  

Follow the steps below to use an iFIT.com MP3, CD,
or video program.

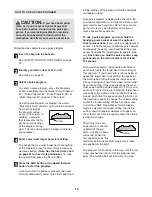
Insert the key into the console.

See HOW TO TURN ON THE POWER on page 13. 

Identify yourself as user A, B, C, or D.

See step 2 on page 13.  

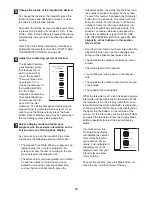
Select the iFIT.com mode.

To select the iFIT.com mode, press the Programs
button repeatedly until until the words “iFIT Mode”
appear on the screen. 

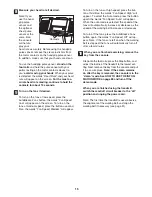
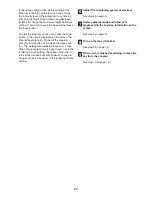
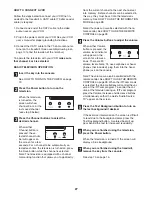
Press the Play button on your MP3 player, CD
player, or VCR.

Note: If you are using an iFIT.com CD, insert the
CD into your CD player; if you are using an
iFIT.com videocassette, insert the videocassette
into your VCR.

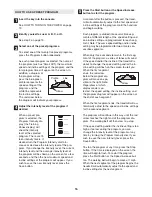
A moment after the Play button is pressed, your
personal trainer will begin guiding you through
your workout. Simply follow your personal trainer’s 
instructions. Note: If the time is flashing on the
screen, press the Start button or the Speed in-
crease button on the console. The treadmill will
not respond to an MP3, CD, or video program
while the time is flashing on the screen.

If you are

not viewing the personal television while using
the program, turn off the television.

4

3

2

1

AUDIO OUT

RIGHT

LEFT

VIDEO  AUDIO

ANT. IN

RF OUT

IN

OUT

CH

3

4

Audio Cable

A

VIDEO  AUDIO

ANT. IN

RF OUT

IN

OUT

CH

3

4

A

B

Wire removed from

AUDIO OUT jack

RCA 

Y-adapter

Audio Cable

Summary of Contents for NTL2495.2

Page 1: ...Write the serial number in the space above for reference Visit our website at www nordictrack com new products prizes fitness tips and much more QUESTIONS As a manufacturer we are com mitted to provi...

Page 2: ...ND ADJUSTMENT 11 HOW TO MOVE THE TREADMILL 29 TROUBLESHOOTING 30 CONDITIONING GUIDELINES 33 PART LIST 34 ORDERING REPLACEMENT PARTS 35 LIMITED WARRANTY Back Cover Note An EXPLODED DRAWING is attached...

Page 3: ...ics store 12 Failure to use a properly functioning surge suppressor could result in damage to the con trol system of the treadmill If the control sys tem is damaged the walking belt may change speed a...

Page 4: ...information with respect to proper grounding of the mast and supporting struc ture grounding of the lead in wire to an an tenna discharge unit size of grounding con ductors location of antenna discha...

Page 5: ...sting health problems Read all instructions before using ICON assumes no responsibility for personal injury or property damage sustained by or through the use of this product SAVE THESE INSTRUCTIONS P...

Page 6: ...us assist you please note the product model number and serial number before calling The model number of the treadmill is NTL24954 2 The serial number can be found on a decal attached to the tread mill...

Page 7: ...the hardware drawings below 7 1 Raise the end of the Frame not shown until the tread mill can be moved on the front Wheels 66 and care fully roll the treadmill off the wood pallet Insert the Wire Harn...

Page 8: ...ent the Short Panel 106 so that the indicated cutouts in the top of the Panel are at the top Have a second per son hold the Short Panel against the Upright 111 with the top of the Short Panel flush wi...

Page 9: ...Left Handrails Next slide a Handrail Bracket 32 onto the lower end of the Right Handrail 86 Insert two Handrail Bracket Bolts 31 with two Washers 116 into the Right Handrail and the Handrail Bracket...

Page 10: ...the 3 4 Screw 95 Discard the other wires included with the receiver A 98 Small Cylinder 121 95 Wire Small Screws 6 Note the location of the 75 ohm antenna terminal on the treadmill For the television...

Page 11: ...d malfunc tion or break down grounding provides a path of least resistance for electric current to reduce the risk of elec tric shock This product is equipped with a cord having an equipment grounding...

Page 12: ...e workouts You can even create custom workout programs and save them in memory for future use In addition the console offers four pulse programs that control the speed and incline of the treadmill to...

Page 13: ...pulled from the con sole adjust the position of the clip as needed HOW TO USE THE MANUAL MODE Insert the key into the console See HOW TO TURN ON THE POWER at the left Designate yourself as user A B C...

Page 14: ...les that you have walked or run during a recent period of time such as the most recent month press the Odometer button the words My Distance and the number of miles will appear on the screen To reset...

Page 15: ...d press the but ton a third time the words Fan Speed High will appear To select the Auto mode press the button again the words Fan Speed Auto will appear When the auto mode is selected the speed of th...

Page 16: ...handrails and begin walking Each program is divided into several time seg ments of different lengths One speed setting and one incline setting are programmed for each seg ment Note The same speed set...

Page 17: ...Hold the handrails and begin walking Each custom program is divided into one minute segments One speed setting and one incline set ting can be programmed for each segment To program a speed setting an...

Page 18: ...n at the end of each seg ment When the first segment ends the treadmill will au tomatically adjust to the speed and incline settings for the second segment The program will continue in this way until...

Page 19: ...pulse sensor it is not necessary to hold the pulse sensor continuously however you should hold the pulse sensor frequently for the program to operate prop erly Each time you hold the pulse sensor keep...

Page 20: ...the program press the Start button or the Speed increase but ton The walking belt will begin to move at 1 mph When the console compares your heart rate to the target heart rate setting the speed and o...

Page 21: ...jack see instruction A below If your stereo has a 1 8 LINE OUT jack see instruction B If your stereo has only a PHONES jack see instruction C A Plug one end of a long 1 8 to RCA stereo audio cable ava...

Page 22: ...r available at electronics stores Next remove the wire that is currently plugged into the LINE OUT jack on your stereo and plug the wire into the unused side of the Y adapter Plug the Y adapter into t...

Page 23: ...E IFIT COM PROGRAMS on pages 21 to 23 To purchase and download iFIT com MP3 programs go to www iFIT com To purchase iFIT com CDs or videocassettes call the toll free telephone number on the front cove...

Page 24: ...eted the walking belt will stop Note To use another MP3 CD or video program press the Stop button or remove the key and go to step 1 on page 23 Note If the speed and or the incline of the treadmill do...

Page 25: ...o the 300 ohm to 75 ohm adapter 2 Press the end of the 300 ohm to 75 ohm adapter into the 75 ohm antenna terminal on the treadmill See assembly drawing 6 on page 10 to find the lo cation of the termin...

Page 26: ...program an elec tronic chirping sound will alert you when the speed and or the incline of the treadmill is about to change CAUTION Always listen for the chirp and be prepared for speed and or incline...

Page 27: ...nto memory Before channels can be selected in this way they must be set into the television s memory See HOW TO USE THE INFORMATION MODE on page 28 Note Channels can also be selected with the re mote...

Page 28: ...ended to be used only when a treadmill is displayed in a store When the demo mode is turned on the power cord can be plugged in the key can be removed from the console and the indicators on the consol...

Page 29: ...ly lower the treadmill until it is resting on the floor Wheels Press the Stop button again and restore the console to the factory settings if desired When the Stop button is pressed the words Restore...

Page 30: ...ker has tripped wait for five minutes and then press the switch to the reset position b Make sure that the power cord is plugged in If the power cord is plugged in unplug it wait for five minutes and...

Page 31: ...mill for a few minutes Repeat until the walking belt is centered b If the walking belt slips when walked on first remove the key and UNPLUG THE POWER CORD Using the allen wrench turn both rear roller...

Page 32: ...en the cable from a CATV company is connected the symptom may be caused by the local company broadcast PROBLEM The remote control does not function properly SOLUTION a When pressing buttons on the rem...

Page 33: ...e aerobic Aerobic exercise is activity that requires large amounts of oxygen for prolonged periods of time This increases the demand on the heart to pump blood to the muscles and on the lungs to oxyge...

Page 34: ...1 Magnet 41 2 Idler Arm Washer 42 4 Idler Arm Nut Incline Nut 43 1 Idler Arm Pulley 44 1 Pulley Bolt 45 1 Idler Arm Pivot Bolt 46 1 Idler Arm Spacer 47 1 Idler Arm 48 1 Idler Arm Spring 49 1 Motor Bel...

Page 35: ...r 132 1 Static Decal 133 2 Caution Decal 134 1 Remote Control 135 1 5 32 Allen Wrench 136 1 Allen Wrench 137 1 Book Holder 138 2 Front Isolator 139 6 Panel Screw 140 3 Panel Bracket 1 6 Blue Wire 2F 1...

Page 36: ...3 52 51 53 57 4 4 37 4 60 6 7 8 9 7 10 62 63 4 4 4 4 71 72 73 42 33 75 4 4 74 4 42 73 77 4 76 31 32 35 36 4 83 84 82 85 84 82 83 80 14 79 77 74 69 62 64 66 67 70 68 65 66 67 68 70 61 58 4 4 59 59 3 3...

Page 37: ...119 120 4 99 95 95 95 95 95 107 95 95 95 95 95 95 95 95 95 95 95 95 94 97 92 112 106 108 109 110 110 111 115 113 113 117 86 90 91 91 93 104 96 114 114 110 114 114 121 95 134 126 125 130 95 95 137 139...

Page 38: ...tion and your continued satisfaction HOW TO GET PARTS AND SERVICE Simply call our Customer Service Department at 1 888 825 2588 and tell them your name and address and the serial number of your Produc...

Reviews: