14
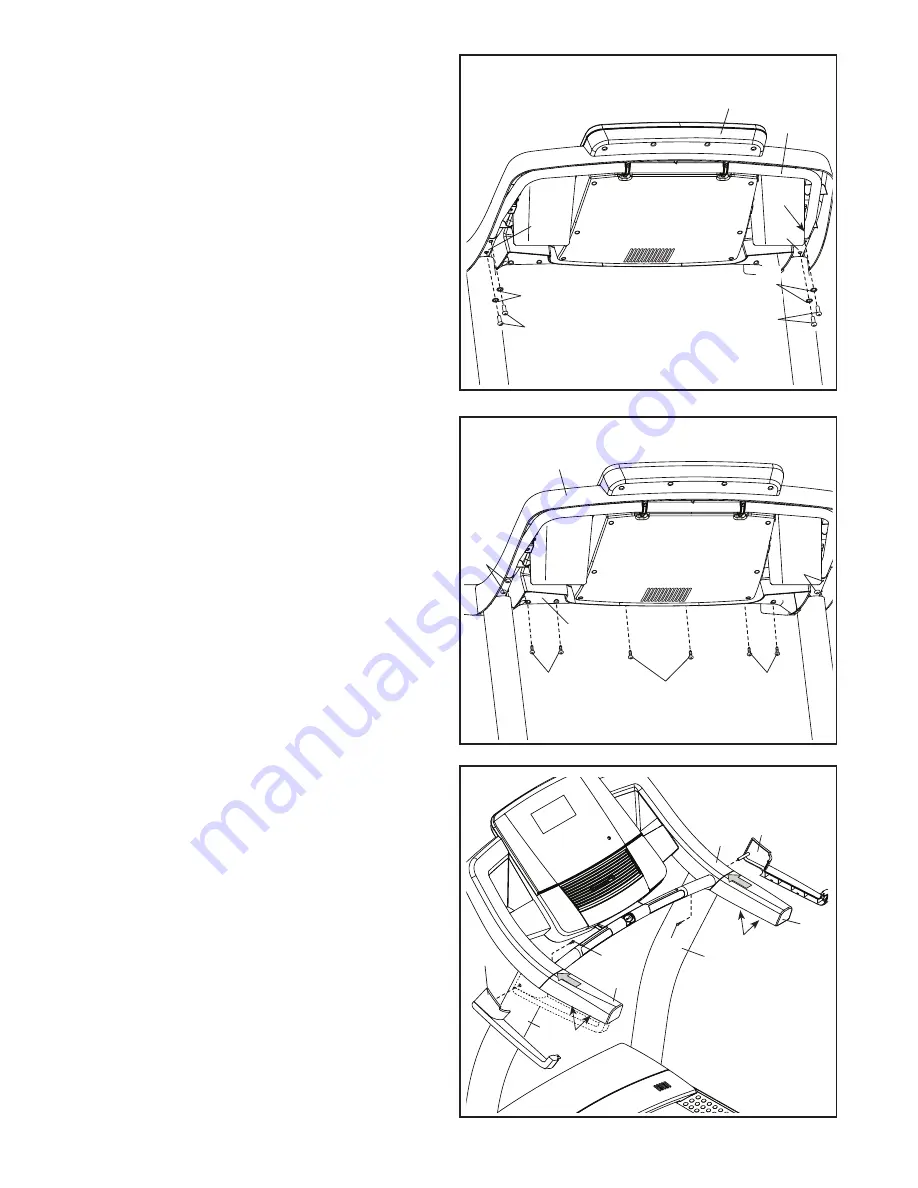
12. Set the console assembly on the brackets on the
Handrails (86).
Make sure that no wires are
pinched.
Insert the excess Upright Wire (81)
behind the Console Frame (104).
Attach the console assembly to the brackets
on the Handrails (86) with the four 5/16" x 3/4"
Screws (4) removed in step 8 and four 5/16" Star
Washers (11).
Start all four Screws, but do not
tighten them yet.
12
86
Console
Assembly
4
4
81
86
104
11
11
13. Attach the Pulse Crossbar (93) to the console
assembly with six #8 x 1/2" Screws (1).
Start all
six Screws, and then tighten them.
Firmly tighten the four 5/16" x 3/4" Screws (4).
13
93
Console
Assembly
4
4
1
1
1
14. Check the gaps between the handrail assem-
blies (A) and the console assembly (B).
If necessary, loosen the #8 x 3/4" Screws (2)
under the handrails and slide the handrails
forward against the console assembly. Then,
retighten the Screws.
Attach the Left Outside Upright Cover (87) and
the Right Outside Upright Cover (96) to the Left
and Right Uprights (89, 90) with a #8 x 1/2"
Screw (1).
Note: Rotate the Covers at an angle
as you set them against the Uprights. Make
sure not to overtighten the Screws.
14
96
89
90
1
1
87
B
2
A
A
2


