background image


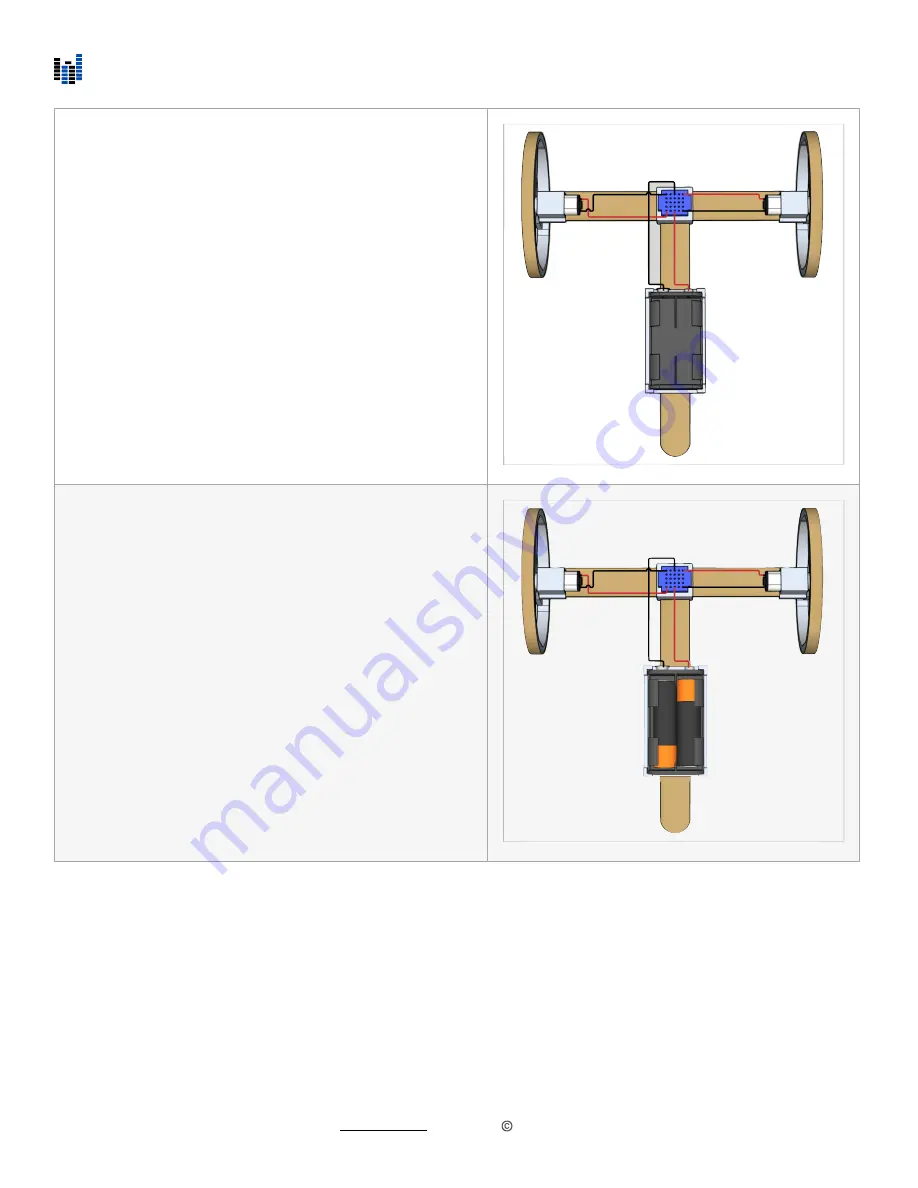
Step 6: 

Connect the other lead from the battery holder to the top row 
on the breadboard

Step 7: 

Insert  the  two  AA  batteries  into  the  battery  holder  and  your 
ScioBot will start running!

Remember,  the  motors  will  ultimately  rotate  in  a  direction 
respective to the direction current is applied. If the motor does 
not  rotate  in  the  direction  you  intended,  just  switch  the 
position of the motor leads. 

For  example,  if  the  left  motor  rotates  backwards  when  you 
give thenScioBot power, simply switch the positions of top left 
motor lead and the bottom left motor lead.

www.nonscio.com                         

©

Nonscio 2020


7

Summary of Contents for ScioBot 1.0

Page 1: ...ges ii Parts List Section I Introduction 1 i What is ScioBot 1 0 1 ii Parts List 1 Section II Building ScioBot 1 0 2 i Assemble the main chassis 2 ii Build the wheel assemblies 2 iii Finalize the chas...

Page 2: ...3 Connect the two pieces using the remaining available slot on the T Connector Required Parts and Components 2x DC Motors 2x Motor Mounts 2x ScioBot Wheels 2x Rubber Bands Step 2 Attach the wheels to...

Page 3: ...main chassis Step 1 Use the slots in the motor mounts to attach the wheel assemblies to the main chassis It does not matter if the motors are oriented on top of the wooden stick or underneath Just mak...

Page 4: ...our ScioBot behave in di ff erent ways You may have actually already con fi gured your ScioBot in an advanced con fi guration If you want to ensure you have the correct wire polarity refer to the Expe...

Page 5: ...Step 2 Connect the other lead from the left motor to the bottom row on the breadboard Step 3 Connect one lead from the right motor to the top row on the breadboard www nonscio com Nonscio 2020 5...

Page 6: ...r lead from the right motor to the bottom row on the breadboard Your motors are now wired to the breadboard Step 5 Connect one lead from the battery holder to the bottom row on the breadboard www nons...

Page 7: ...the motors will ultimately rotate in a direction respective to the direction current is applied If the motor does not rotate in the direction you intended just switch the position of the motor leads F...

Page 8: ...Section III Additional Wiring Con fi gurations FORWARD BACKWARD www nonscio com Nonscio 2020 8...

Page 9: ...can be converted into a left turn by disconnecting the left motor leads completely RIGHT PIVOT This con fi guration can be converted into a right turn by disconnecting the right motor leads completely...

Page 10: ...gure upgrade and extend your prototypes breadboards accelerate your ability to complete projects EXPERT TIP On the back side of each motor there is a sign This allows you to identify the polarity of e...

Reviews: