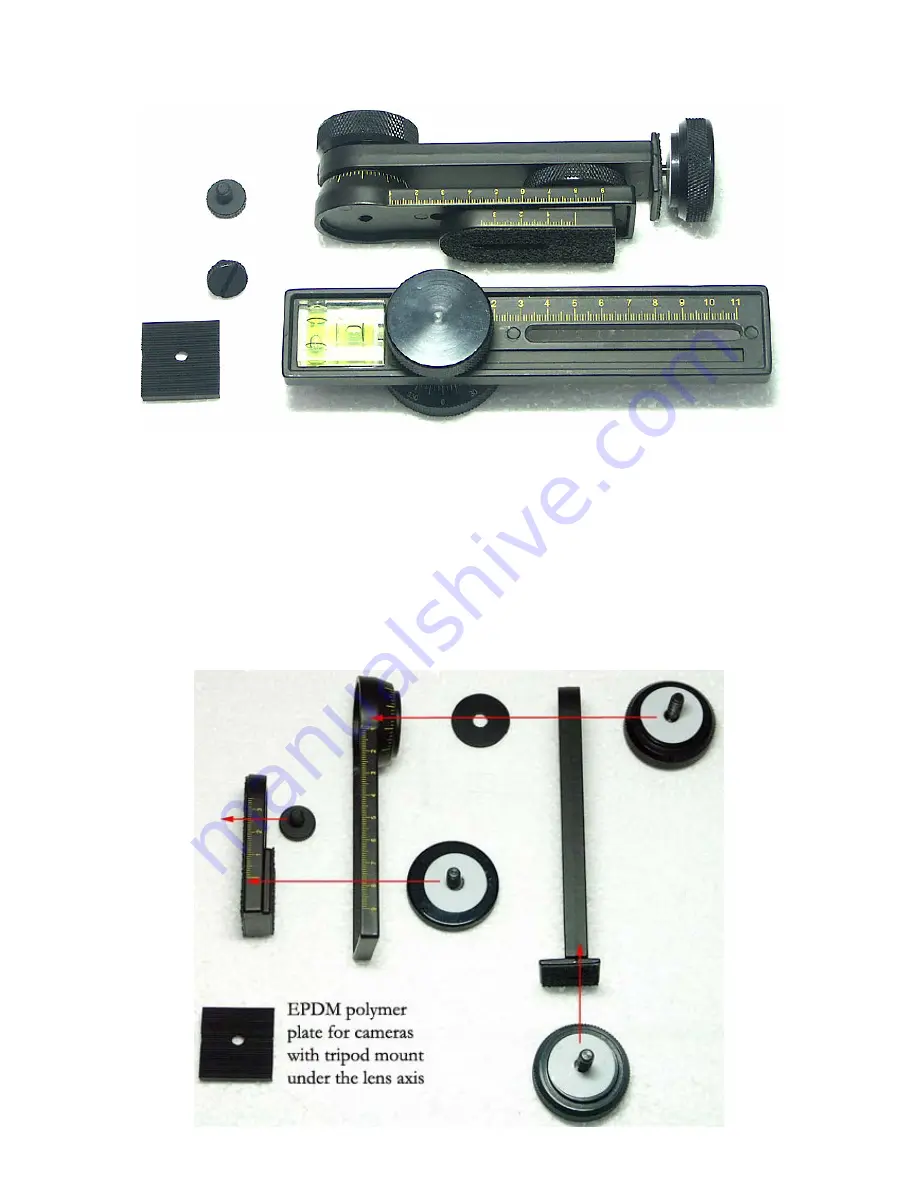
The package
Nodal Ninja is shipped in a semi-assembled form as in the picture above. It includes 2
tightening bolts, one EPDM polymer adapter for cameras with tripod mount under the lens axis and other two pre-assembled units.
Parts in details
Page 1: ...s axis such as SLR and DSLR and also most cameras with tripod mount off the lens axis such as most consumer prosumer cameras in the current market It has all the import features to allow you to rotate...
Page 2: ...cifications will determine whether Nodal Ninja SPH 1 is compatible with your camera or not In case your camera is incompatible a special adapter may be made to extend the compatibility Contact us for...
Page 3: ...m with future modified parts This value corresponds to the distance of your tripod mount away from the entrance pupil position The minimum value of the axial adjustment will be reduced from 3 9cm to 2...
Page 4: ...nja is shipped in a semi assembled form as in the picture above It includes 2 tightening bolts one EPDM polymer adapter for cameras with tripod mount under the lens axis and other two pre assembled un...
Page 5: ...t you MUST rotate in CLOCKWISE manner otherwise the tightening knob will be loosened by the friction And the whole assembly may fall down EPDM polymer is a high quality and durable rubber The EPDM ada...
Page 6: ...re just a few parts and they come in semi assembled form What you need to do is determine some dimensional constants of your camera lens combination such as the entrance pupil position height from bas...
Page 7: ...ount off the lens axis you need to use the off axial adapter But before you use it you need to determine the amount of off set Using the Dimage 7 as an example first you need to determine the lens axi...
Page 8: ...In this case you place the adapter parallel to this side Then you slide the adapter until the center of the bolt has the desired amount of off set i e 29mm on a Dimage 7 You may need a ruler or any st...
Page 9: ...g 41mm in front of tripod mount for Dimage 7 series at 28mm focal length what you need to do is mount the camera onto the vertical rotator arm through the off axial adapter There is a mark at the back...
Page 10: ...ter of tripod mount So you simply mount your camera on it and adjust its position so that the white mark corresponds to the distance of the tripod mount from the entrance pupil position Check that the...
Page 11: ...f the adapter Then check the accuracy of the position with a straight object Again you can mark the position of the bolt on the adapter for future use Then mount your camera to the vertical rotator ar...
Page 12: ...nd is usually the choice to reduce the number of shots to take for the pano especially for the 360 degree virtual tour However you can use the tele end to reduce distortion and increase the resolution...