


71
CONTROL overview
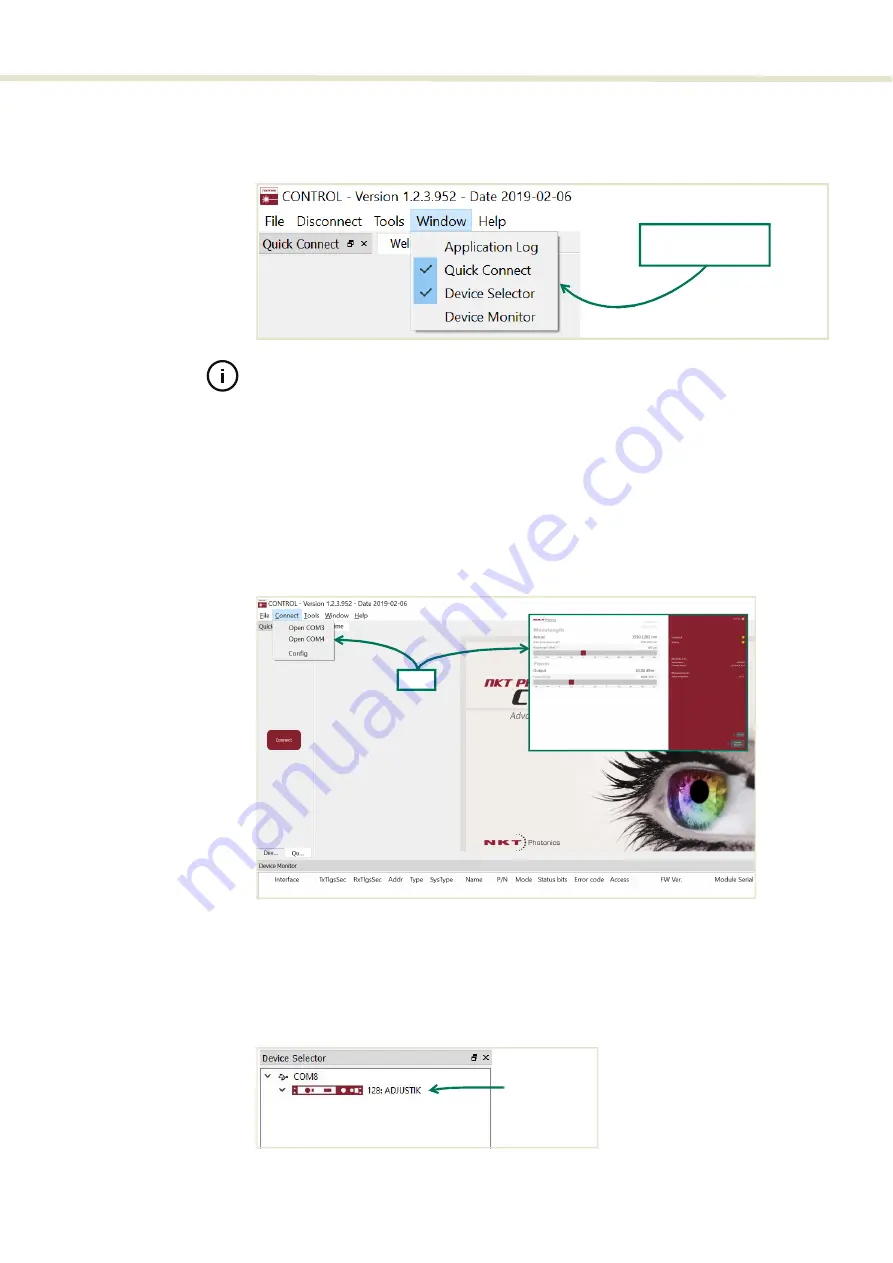
Toggling panels
Use the Menu > Window drop down menu to check and uncheck panels to be
displayed. A blue check mark indicates the panel is displayed.
Figure 36
Panels dragged outside the main window
Note:
Clicking the ‘X’ in the upper right corner of any panel also closes it.
Connecting to the
laser
When CONTROL is launched, a Welcome panel is displayed as in
. In
the menu bar, click the ‘Connect’ drop down menu and then click on the COM
port your laser is using to connect the PC to the laser. The Control and Status
panels are displayed once the laser connects to CONTROL.
“Connecting the laser to a CONTROL PC” on page 57
Figure 37
Welcome screen and connecting
Device Selector
The
Device Selector
panel shows an icon for each connected device.
shows the device selector for an ADJUSTIK laser. If multiple lasers are detected
by CONTROL, click on the ADJUSTIK icon to brings up its controls. To modify the
ICON text, see
Figure 38
Device selector panel
Check the panels to
display them
Click
Click to select
Summary of Contents for Koheras ADJUSTIK HP
Page 1: ...Item 800 611 01 Koheras ADJUSTIK HP PRODUCT GUIDE Low Noise Single Frequency Laser System...
Page 10: ...10 E Part numbers 113...
Page 12: ...12...
Page 16: ...16...
Page 18: ...18...
Page 20: ...20...
Page 36: ...Chassis labels 36...
Page 48: ...48...
Page 56: ...Menu items 56...
Page 68: ...Enabling and disabling emission 68...
Page 84: ...CONTROL Control panel 84...
Page 86: ...86...
Page 90: ...Placing the laser on a table or shelf 90...
Page 98: ...98...
Page 102: ...102...
Page 112: ...Installing CONTROL 112...
Page 114: ...114 2...
Page 115: ...Koheras ADJUSTIK Product Description Release 1 0 04 2021 W 10456...


