


14
14
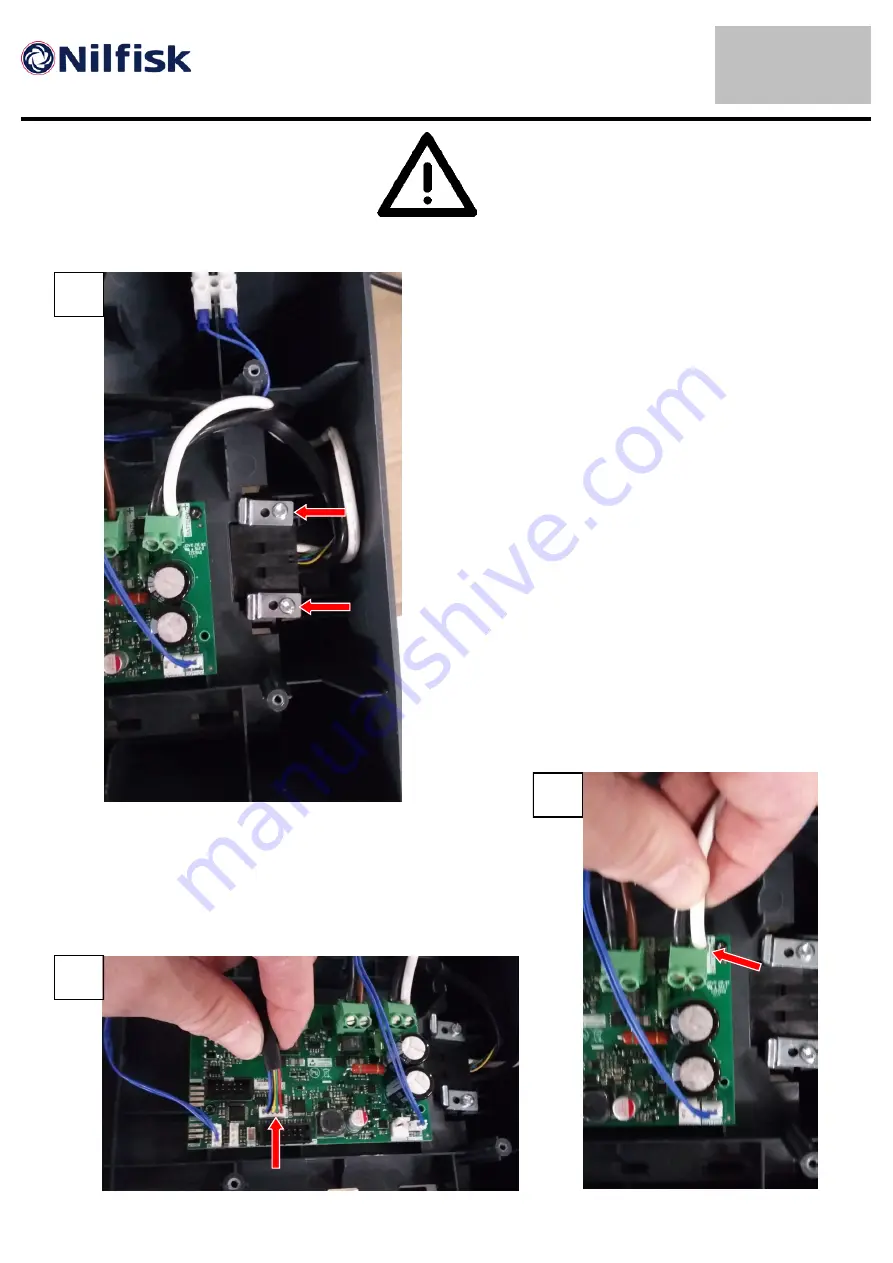
D.4
Change battery connector
Disassemble the unit following guide
in previous section D.0.
Unscrew the brackets holding the
battery connector (fig.1).
Disconnect the wires from the battery
connector on the PCB (fig.2 + 3).
Replace the battery connector and
reassemble the machine.
1
2
3
WARNING
: The electric section of the machine
contains live components.
Always disconnect the battery before disassembly.
Summary of Contents for GD 5 BATTERY
Page 1: ...ENGLISH GD 5 Battery Service manual 26 06 2017 GD 5 Battery variants EU UK CH AUS CN US...
Page 5: ...5 5 B Technical data GD 5 Battery specifications all variants...
Page 16: ...16 16 E Spare parts Cassette and electronics...
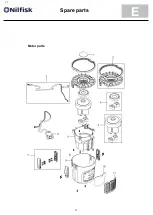
Page 17: ...17 17 E Spare parts Motor parts...
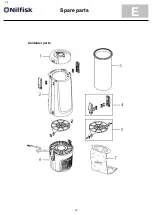
Page 18: ...18 18 E Spare parts Container parts...
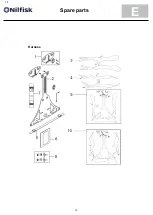
Page 19: ...19 19 E Spare parts Harness...
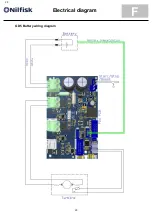
Page 20: ...20 20 F Electrical diagram GD5 Battery wiring diagram...


