background image

4

1)

OEL=Occupational Exposure Limit, *) Optional accessories / Option depending on model

Original instruction

1


IMPORTANT SAFETY INSTRUCTIONS

1.1 

Symbols used to mark instructions

DANGER

  Danger that leads directly to serious or irreversible injuries, or


even death.

WARNING

  Danger that can lead to serious injuries or even death.

CAUTION

  Danger that can lead to minor injuries and damage.

 Before starting up your machine for the first time, this instruction manual must be read through 

carefully. Save the instructions for later use.

1.2 

Instructions for use 

Besides the operating instructions and the binding accident prevention regulations valid in the country 

of use, observe recognised regulations for safety and proper use. 

1.3 

Purpose and intended use

This machine is designed for industrial use, such as e.g. plants, construction sites and workshops. 

This machine is also intended for commercial use, for example in hotels, schools, hospitals, factories, 

shops, offices and rental businesses. Accidents due to misuse can only be prevented by those using 

the machine. The appliance is suitable for picking up dry, non-flammable dust and liquids

Any other use is considered as improper use. The manufacturer accepts no liability for any damage 

resulting from such use. The risk for such use is borne solely by the user. Proper use also includes 

proper operation, servicing and repairs as specified by the manufacturer.

READ AND FOLLOW ALL SAFETY INSTRUCTIONS. 

For Dust Class L machines (with type designation -0L, 2L, LC) following applies: 

The appliance is suitable for picking up dry, non-flammable dust, hazardous dusts with 

OEL

1)

 value > 1mg/m3. Dust Class L (IEC 60335-2-69). The dusts which belong to this 

class have OEL

1)

 values > 1mg/m3. For machines intended for the Dust Class L, the filter material is 

tested. The maximum degree of permeability is 1% and there is no special requirement for disposal. 

Observe national regulations before use. For dust extractors, ensure adquate air change rate L, when 

the exhaust air is returned to the room.

1.4 

Important warnings 

WARNING

•  To reduce the risk of fire, electric shock, or injury, please read and 

follow all safety instructions and caution markings before use. This 
vacuum cleaner is designed to be safe when used for cleaning 
functions as specified. Should damage occur to electrical or me-
chanical parts, the cleaner and / or accessory should be repaired 
by a competent service station or the manufacturer before use in 
order to avoid further damage to the machine or physical injury to 
the user.

Summary of Contents for ATTIX 19 GALLON AE

Page 1: ...ATTIX 7 ATTIX 19 GALLON Instructions for use 107413879 A 07 2018 auto ...

Page 2: ...auto ATTIX 7 2 9 3 4 1 5 5 6 8 10 14 14 15 13 ...

Page 3: ...dered as improper use The manufacturer accepts no liability for any damage resulting from such use The risk for such use is borne solely by the user Proper use also includes proper operation servicing and repairs as specified by the manufacturer READ AND FOLLOW ALL SAFETY INSTRUCTIONS For Dust Class L machines with type designation 0L 2L LC following applies The appliance is suitable for picking u...

Page 4: ...heated surfaces Keep hair loose clothing fingers and all parts of the body away from openings and moving parts Do not put any objects into open ings or use with opening blocked Keep openings free of dust lint hair and anything else that could reduce the flow of air Do not use in outside areas at low temperature Do not use to pick up flammable or combustible liquids such as gasoline or use in areas...

Page 5: ...pliance must be identical to the parts they replace A double insulated appliance is marked with the words DOUBLE INSULATION or DOUBLE INSULATED The symbol square within a square may also be used on the product The machine is equipped with a specially designed cord which if damaged must be replaced by a cord of the same type This is available at authorised service centres and dealers and must be in...

Page 6: ... water on to the upper section of the machine The vacuum cleaner must not be used if the electrical cable or plug show any sign of damage Regularly inspect the cable and the plug for damage If this becomes damaged it should be repaired only by Nilfisk or an authorised Nilfisk Service Dealer in order to avoid a hazard Do not handle the electrical cable or plug with wet hands Do not unplug by pullin...

Page 7: ...the maintenance area so that no harmful substances get into the surroundings For Dust Class L machines with type designation 0L 2L LC following applies During maintenance and cleaning handle the machine in such a manner that there is no danger for maintenance staff or other persons In the maintenance area Use filtered compulsory ventilation Wear protective clothing Clean the maintenance area so th...

Page 8: ...ppliance the use of incorrect brushes in addition to using the ap pliance in a way other than for the intended purpose exempt the manufacturer from any liability for the resulting damage As specified in European Directive 2012 19 EU on old electrical and electronic appliances used electrical goods must be collected separately and recycled ecologically Contact your local au thorities or your neares...

Page 9: ... starting 3 1 Assembling the vacuum cleaner 1 The mains plug should not yet be inserted into a socket 2 Open the retaining clamps 1 and remove upper section of the cleaner 3 Take the accessories1 out of the dirt tank and the packag ing 4 Place a filter bag into the tank as described in the instruc tions printed on the filter bag IMPORTANT Press the filter bag connection firmly on to the inlet fitting 5...

Page 10: ...tched off 2 Insert the power cord into a properly installed and fused socket with earthing contact 1 Connect the electrical ap pliance to the appliance socket1 on the control panel 4 2 2 Switch position auto 1 Before switching the switch to position auto ensure that the tool connected to the appliance socket is switched off 1 Turn the switch to position auto 1 The vacuum cleaner motor starts when t...

Page 11: ...he filter ele ment is automatically cleaned dur ing operation We recommend com plete cleaning if the filter element becomes extremely dirty 4 3 2 Cleaning the filter element Automatic Filter Cleaning System 1 1 Switch off the vacuum clean er 2 Close the nozzles or suction hose opening with the palm of your hand 10 sec 4 3 Cleaning the filter element 4 3 1 Cleaning the filter element Push Clean Sys...

Page 12: ...perly See section 7 2 4 and 7 2 5 Replacing the filter element The use of a separate filter ele ment or filter screen is recom mended If foam appears stop work im mediately and empty the tank To reduce the amount of foam use foam killer Nilfisk Foam Stop see section 9 5 Accesso ries for order number 6 After finishing work 6 1 Switching the vacuum cleaner off and storage 1 Switch off the vacuum clean e...

Page 13: ... the slide 2 4 Close the waste bag using the cable binder 3 5 Dispose of the dirt in accord ance with legal regulations 6 Insert a new waste bag into the cleaned tank as de scribed in the instructions enclosed 7 2 2 Replacing the filter bag 1 Open the retaining clamps and remove the upper sec tion of the cleaner from the dirt tank 2 Carefully remove the filter bag connection from the inlet fitting...

Page 14: ...wards and tilt the tank 4 Tip out the collected dirt 5 Dispose of the dirt in accord ance with legal regulations or 1 Open the tank locks 4 2 Use the handles 5 to lift the tank out of the frame 4 Tip out the collected dirt 5 Place the empty tank in the frame and close the locks 4 6 Dispose of the dirt in accord ance with legal regulations 1 1 3 3 1 1 To empty the dirt tank after picking up liquids...

Page 15: ...r Cleaning System 1 1 Open the retaining clamps and remove the upper sec tion of the cleaner from the dirt tank Lay the upper sec tion of the cleaner down with the filter element facing up wards Do not place the up per section of the cleaner on the guard 1 and do not damage the filter element 2 Open the bar handle 2 and remove it 3 Remove the filter holder 3 4 Carefully remove the filter el ement ...

Page 16: ... works or that the plug is insert ed correctly The power rating of the elec trical tool is too low Note that minimum power rat ing is P 40W Reduced suction power Suction power selected with suction power control is too low Set suction power in accord ance with section 4 2 3 Set ting suction power Clogged suction hose nozzle Clean suction hose nozzle Filter bag is full See section 7 2 2 Replacing f...

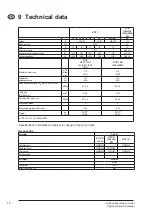
Page 17: ...00 Maximum underpressure hPa in 232 6 85 232 6 85 Sound pressure level LPA IEC 60335 2 69 dB A 65 2 65 2 Vibration ISO 5349 ah m s2 2 5 2 5 Working Sound Level dB A 57 2 57 2 Protection class I I Protection grade moist dust IP X4 IP X4 Weight Kg lb 25 273 54 58 25 273 54 58 3 ATTIX 761 21 XC 19 GALLON AS PE2 Specifications and details are subject to change without prior notice Accessories Descript...

Page 18: ...Nilfisk Inc 1 6 6 Kita shinyokohama Kouhoku ku Yokohama 223 0059 Tel 81 45548 2571 www nilfisk com MALAYSIA Nilfisk Sdn Bhd Sd 33 Jalan KIP 10 Taman Perindustrian KIP Sri Damansara 52200 Kuala Lumpur Tel 60 3603 627 43 120 www nilfisk com MEXICO Nilfisk de Mexico S de R L de C V Pirineos 515 Int 60 70 Microparque Industrial WSantiago 76120 Queretaro Tel 52 442 427 77 00 www nilfisk com NEW ZEALAND Nilfis...

Reviews: