background image

©

 2014 Nil

fi

 sk-Advance, Inc.

3/06 revised 8/14  Form No. 56040888 REV C

page 1 of 6

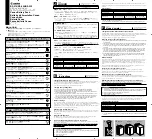
56422156 ONBOARD CHARGER KIT

56422186 AGM ONBOARD CHARGER KIT

Advolution™ Models: ALL

UHR 70-1700 Models: ALL

CONTENTS OF KIT

 ITEM 

PART 

NO. 

QTY 

DESCRIPTION


56040888 

Instruction 

Sheet

 1 

56478246 

Cable 

Tie


56001954 

Wsh, Flt SAE #10


56002192 

Scr, Pan Phil 10-24 x .75


56002768 

Nut, Hex Nyl Loc 10-24


56009005 

Scr, Pan Phil SS Type B 10-16 x .75


56422145 

Charger, Battery Onboard


56422159 

Bushing, Open/Closed 1.25

 8 

56422169 

Cord 

Holder

 WARNING!

Use extreme caution when working with batteries.  Sulfuric acid in batteries can cause severe injury if allowed to contact the skin or eyes.  
Explosive hydrogen gas is vented from the batteries through openings in the battery caps.  This gas can be ignited by any electrical arc, 
spark or 

fl

 ame.  Do not install any lead-acid battery in a sealed container or enclosure.  Hydrogen gas from overcharging must be allowed 

to escape.

 WARNING!

Do not 

fi

 ll the batteries before charging.

Charge batteries in a well-ventilated area.
Do not smoke while servicing the batteries.

When Servicing Batteries...

*


Remove all jewelry

*


Do not smoke

*


Wear safety glasses, rubber gloves and a rubber apron

*


Work in a well-ventilated area

*


Do not allow tools to touch more than one battery terminal at a time

ALWAYS disconnect the negative (ground) cable 

fi

 rst when replacing batteries to prevent sparks.

ALWAYS connect the negative cable last when installing batteries.

Summary of Contents for 56422156

Page 1: ...e injury if allowed to contact the skin or eyes Explosive hydrogen gas is vented from the batteries through openings in the battery caps This gas can be ignited by any electrical arc spark or flame Do not install any lead acid battery in a sealed container or enclosure Hydrogen gas from overcharging must be allowed to escape WARNING Do not fill the batteries before charging Charge batteries in a w...

Page 2: ...o move the position of the switches to match that shown below for AGM batteries If you are not using AGM batteries leave the switches in their default positions FIGURE 1 Charger set to default charging curve 1 for flooded batteries No changes to charging curve required Set charging curve to 14 for Discover AGM batteries Dip switches are accessible by lifting up the left corner of display panel of ...

Page 3: ...n NOTE A long piece if string or twine works well for this by dangling it down through the hole tying it around the power cord plug and then pulling it back up 4 Install the Cord Holder 8 using the Screws 5 and then the Bushing 7 NOTE There is no need to pre drill holes for the screws they are self drilling The Bushing 7 will prevent the Power Cord A from falling back down through the hole FIGURE ...

Page 4: ... 2014 Nilfisk Advance Inc 3 06 revised 8 14 Form No 56040888 REV C page 4 of 6 5 See Figure 3 Remove the 4 Screws A and remove the Front Panel B from the machine FIGURE 3 ...

Page 5: ...es from the charger up and over the chassis as shown Then route the 3 wires along the chassis and up through the opening in the bottom of the body as shown WARNING Improper routing installation can cause damage to wire insulation and lead to short circuits causing damage to the charger batteries and or machine FIGURE 4 ...

Page 6: ...d black wires are one of the 3 wires referenced in step 6 routed inside a single conduit H IMPORTANT Verify that no charger wires are pinched or routed through small diameter turns that there is no potential for rubbing against any sharp edges and that wires do not hang down where they may be susceptible to damage 10 Tie Strap 1 the 3 wires from the battery charger to the existing wiring harness b...

Reviews: