10
6
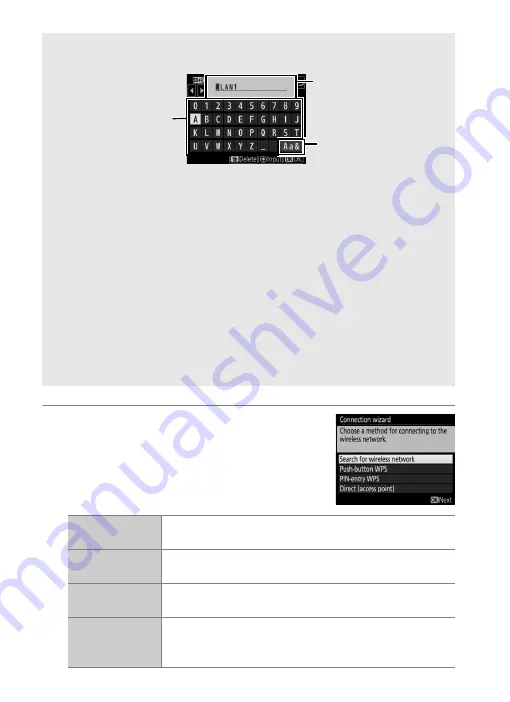
Choose a connection method.
Highlight the connection method used
by the network and press
J
. More
information can be found on the pages
listed below.
A
Text Entry
The following dialog is displayed when text entry is required.
To enter a new letter at the current cursor position, tap the letters on the
touch-screen keyboard (tap the keyboard selection button to cycle
through the upper-case, lower-case, and symbol keyboards). You can
also use the multi selector to highlight the desired character in the
keyboard area and press the center of the multi selector to insert the
highlighted character at the current cursor position (note that if a
character is entered when the field is full, the last character in the field
will be deleted). To delete the character under the cursor, press the
O
(
Q
) button. To move the cursor to a new position, tap the display or
hold the
W
(
M
) button and press
4
or
2
.
To complete entry and close the dialog, press
J
. To exit without
completing text entry, press
G
.
Search for wireless
network
Choose from a list of networks detected by the
camera. Proceed to page 11.
Push-button WPS
Choose for wireless LAN access points with push-
button WPS. Proceed to page 12.
PIN-entry WPS
Choose for wireless LAN access points with PIN-
entry WPS. Proceed to page 14.
Direct
(access point)
Connect directly to a host computer or ftp server in
access point mode, with the camera serving as an
access point. Proceed to page 15.
Name area
Keyboard area
Keyboard selection
Summary of Contents for WT-6
Page 13: ...xiii ...
Page 43: ...29 4 Click Next 5 Select Wireless LAN WT 5 WT 6 and click Next ...
Page 46: ...32 9 Select Manual setup for advanced users and click Next ...
Page 59: ...45 ...
Page 60: ...46 ...
Page 61: ...47 ...


