background image

83

82

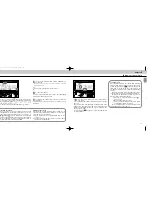
Non-TTL Auto Flash 

Mode

Chapter 

3

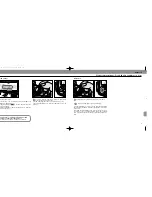
Push 

button for a test firing (see page 110) when

you are not sure whether subject is within the flash

shooting range.
If ready-light 

blinks for a few seconds after test firing,

flash has fired at its maximum output but light might not
have been sufficient. Select a wider aperture or move closer
to subject.

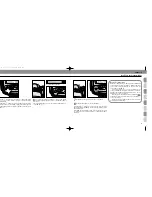
Look into the camera viewfinder, compose and lightly
the press shutter release button to confirm that subject

is in focus.
Check that ready-light is on in the camera’s viewfinder  or
on the SB-25 

.

Fully depress shutter release button to fire flash.

Recheck ready-light to see if it is blinking.

If ready-light 

blinks for a few seconds after shooting,

flash has fired at maximum output but the light may have
been insufficient.
Reconfirm shooting distance and, if necessary, move closer
to subject or select a wider aperture to compensate under-
exposure.

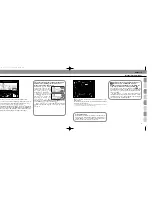
F90-Series/N90’s viewfinder

Exposure compensation

Exposure compensation in Non-TTL Auto Flash mode
is achieved by purposely setting a different aperture
value on the camera (actually on the lens in most
cases) than on the SB-25.

Use an aperture 1/3 to one stop smaller for an

entirely dark background (low reflectance). For back-
grounds that include a highly reflective object, use an
aperture 1/3 to one stop larger.

Note that shooting distance range indication 

corresponds to the aperture value set on the SB-25 —
not on the camera.

In general, you may want to take a series of pictures

using exposure bracketing.

SB-25_En  03.1.14 8:18 PM  Page 82

Summary of Contents for SB-25

Page 1: ...Instruction Manual E Autofocus Speedlight 25_En 03 1 14 8 18 PM Page 1 ...

Page 2: ...ration in shaded boxes with mark By becoming thoroughly familiar with the SB 25 you will be able to use its advanced features more effectively and enjoy great results from the very beginning F90 Series N90 Users F4 Series F 801 N8008 and F 801s N8008s Users F 601 N6006 and F 601M N6000 Users F 401x N5005 Users F 501 N2020 and F 301 N2000 Users F 401 N4004 and F 401s N4004s Users FA FE2 FG and Niko...

Page 3: ...401 N4004 and F 401s N4004s Users Choosing A Flash Method Set Up and Practice 70 75 For FA FE2 FG and Nikonos V Users Choosing A Flash Method Set Up and Practice 76 79 Non TTL Auto Flash Mode Shooting with Varied Lens Apertures 80 83 Manual Flash Mode Manual Light Output Control 84 89 Synchronization in Continuous Shooting 89 Repeating Flash Mode For Multiple Exposure 90 95 Chapter 4 Flash Shootin...

Page 4: ...Chapter 1 Introducing the SB 25 Autofocus Speedlight 25_En 03 1 14 8 18 PM Page 6 ...

Page 5: ...90 and down to 7 rotates 90 to the right and 180 to the left ery chamber lid e and lift to open h head tilting lock ase lever er Feet select lever de battery chamber ery chamber epts four 1 5V AA type penlight batteries either alkaline manganese or 1 2V NiCd batteries age for NiCd batteries varies depending on ufacturer maximum permitted is 1 5V Autofocus assist illuminator LED Enables autofocus o...

Page 6: ...o a computer controlled exposure meter multi segment sensor and TTL through the lens sensor shutter speed aperture and even flash output can be automatically controlled to keep both subject and background in correct exposure In Matrix Balanced Fill Flash the camera s Matrix Metering System i e multi segment sensors determines the correct exposure based on ambient light Flash output is then control...

Page 7: ...o the tter being activated the SB 25 fires a series of nearly sible preflash or Monitor Preflash hese preflash are detected by the F90 Series N90 s TTL ti sensor analyzed for brightness and contrast then grated with distance information from the lens D type kor and other exposure control information for a bal ed fill flash exposure D Multi Sensor Balanced Fill Flash can be performed h any built in...

Page 8: ...t of the time that the curtain are open FP High Speed Sync Flash Front curtain sync flash Rear curtain sync flash SB 25 sync flash In normal flash synchronization the flash fires at an early stage of exposure i e front curtain sync At slow shutter speeds with a moving subject this results in unnatural light patterns For more natural lighting use Rear Curtain Sync With this method the flash fires a...

Page 9: ...rolled by the angle at ch light strikes the subject and is reflected back to the mera s lens For further details see Red Eye page 134 Repeating flash mode offers strobo effect multiple exposure on a single frame TTL Auto Flash 32 79 3D Multi Sensor Balanced Fill Flash 1 Multi Sensor Balanced Fill Flash 1 Matrix Balanced Fill Flash 2 2 2 3 3 4 Center Weighted Fill Flash 1 2 2 2 3 3 4 Spot Fill Flas...

Page 10: ...Chapter 2 Before Flash Shooting 25_En 03 1 14 8 18 PM Page 18 ...

Page 11: ...RAGE OF THE SB 25 SPEED HT EE PAGES 136 AND 137 Tips on Speedlight Care TTERIES CARE AND CAUTION EE PAGE 138 About Batteries Selecting Measurement System Meters or Feet 1 Slide the battery chamber cover in the direction and lift to open ABNORMAL LC LIQUID CRYSTAL DISPLAY AND MALFUNCTIONING In certain cases due to normal characteristics of the built in microcomputer the speedlight may not oper ate ...

Page 12: ... STBY stand by position or ON to turn on the speedlight If batteries are properly installed power is sufficient ready light will come on and LCD indications will appear LCD figures and symbols for meters m and feet ft do not appear simulta neously as shown above They are shown together throughout this manu al for ease of explanation Replace batteries with a fresh set With alkaline manganese batter...

Page 13: ...then while holding the lever tilt the flash head 2 Adjust the flash head so it faces straight forward check that it is not rotated to the right or left To unlock from the forward position slide the lock release lever in P direction then while holding the lever rotate flash head to either the right or left 3 Confirm indicator bars appear in the flash shoot ing distance scale LCD panel Bars do not a...

Page 14: ...epeating flash indicator h shooting distance scale m head position indicator rture indicator Exposure compensation indicator Underexposure indicator Exposure compensation underexposure value Red eye reduction control indicator Light amount indicator m button ustment buttons Select button M button Illuminator button dy light open flash button Power switch e All LCD liquid crystal display figures an...

Page 15: ...linking The aperture value indicator blinks during adjustment and stops blinking after eight seconds unless an adjust ment is made with an adjustment but ton The last blinking figure is auto matically set in this case Automatic aperture adjustment F90 Series N90 F4 Series F 801 N8008 or F 801s N8008s used with an AF Nikkor lens including the lat est D Type or Nikkor lens hav ing a built in CPU No ...

Page 16: ...atest D Type the zoom head automatically adjusts o the closest available wider focal length setting With a zoom lens the zoom head automatically adjusts within the limits of the available coverage from 24mm to 5mm You must set zoom head position manually when sing your camera with other lenses or to select a specif cally desired position For manual adjustment with same camera lens com binations as...

Page 17: ...select a particular flash method For example by replacing a D Type AF Nikkor with an AI P lens you can switch from 3D Multi Sensor to Multi Sensor Fill Flash By using the SB 25 s button you can perform Standard TTL Flash except for P and Ps exposure modes regardless of lens type Flash Methods F90 Series N90 Settings and Lenses 1 Suitable lenses and use depend on camera see instruction manual for i...

Page 18: ...chosen on the camera and zoom head position have been set and appear in the SB 25 s LCD panel automatic aperture zoom head adjust ment Automatic aperture zoom head adjustment AF Nikkor lens including the latest D Type or Nikkor lens having a built in CPU he aperture and zoom head position in use are auto matically set and indicated in the SB 25 s LCD panel For other lenses set manually according t...

Page 19: ...ra to capture exact exposure information for your picture composition except when in manual exposure mode Confirm controlled aperture and shutter speed These also appear in the camera s LCD panel The aperture in use shown in the viewfinder and shooting distance indicator bars appear in the SB 25 s LCD panel Selecting an exposure metering system on the F90 Series N90 camera ither 3D Multi Sensor Ba...

Page 20: ...e in aperture pri ority auto or manual exposure mode to compensate under exposure Firing Flash Underexposure indication When subject may have been underexposed mark and amount of underexposure for example appear in the SB 25 s LCD panel after firing To compensate underexposure in the above exam ple you might consider using an aperture at least 2 f stops wider or move closer to subject button to re...

Page 21: ...nual M 1 Suitable lenses and use depend on the camera see instruction manual for information 2 With AE Action Finder DA 20 Center Weighted Fill Flash and Standard TTL Flash can be used With Waist Level Finder DW 20 and 6x High Magnification Finder DW 21 because Matrix and Center Weighted metering systems can not be used only Standard TTL Flash can be used 3 Includes the latest D type Nikkor lenses...

Page 22: ...Nikkor lens having a built in CPU The aperture and zoom head position in use are auto matically set and indicated in the SB 25 s LCD panel For other lenses set manually according to the shooting situation See Setting Aperture Value Manual Adjustment pages 28 and 29 and Setting Zoom Head Position Manual Adjustment pages 29 and 30 Setting Up SB 25 t Up and Practice me operations can be controlled au...

Page 23: ...system a Matrix metering system to perform Matrix Balanced Fill Flash b Center Weighted metering system to perform Center Weighted Fill Flash c With the F 801s N8008s Spot metering system to perform Spot Fill Flash d Any metering system can be chosen to perform Standard TTL Flash 8 Perform other settings a For programmed auto set lens to minimum aperture highest f number b For shutter priority aut...

Page 24: ...light is on in the camera s viewfinder or on the SB 25 Check whether subject is in focus by using the in focus indicator I in the camera s viewfinder F4 Series F 801 N8008 and F 801s N8008s SB 25 0 Confirm shooting distance ck whether subject falls within the range shown by the oting distance indicator bars in the SB 25 s LCD el If not move closer to subject or select a wider aper in aperture prio...

Page 25: ...flash method selection Also the mark does not appear in the SB 25 s LCD panel table lenses and use depend on the camera see instruction manual for ormation cept AF lenses for F3AF cameras 3 Matrix metering system automatically shifts to Center Weighted indicated by a blinking mark in the camera s LCD panel Only Center Weighted Fill Flash is available sh Methods with F 601 N6006 s in 1 kor ses 2 P ...

Page 26: ...iority auto A d Manual exposure mode M 7 Select a metering system a Matrix metering system to perform Matrix Balanced Fill Flash b Center Weighted metering system to perform Center Weighted Fill Flash c With the F 601 N6006 Spot metering system to per form Spot Fill Flash d Any metering system can be chosen to perform Standard TTL Flash 8 Perform other settings a For programmed auto set lens to mi...

Page 27: ... be taken with the aper ture set on the camera Controlled shutter speed and aperture in programmed aperture priority auto Aperture and shutter speed are automatically con trolled by the camera as specified in the following tables Controlled shutter speeds Lens in use focal length Shutter speed 60mm or shorter 1 focal length to 1 125 sec Longer than 60mm 1 60 to 1 125 sec Usable maximum apertures i...

Page 28: ...sition F 601M N6000 Background may be overexposed Use a lower ISO film or add a neutral density filter or circular polarizer value appears in electronic analog display F 601 N6006 Background may be underex posed If necessary switch to slow sync to obtain shower shutter speed or switch to shutter priority auto exposure mode to select slower shutter speed Shutter priority auto FEE blinks Lens not se...

Page 29: ...ure Choosing A Flash Method The SB 25 enables you to perform Matrix Balanced or Center Weighted Fill Flash These functions are described in detail on pages 10 and 11 You can choose Matrix Balanced Fill Flash when using programmed auto shutter priority or aperture priority expo sure mode or Center Weighted Fill Flash when using man ual exposure mode see the chart at right Flash Methods in TTL Auto ...

Page 30: ...struction see Setting ISO Film Speed Manual Adjustment pages 27 to 28 4 Set the built in zoom head position For instruction see Setting Zoom Head Position Manual Adjustment pages 29 to 30 Setting Up Your Camera 5 Select one of the following exposure modes a Programmed auto P shutter priority auto S or aperture priority auto A to perform Matrix Balanced Fill Flash b Manual exposure mode to perform ...

Page 31: ... indicator bars step 9 setting a wrong aperture value on the SB 25 does not affect all TTL Auto Flash operations a shot will be taken with the aperture set on the camera Selected exposure mode Programmed auto Shutter priority auto Aperture priority auto Manual Viewfinder LED No indication or R R R or or R R Status cause Background is overexposed OK Background is correctly exposed Background is und...

Page 32: ...hoose an aperture that does not exceed the maximum possi le aperture for the film in use as given below SO film peed Maximum perture 25 50 100 200 400 800 1000 f 4 f 4 7 f 5 6 f 6 7 f 8 f 9 5 f 10 10 Confirm ready light has come on and subject is in focus Confirm ready light is on in the camera viewfinder or on the SB 25 Check whether subject is in focus by using the in focus indicator I in the ca...

Page 33: ...n choose Programmed TTL Auto Flash against Standard TTL Flash by setting camera to a programmed auto exposure mode either PDUAL P or PHI Check charts on the previous page Before proceeding ATTACH SPEEDLIGHT TO CAMERA TURN ON BOTH SPEEDLIGHT AND CAMERA USE SINGLE SERVO AUTOFOCUS S OR MANUAL FOCUS M USE SINGLE FRAME SHOOTING S FILM ADVANCE MODE USE FILM WITH A SPEED BETWEEN ISO 25 AND ISO 1000 USE A...

Page 34: ...speed that is not within the synchronization range TTL Auto Flash Mode For F 501 N2020 and F 301 N2000 Users Chapter 3 Confirm Settings 7 Set aperture in the SB 25 s LCD panel For instruction see Setting Aperture Value Manual Adjustment pages 28 to 29 In programmed auto exposure mode aperture is automatically controlled by the camera Choose a value using Shutter speed aperture settings in Programm...

Page 35: ...er compose and lightly press the shutter release button nfirm ready light has come on and subject is in focus ck that ready light is on in camera viewfinder or on the 25 ck whether subject is in focus 10 Fully depress shutter release button to fire flash 11 Recheck ready light to see if it is blinking If ready light blinks for a few seconds after shooting the flash has fired at its maximum output ...

Page 36: ...de the right aperture and shutter speed are automatically selected by the camera Flash output is con trolled by the Speedlight to correctly expose the subject Standard TTL Flash When using aperture priority auto or manual exposure mode you will be asked to confirm flash use the same as above Flash output is controlled by the Speedlight for a correctly exposed subject Shutter speed and or aperture ...

Page 37: ...n the following page In aperture priority auto or manual exposure mode set the aperture value that you have set on the camera from step 6 Once aperture is set indicator bars show the shooting distance range for that setting This operation is important for reading the appropriate shooting distance from the indicator bars step 8 setting a wrong aperture value on the SB 25 does not affect all TTL Aut...

Page 38: ...ove closer to subject or select a wider aperture when rture priority auto or manual exposure mode then eat steps 7 and 8 10 Fully depress the shutter release button to fire flash 11 Recheck ready light to see if it is blinking If ready light blinks for a few seconds after shooting the flash has fired at its maximum output but the light may have been insufficient Reconfirm shooting distance and if ...

Page 39: ...tting for simplicity always leave the switch at this position 3 Set ISO speed of the film in use Usable film speeds are from ISO 25 to ISO 400 For instruction see Setting ISO Film Speed Manual Adjustment pages 27 to 28 4 Set position of the built in zoom head For instruction see Setting Zoom Head Position Manual Adjustment pages 29 to 30 Shooting indicator bars in the LCD panel move as the figure ...

Page 40: ...nto camera viewfinder compose and lightly press the shutter release button Confirm ready light has come on and subject is in focus Check if ready light is on in camera s viewfinder or on the SB 25 Firing Flash 9 Fully depress the shutter release button to fire flash 10 Recheck ready light to see if it is blinking If ready light blinks for a few seconds after shooting flash has fired at its maximum...

Page 41: ...TL Auto sh mode set the SB 25 s flash mode selector to for n TTL Auto Flash operation n Non TTL Auto Flash shooting light output automatical hanges to match the flash to subject distance but ead of light being measured through the lens it is mea ed by the light sensor on the front of the SB 25 he SB 25 can be used in Non TTL Auto Flash mode with Nikon camera lens combination efore proceeding ATTAC...

Page 42: ...conds after shooting flash has fired at maximum output but the light may have been insufficient Reconfirm shooting distance and if necessary move closer to subject or select a wider aperture to compensate under exposure F90 Series N90 s viewfinder Exposure compensation Exposure compensation in Non TTL Auto Flash mode is achieved by purposely setting a different aperture value on the camera actuall...

Page 43: ...to 1 2 1 4 1 16 1 32 1 64 and FP1 and FP2 1 Flash mode selector at Manual Flash 2 Flash sync mode selector at NORMAL 3 ISO film speed in use and zoom head position 6 Aperture value 4 Flash out put level Before proceeding ATTACH SPEEDLIGHT TO CAMERA TURN ON BOTH SPEEDLIGHT AND CAMERA USE APERTURE PRIORITY AUTO OR MANUAL EXPO SURE MODE USE SINGLE SERVO AUTOFOCUS S or A OR MANU AL FOCUS M USE SINGLE ...

Page 44: ...t can choose an amount ranging from full power 1 1 to sixty fourth 1 64 LCD indications change as h the F90 Series N90 indication and then will appear r At the same time appears next to This lies exclusively to FP High Speed Sync Flash and is dis sed in the following pages see pages 98 to 103 Using guide number Guide number is helpful to calculate exact flash shoot ing distance in manual flash ope...

Page 45: ...rames per sec at 1 64 light output This means you can take up to 40 flash pictures in rapid succession Batteries must be fresh to achieve the rates indicated Caution Let the flash unit rest at least 10 minutes after continuous firing at a maximum number see the chart to allow it to cool off Overuse generates heat that could shorten the Speedlight s life Safety range in continuous firing Flash mode...

Page 46: ...ync mode selec tor position is only used for Rear Curtain Sync Flash in TTL Auto Non TTL Auto and Manual Flash and only with the F90 Series N90 F4 Series F 801 N8008 and F 801s N8008s For details see page 105 3 Set the built in zoom head position For instructions see Setting Zoom Head Position Manual Adjustment pages 29 to 30 4 Press button to choose desired light output You can choose an amount r...

Page 47: ... example firing six times at 8Hz takes 6 8 sec to occur However because your camera does not have a shutter speed of 6 8 0 75 sec you should set it to the closest slower shutter speed which is one second The following equation can be applied to calculate an appropriate shutter speed Shutter speed Number of flash per frame Speed of flash Hz where the result shutter speed must be rounded off to the ...

Page 48: ...nds at the location suggested by the LCD s mea surement scale If not change the aperture by turning the lens aperture ring to adjust the bar Finally perform minus exposure compensation to prevent overexposure of overlapping images use the aperture ring to choose another aperture one or two stops smaller than indicated above The aperture indicated by the LCD provides a correct exposure with the ver...

Page 49: ...Chapter 4 Flash Shooting Applications 25_En 03 1 14 8 18 PM Page 96 ...

Page 50: ...in the LCD panel lightly press the camera s shutter release button 4 Confirm the zoom head position has been set and appears in the SB 25 s LCD panel The zoom head position is automatically set and indicated in the SB 25 s LCD panel when the camera is used with an AF Nikkor lens including the latest D Type or a Nikkor lens having a built in CPU Or set manually according to the shooting situation s...

Page 51: ...h subject standing at the location repre sented by indication bar readjust indicator bar from step 11 to the left by one or two steps so the bar indicates a position closer than the actual subject location Experience indicates that a small amount of under exposure may result in a more pleasing photograph To readjust the indicator bar perform one or a com bination of the following adjustments 1 Pre...

Page 52: ...press the shutter release button to check the ready light is on in the camera s viewfinder dy light also appears on the SB 25 3 Fully depress shutter release button to fire flash Guide number in FP High Speed Sync Flash The guide number helps you determine an exact flash shooting flash to subject distance for the selected aper ture f stop number FP guide numbers vary with the ISO film speed in use...

Page 53: ...e Reduction Control with an F90 Series N90 camera 2 When performing multiple flash photography with an F90 Series N90 F4 Series F 801 N8008 or F 801s N8008s 3 When shutter speed dial is set at T with an F4 Series camera Use a tripod to minimize camera shake ed Eye Reduction Control or Better Flash Portraits ht from the camera s flash reflects off the interior of the through the wide open pupil and...

Page 54: ...his feature is available only in TTL Auto Flash mode 2 Press the button Confirm the indicator appears and zero exposure compensation value blinks in the LCD panel 3 Press buttons for value adjustment Adjustment can be made while the value indicator is blinking Simultaneously the shooting indicator bars change 4 Press the button again to complete setting The the value indicator will automatically s...

Page 55: ...O film speed in use See Setting Aperture Values Manual Adjustment pages 28 and 29 For TTL Auto Flash be sure the substituted film speed falls within the range of usable films that ensure correct exposure with your camera Confirm whether subject is within the range shown by the shooting distance indicator bars If not make necessary adjustments move farther or closer Flash exposure compensation Addi...

Page 56: ...e flash adapter to achieve expanded coverage When you use the wide flash adapter the zoom head is automatically adjusted and the LCD panel shows with indication While the adapter is used the automatic zoom head position adjustment does not function for F90 Series N90 F4 Series F 801 N8008 or F 801s N8008s cameras even when used with an AF Nikkor lens including the latest D Type or Nikkor lens havi...

Page 57: ...h the adjusted zoom head position and or indication will blink if the wide flash adapter is stored in its original place this does not affect nor mal flash operation 1 Press and buttons simultaneously for a few seconds until the previously set number and the indication start blinking 2 Press only button to set your desired zoom head position To resume automatic adjustment with certain camera lens ...

Page 58: ...s beyond the autofocus distance range see at right Notes of AF assist LED focus manu ally on the clear matte field Notes on AF assist LED Autofocus distance range with AF assist LED depends on the lens in use and subject s reflection ratio For example with an AF Nikkor 50mm f 1 8 lens including the latest D Type lens and a subject having 35 reflection ratio you can perform autofocus from approx 1m...

Page 59: ...the camera s meter on or push the SB 25 s open flash button When using a remote cord with the FA or FE2 connected to Nikon Motor Drive MD 12 camera remains on as long as the MD 12 s power switch is on In this case the SB 25 will not turn off in STBY position Use OFF position to turn it off manually You cannot use the STBY position to turn on the SB 25 when using it with an FA FE2 or FG set on a me...

Page 60: ... Number o Calculate a Proper Aperture Diffusing Light To Soften Harsh Shadows With a subject in front of a wall a direct flash causes harsh and unattractive shadows By bouncing the light off the ceil ing or walls or by diffusing the light with card s or paper you can soften harsh shadows and create attractive por traits The SB 25 comes with a built in diffuser You can use it alone or with a combin...

Page 61: ... subject within 1 5m approx 5 ft Tilting up to 90 front down to 7 Rotation to right 90 front to left 180 or F90 Series N90 users n bounce photography with the flash head tilted or otated the SB 25 does not fire Monitor Preflash es ven for 3D Multi Sensor Balanced or Multi Sensor Balanced Fill Flash operation A B C Mounting Removing diffuser card A To mount the diffuser card slide out the wide flas...

Page 62: ...Auto Flash Mode section relating to your camera type Note that the LCD panel cannot be used to compute flash shooting distance in bounce photography To protect the diffuser from burning be sure it does not come in direct contact with the flash head Avoid reflection from the translucent material into the lens unce Flash Photography Select a ceiling or wall to bounce the flash from The built in diff...

Page 63: ... panel cannot be used to compute shooting distance f stop coefficient flash to subject distance For example to shoot a subject located 0 5 m away with an ISO 100 film and a wide flash adapter f stop 4 8 0 5 You can then use an aperture of f 8 or smaller a larger f number As far as conditions allow you should choose the smallest aperture as large an f number possible With a very light or dark toned...

Page 64: ...t for TTL tiple Flash pages 130 and 131 Caution To avoid damage to flash units or incorrect oper ation never mix Nikon Speedlights with flash units of other manufacturers 0 Series N90 F 501 N2020 Nikonos V Series F 301 N2000 F3 Series 801 N8008 F 401 N4004 F2 Series 801s N8008s F 401s N4004s FM2 601M N6000 FE2 401x N5005 FG 601 N6006 FA FG 20 APPLICABLE NIKON SLR MODELS Precaution for Rear Curtain...

Page 65: ... first shot Take care that the combined total of the coefficients numbers shown in parentheses below for all Speedlights used at any one time does not exceed 20 at 20 C 68 F or 13 at 40 C 104 F If you are unable to take a second shot disconnect the master Speedlight from the camera or turn each of the Speedlights off once This resets the circuits so you can resume shooting Speedlight coefficients ...

Page 66: ...11 SB 14 SB 140 cannot used with the F 401 N4004 or F 401s 004s either as a master or slave unit F3 Series F4 Series F90 Series N90 F 801 N8008 F 801s N8008s F 601 N6006 F 601M N6000 F 501 N2020 F 401 N4004 F 401s N4004 F 401x N5005 F 301 N2000 FA FE2 FG Nikonos V V Type Sync Cord Master flash unit SC 18 1 5m 4 9 ft SC 19 3m 9 8 ft Using SC 18 or SC 19 up to five flash units can be used for multip...

Page 67: ... SC 24 SC 24 for TTL Auto Flash operation when using the 25 off a Nikon F4 Series camera fitted either with a 6x h Magnification Finder DW 21 or Waist Level Finder 20 he SC 24 comes with two TTL multiple flash terminals one tripod socket It is approx 1 5m 4 9 ft long TTL Multi Flash Adapter AS 10 Use Multi Flash Adapter AS 10 when using more than three units for TTL multiple flash operation The AS...

Page 68: ...ft thereby increasing the angle of reflection Flash Sync Mode Selector vs Position The SB 25 is capable of synchronizing flash output with shutter curtain movement for either the front first curtain or rear second curtain At position the Speedlight synchronizes flash output at the moment the front curtain has fully opened at the end of front curtain movement but before the rear curtain has started...

Page 69: ...ut of the rain Keep the SB 25 away from high tem peratures and do not store in a damp place When not using the SB 25 remove batteries to avoid damage due to battery leakage If leakage occurs take the SB 25 to your nearest Nikon dealer When not using the SB 25 perform the following once a month 1 Install batteries turn on the SB 25 2 Wait until the ready light comes on 3 Fire flash a few times to r...

Page 70: ...l temperature operation 20 C 68 F Electronic construction Automatic Insulated Gate Bipolar Transistor IGBT and series circuitry Zoom capability Seven settings 20mm with the built in wide flash adapter 24mm 28mm 35mm 50mm 70mm 85mm auto power zoom with the Nikon F90 Series N90 F4 Series F 801 N8008 and F 801s N8008s manually set with other cameras Bounce capability Flash head tilts down to 7 or up ...

Page 71: ...times 400 times 6 sec 6 sec 6 10 sec 6 30 sec ernal power rce SD 8 AA type alkaline manganese 100 times 200 times 250 times 3 sec 3 5 sec 3 9 sec 3 30 sec ernal power rce SD 7 C type NiCd 140 times 1 6 sec 1 6 30 sec ernal power rce SD 8 AA type NiCd 100 times 1 6 sec 2 30 sec h either alkaline manganese or NiCd batteries installed in the SB 25 a measured with fresh batteries Data for light output...

Page 72: ...7 4 0 8 8 4 0 8 8 8 32 22 16 11 8 5 6 4 0 6 2 5 0 6 3 7 0 6 4 0 0 6 4 5 0 6 5 2 0 6 6 0 0 6 6 2 32 22 16 11 8 5 6 0 6 1 7 0 6 2 6 0 6 2 8 0 6 3 2 0 6 3 7 0 6 4 2 0 6 4 4 32 22 16 11 8 0 6 1 2 0 6 1 8 0 6 2 0 0 6 2 3 0 6 2 6 0 6 3 0 0 6 3 1 ISO film speed Shooting distance range in feet 1600 800 400 200 100 50 25 Zoom set Zoom set Zoom set Zoom set Zoom set Zoom set Zoom set at 20mm at 24mm at 28mm...

Page 73: ...ritical articles or reviews may be made without written authorization from NIKON CORPORATION NIKON CORPORATION FUJI BLDG 2 3 MARUNOUCHI 3 CHOME CHIYODA KU TOKYO 100 JAPAN PHONE 81 3 3214 5311 TELEX NIKON J22601 FAX 81 3 3201 5856 N Printed in Japan 9 033 CO02 S603 25_En 03 1 14 8 18 PM Page 144 ...

Reviews: