background image

135

Menu Guide—Custom Settings

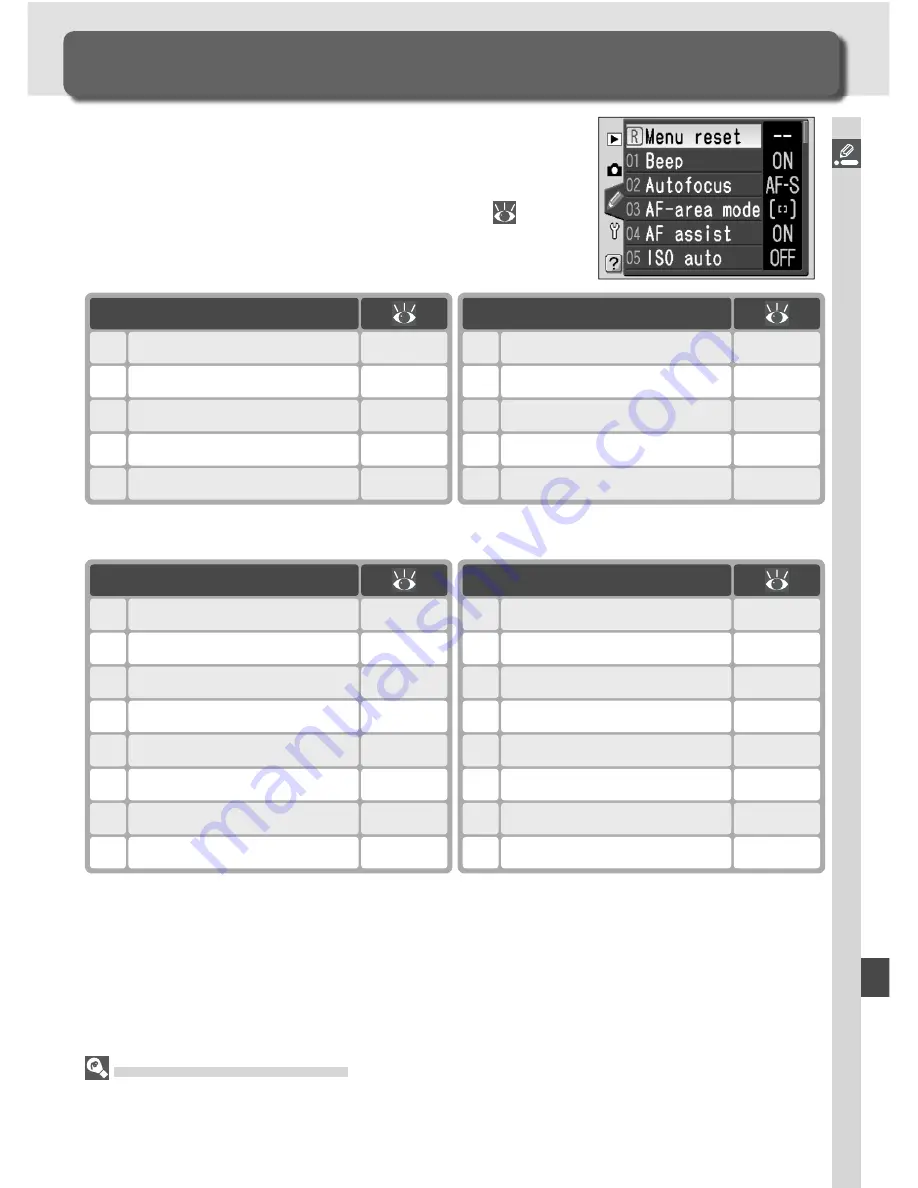
The Custom Settings (CSM) menu can be used 
to customize camera settings to suit individual 
preferences.  When 

Simple 

is selected for the 

CSM menu

  option in the setup menu (

  161), 

the Custom Settings menu contains the following 
options:

Custom Settings

Fine-Tuning Camera Settings

A further sixteen items are listed when 

Detailed 

is selected for 

CSM menu

:

 Using the Multi Selector

The multi selector can be used at any time when the monitor is on.  The focus selector 
lock switch only takes effect when the monitor is off.

Option

Menu reset

136–137

R

Beep

138

01

Autofocus

139

02

AF-area mode

140

03

AF assist

141

04

Option

ISO auto

142–143

05

No CF Card?

143

06

Image review

144

07

Grid display

144

08

EV step

144

09

Option

Exp comp.

145

10

Center wtd

145

11

BKT set

146

12

BKT Order

146

13

Command dial

147

14

Option

AF area illm

149

18

Flash mode

150–151

19

Flash sign

152

20

Shutter spd

152

21

Monitor off

153

22

AE-L / AF-L

147

15

AE Lock

148

16

Focus area

148

17

Meter-off

153

23

Self-timer

153

24

Remote

154

25

The fi rst and last items in each menu are linked.  Pressing the multi selector 
down when 

09 

EV step 

(simple view) or 

25 

Remote 

(detailed view) is select-

ed highlights 

R Menu reset

.  Pressing the multi selector up when 

R Menu 

reset 

is selected displays 

09 

EV step 

or 

25

 Remote

.

Summary of Contents for D70s

Page 1: ...En The Nikon Guide to Digital Photography with the DIGITAL CAMERA ...

Page 2: ...g production and shipping The D70S however is designed to be used with interchangeable lenses and foreign matter may enter the camera when lenses are removed or exchanged Once inside the camera this foreign matter may adhere to the low pass filter where it may appear in photographs taken under certain conditions To prevent foreign matter from entering the camera do not exchange lenses in dusty env...

Page 3: ...hand at creative composition as described in Digital Vari Programs Next read Overview and Getting to Know the Camera to familiarize yourself with the conven tions used in this manual and the names of camera parts then set up your camera as described in First Steps on camera menus and custom settings Menu Guide More About Playback Technical Notes Focus Digital Vari Programs Self Timer Mode Sensitiv...

Page 4: ...sult of a fall or other accident remove the battery and or AC adapter and then take the product to a Nikon authorized service center for inspection Observe proper precautions when han dling batteries Batteries may leak or explode if im properly handled Observe the following precautions when handling batteries for use in this product Be sure the product is off before re placing the battery If you a...

Page 5: ...battery or other small parts into their mouths Removing memory cards Memory cards may become hot dur ing use Observe due caution when removing memory cards from the camera CD ROMs The CD ROMs on which the software and manuals are distributed should not be played back on audio CD equipment Playing CD ROMs on an audio CD player could cause hearing loss or damage the equipment Observe caution when us...

Page 6: ...t any time and without prior notice Nikon will not be held liable for any damages resulting from the use of this product While every effort has been made to ensure that the information in these manuals is accurate and complete we would appreciate it were you to bring any errors or omissions to the attention of the Nikon representative in your area address provided separately This equipment has bee...

Page 7: ... has issued cautions on copies or reproductions of securities is sued by private companies shares bills checks gift certificates etc commuter passes or coupon tickets except when a minimum of necessary copies are to be provided for business use by a company Also do not copy or reproduce pass ports issued by the government licenses issued by public agencies and private groups ID cards and tickets s...

Page 8: ...e a Photograph 27 Step 5 Focus 28 Step 6 Take the Photograph 30 Basic Playback 31 Digital Vari Programs 32 Taking Photographs 35 When to Use Shooting Options 36 Using Camera Menus 39 Image Quality and Size 41 Image Quality 41 Image Size 43 Sensitivity ISO Equivalency 46 White Balance 48 Fine Tuning White Balance 50 Preset White Balance 52 Optimizing Images 56 Customizing Image Enhancement Options ...

Page 9: ...ation 116 Viewing Multiple Images Thumbnail Playback 118 Taking a Closer Look Playback Zoom 120 Protecting Photographs from Deletion 121 Deleting Individual Photographs 122 Menu Guide 123 The Playback Menu 124 Delete 124 Playback Fldr 126 Rotate Tall 126 Slide Show 127 Hide Image 129 Print Set 130 The Shooting Menu 132 Optimize Image 132 Long Exp NR 133 Image Quality 134 Image Size 134 White Bal 1...

Page 10: ...r 167 Image Rotation 168 Connections 169 Television Playback 170 Connecting to a Computer 171 Printing Photographs 175 Technical Notes 181 Camera Settings 182 Optional Accessories 183 Lenses for the D70S 183 Optional Speedlights 186 Other Accessories 190 Caring for the Camera 193 Troubleshooting 198 Specifications 201 Index 206 ...

Page 11: ...s and conventions used Getting to Know the Camera Bookmark this section and refer to it for informa tion on the names and functions of camera parts First Steps This section details the steps required to ready the camera for use inserting the battery and memory card attaching a lens and camera strap and set ting the date time and language Introduction Getting Started ...

Page 12: ...swers to frequently asked questions FAQs and general advice on digital imaging and pho tography Additional information may be available from the Nikon representative in your area See the URL below for contact information http nikonimaging com Replacing This Manual Should you lose this manual replacements can be ordered for a fee from any autho rized Nikon service representative Thank you for your ...

Page 13: ...tter release button 12 Power switch 24 Control panel 6 Focal plane mark 74 Eyelet for camera strap 13 Metering mode button 75 Take a few moments to familiarize yourself with camera controls and dis plays You may find it helpful to bookmark this section and refer to it as you read through the rest of the manual Camera Body Getting to Know the Camera Camera Controls and Displays ...

Page 14: ...ton 19 DC in connector under cover 170 Video connector under cover 170 Speedlight lock release button 97 Flash sync mode button 97 Flash exposure compensation button 102 Self timer lamp 105 107 AF assist illuminator 72 Red eye reduction lamp 95 Sub command dial 147 Built in Speedlight 94 USB connector under cover 171 Focus mode selector 64 Infrared receiver 107 Remote cord connector under cover 19...

Page 15: ...66 Memory card slot cover latch 20 Multi selector 12 Main command dial 147 AE AF lock button 84 Memory card slot cover 20 Memory card access lamp 30 Diopter adjustment control 27 Image quality size QUAL button 41 Playback zoom button 120 Enter button 40 Sensitivity ISO button 46 Thumbnail button 118 White balance WB button 48 Protect button 121 Help button 136 Shooting mode button 62 Format button...

Page 16: ...tery indicator 24 4 Flash sync mode 95 5 Image quality 41 6 Image size 43 7 White balance mode 48 8 Number of exposures remaining 25 Number of shots remaining before memory buffer fills 62 Preset white balance recording indicator 52 Remote control mode indicator 107 9 K appears when memory remains for over 1000 exposures 45 10 Beep indicator 138 11 Aperture f number 76 Bracketing increment 87 PC m...

Page 17: ...ode 139 17 Focus area 66 AF area mode 140 18 Metering mode 75 19 Self timer indicator 105 Remote control indicator 107 20 Bracketing progress indicator 87 21 Bracketing indicator 87 22 Shooting mode 62 19 22 21 20 13 14 15 16 17 18 LCD Illuminator Pressing the button activates the control panel backlight LCD illuminator allowing the display to be read in the dark ...

Page 18: ...is also equipped with on demand grid lines When On is selected for Custom Setting 8 Grid display 144 a reference grid is superimposed over the display in the viewfinder This grid is a useful aid when composing landscape shots or when tilting or shifting a PC Nikkor lens Owing to the characteristics of this type of viewfinder display you may notice fine lines radiating outwards from the selected fo...

Page 19: ...172 12 Flash ready indicator 97 13 Battery indicator 24 14 Electronic analog exposure display 82 Exposure compensation 86 15 Auto sensitivity indicator 142 16 K appears when memory remains for over 1000 exposures 45 The Viewfinder Display The focus area and grid line displays in the viewfinder advanced focusing screen dis play tend to brighten at high temperatures and to darken and exhibit slower ...

Page 20: ...y op timizes settings to suit the selected scene making creative photography as simple as rotating the mode dial Freeze motion in sports shots Take close ups of flowers insects or other small objects Shoot portraits with the background in soft focus Auto 32 Use for point and shoot snapshots that leave the cam era in charge of settings Recommended for first time users of digital SLR cameras Night L...

Page 21: ...ject Use flexible program to control shutter speed and aperture 77 or adjust exposure with exposure compensation 86 Adjust aperture to soften background details or increase depth of field to bring both the main subject and the back ground into focus S Shutter Priority Auto 79 Choose fast shutter speeds to freeze action slow shutter speeds to suggest motion by blurring moving objects M Manual 82 Ma...

Page 22: ...panel and all indicators in the viewfinder then turn off to save power auto meter off The length of the auto meter off delay can be adjusted using Custom Setting 23 Meter off 153 Navigating the Menus The multi selector is used to navigate through the camera menus Cancel and return to previous menu or move cursor left Display sub menu move cursor right or make selection Move cursor up Move cursor d...

Page 23: ... cover gently outwards as shown at right Once the cover is unlatched you can move it slightly away from the monitor and then remove it as shown To replace the cover for shooting or storage insert the two projections on the top of the cover into the match ing indentations above the camera monitor then press the bottom of the cover until you hear it click into place First Steps Getting the Camera Re...

Page 24: ...to the position and open the battery chamber cover 3Insert the battery Insert the battery as shown at right Li ion BATTERY PACK 4Latch the battery chamber cover To prevent the battery from being dislodged during operation be sure the cover is securely latched Read Battery Warnings Read and follow the warnings and cautions on pages ii iii and 196 197 of this manual together with any warnings and in...

Page 25: ...F Operation has been confirmed with the following CR2 lithium batteries SANYO CR2 lithium batteries Toshiba CR2 lithium batteries Maxell CR2 lithium batteries Energizer CR2 lithium batteries The capacity of the above batteries may vary with storage conditions in some cases they may cease to function before their expiry date The presence of fingerprints or other foreign matter on the battery termin...

Page 26: ... monitor and the icon will flash in the control panel Follow the steps below to choose a language and set the time and date Select language 2 Edit Year Month Day Hour Minute and Second Press multi selector left or right to select item up or down to change 4 Language selection dialog displayed 1 Display DATE menu 3 Exit DATE menu Monitor turns off 5 ...

Page 27: ...pow ered by an optional EH 5 AC adapter Three days of charging will power the clock for about one month If the icon flashes in the control panel the clock battery is exhausted and the clock has been reset to 2005 01 01 00 00 00 Set the clock to the correct date and time as described in The Setup Menu Date 161 The Camera Clock The camera clock is less accurate than most watches and household clocks...

Page 28: ...s release button rotate the lens coun ter clockwise until it clicks into place 3Lock aperture at the minimum setting This step is not necessary if you are using a type G lens not equipped with an aperture ring If you are using a lens of another type lock aperture at the minimum setting highest f number If this step is omitted when attaching a CPU lens the aperture displays in the control panel and...

Page 29: ...photographs or the viewfinder display When no lens is in place keep the lens mount covered with the supplied body cap When exchanging lenses or replacing the body cap keep the lens mount pointed down Detaching Lenses Be sure the camera is off when removing or exchanging lenses To remove the lens press and hold the lens re lease button while turning the lens clockwise ...

Page 30: ...heck to be sure that the card is in the correct orientation The memory card slot is on a slight angle see illustration at right Match the angle of the memory card slot when inserting cards 2Open the card slot cover Open the card slot cover as shown at right Inserting Memory Cards In place of film the D70S uses CompactFlash or microdrive memory cards to store photographs For a list of approved memo...

Page 31: ...tion in the setup menu 4Format the memory card Memory cards must be formatted before first use Formatting Memory Cards Formatting memory cards permanently deletes any data they may contain Be sure to copy any photographs and other data you wish to keep to a computer before proceeding 171 174 To format the card turn the camera on and hold the and buttons down simultaneously for approximately two se...

Page 32: ... data or in damage to the camera or card Open card slot cover and press the eject button to partially eject the card The card can then be removed by hand Do not push on the memory card while pressing the eject button Failure to observe this precaution could damage the memory card Note that memory cards may be hot after use Observe due caution when removing memory cards from the camera No Memory Ca...

Page 33: ...asic Playback Read this section for information on viewing pho tographs in the monitor Digital Vari Programs This section describes other Digital Vari Programs that leave the camera in charge of settings while allowing you to express your creativity with a vari ety of subject types Rotate the Mode Dial to 24 Step 1 Ready the Camera 24 25 Step 2 Adjust Camera Settings 26 Step 3 Frame the Photograph...

Page 34: ... meter off Press shutter re lease button halfway to reactivate display Battery partially discharged flashes flashes Battery exhausted Shutter release disabled Low battery Ready fully charged spare battery Step 1 Rotate the Mode Dial to Rotate the mode dial to In this automatic point and shoot mode the majority of set tings are controlled by the camera in response to shooting conditions making it i...

Page 35: ...isplay see Troubleshooting 200 Camera Off Display If the camera is turned off with a battery and memory card inserted the number of exposures remaining will be displayed in the control panel 2 3 Check the number of exposures remaining The exposure count displays in the control panel and viewfinder show the number of photographs that can be taken at current settings When this number reaches zero wi...

Page 36: ...Description Shooting mode Single frame 62 63 One photograph is taken each time shutter release button is pressed Sensitivity 200 46 47 Sensitivity digital equivalent of film speed set to value roughly equivalent to ISO 200 Image size L Large 43 45 Images are 3 008 2 000 pixels in size Image quality NORM JPEG Normal 41 42 Pictures are compressed for balance between im age quality and file size that...

Page 37: ...andgrip in your right hand and cradle the camera body or lens with your left Viewfinder Frame Coverage The viewfinder shows slightly less of the image approximately 95 both vertically and horizontally than appears in the final photograph Viewfinder Focus The viewfinder is equipped with diopter adjustment to accommodate individual differences in vision To adjust viewfinder focus slide the diopter a...

Page 38: ... subject moves out of the selected focus area before the camera has focused the camera will focus based on information from other focus areas If the subject is dark the AF assist illuminator 72 will light automatically to assist in the focus operation To focus on a subject that does not fall in any of the five focus frames use focus lock 70 For information on what to do if the camera is unable to ...

Page 39: ...odes the built in Speedlight will pop up automatically when the shutter release is pressed halfway 94 When the built in Speedlight is raised photographs can only be taken when the flash ready indicator is displayed If the flash ready indicator is not displayed remove your finger briefly from the shutter release button and try again If desired the flash can be turned off so that it will not fire ev...

Page 40: ...ain point even at high shutter speeds While the photograph is being recorded to the memory card after shooting it will be displayed in the monitor see opposite and the access lamp next to the card slot cover will light Do not eject the memory card turn the camera off or remove or disconnect the power source until the lamp has gone out Removing the memory card or cutting power in these circumstance...

Page 41: ... the monitor Press the multi selector up or down to view additional photographs Press the multi selector down to view photographs in the order recorded up to view photographs in reverse order Deleting Unwanted Photographs To delete the photograph currently displayed in the monitor press the button A confirma tion dialog will be displayed Press the button again to delete the image and return to pla...

Page 42: ...sh set to front curtain sync Other modes can be selected 96 Landscape Use for vivid landscape shots that enhance outlines colors and contrast in such subjects as skyscapes and forests Use wide angle lens for wider field of view Built in Speedlight and AF assist illuminator turn off auto matically and will not fire even when lighting is poor Auto Use for snapshots Camera settings are automatically ...

Page 43: ...en in low light photographs Tripod self timer 105 and or optional ML L3 remote control 107 or MC DC1 remote cord 191 can be used to prevent blurring at slow shutter speeds At speeds slower than 1s use noise re duction to reduce mottling 133 Use mode for portraits that include night scenery Built in Speedlight and AF assist illuminator turn off automatically and will not fire even when lighting is ...

Page 44: ... shutter release button is pressed 105 The optional ML L3 remote control offers instantaneous remote release and remote release with a two second delay 107 while the optional MC DC1 remote cord can be used for remote release and features a shutter release button lock see the MC DC1 instruction manual for details P S A and M Modes In addition to the settings available in mode P S A and M modes offe...

Page 45: ...phs described the basic order of operations for taking photographs at the most commonly used settings This chapter ex plains how and when to adjust camera settings for different shooting conditions Taking Photographs The Details ...

Page 46: ...urst Focus 64 74 Give priority to accurate focus or shutter response Select how focus area is chosen and whether to fo cus manually or automatically Self Timer 105 106 Delay shutter release until after the shutter release button is pressed Remote Control 107 110 Use the optional remote control for taking photos at a distance Two Button Reset 111 Reset shooting options to default values Photos out ...

Page 47: ... to lighting for natural coloration Bracketing 87 93 Create multiple photographs bracketing a selected exposure value flash level or white balance Metering 75 Choose how the camera sets ex posure Exposure Mode 76 83 Set shutter speed how long the CCD is exposed to light and ap erture the size of the opening through which light enters the camera for a variety of effects Exposure Compensation 86 Adj...

Page 48: ...ng 87 93 How important is background lighting to the photograph Optimizing Images 56 61 Sensitivity ISO Equivalency 46 47 White Balance 48 55 Self Timer Mode 105 106 Using a Remote Control 107 110 Flash Photography 94 104 Will I need a flash Is the subject very bright very dark or high contrast What is more important shutter speed or aperture What is the subject and how will I compose the photogra...

Page 49: ... main menus the playback menu the shooting menu the Custom Settings menu and the setup menu When the menu button is pressed the camera displays the last menu used To select a different menu The Custom Settings Menu 161 The Custom Settings menu normally lists only options R through 9 if desired all options can be displayed If menu item is highlighted press button 1 To view menu names press multi se...

Page 50: ...n performs the same function as pressing the multi selector to the right In some cases a selection can only be made using button Exiting the Menus To exit the menus press the button if a menu option is highlighted press the button twice You can also exit the menus by pressing the button to exit to playback mode or by turning the camera off To exit the menus and focus the camera for the next shot p...

Page 51: ... JPEG image is 3 008 2 000 pixels in size NEF Raw NEF JPEG NEF images can only be viewed using Nikon Capture 4 version 4 2 or later available separately 191 or PictureProject When photographs taken at NEF JPEG Basic are viewed on the camera only the JPEG image will be displayed When photographs taken at NEF JPEG Basic are deleted both NEF and JPEG images will be deleted File Names Photographs are ...

Page 52: ...Image Quality Menu 1Highlight Image quality in the shooting menu 132 and press the multi selector to the right 2Highlight the desired option and press the multi selector to the right The shooting menu will be displayed The QUAL Button When the monitor is off image quality can be set by pressing the QUAL button and rotating the main command dial Image quality is displayed in the control panel ...

Page 53: ...88 19 13cm 7 5 5 1 504 1 000 S 1504 1000 Image size can be set using the Image size option in the shooting menu or by pressing the QUAL button and rotating the sub command dial Image size can not be selected when NEF Raw or NEF JPEG Basic is selected for image quality When opened in Nikon Capture version 4 2 or later available separately 191 or PictureProject NEF images are 3 008 2 000 pixels in s...

Page 54: ...ing Photographs Image Quality and Size The QUAL Button When the monitor is off image size can be set by pressing the QUAL button and rotating the sub command dial Image size is displayed in the control panel ...

Page 55: ...e size varies with scene recorded and make of memory card Maximum number of frames that can be stored in memory buffer Actual number of photos that can be taken before buffer fills may vary with make of memory card Size of JPEG image fixed at L When opened in Nikon Capture 4 version 4 2 or later available separately or PictureProject NEF image is 3 008 2 000 pixels Total file size of NEF RAW and J...

Page 56: ...SO button and rotating the main command dial The ISO Menu 1Highlight ISO in the shooting menu 132 and press the multi selector to the right Sensitivity The higher the sensitivity the more likely pictures are to be subject to noise in the form of randomly spaced brightly colored pixels 5 ISO Auto 142 When On is selected for Custom Setting 5 ISO auto the camera will automatically vary sensitivity fr...

Page 57: ... Photographs Sensitivity ISO Equivalency The ISO Button When the monitor is off sensitivity can be set by pressing the ISO button and rotating the main command dial Sensitivity is displayed in the control panel ...

Page 58: ...te balance is recommended with most light sources If the desired results can not be achieved with auto white balance choose an option from the list above or use preset white balance Approximate color temperature White balance adjusted automatically based on color temperature from 1 005 pixel RGB sensor and CCD image sensor For best results use type G or D lens With built in Speedlight and optional...

Page 59: ...e WB Button When the monitor is off white balance can be set by pressing the WB button and rotating the main command dial White balance is displayed in the control panel Speedlights Connected via a Sync Cable Auto white balance may not produce the desired results when the AS 15 accessory shoe adapter is used to connect optional Speedlights via a sync cable Use preset white balance or set white bal...

Page 60: ...n and rotating the sub command dial At settings other than 0 a icon appears in the control panel The White Balance Menu 1In the white balance menu 49 highlight an option other than Preset and press the multi selector to the right 2Press the multi selector up or down to choose the desired value and press the multi selector to the right The shooting menu will be dis played Color Temperature The perc...

Page 61: ... 5 400K 5 800K 6 400K 8 800K 3 3 300K 7 200K 5 600K 6 000K 6 600K 9 200K The size of the increments for Fluorescent reflects the wide variations in color tem perature among the many different types of fluorescent light source ranging from low temperature stadium lighting to high temperature mercury vapor lamps Mired Any given change in color temperature produces a greater difference in color at lo...

Page 62: ...alance at a time the existing value is overwritten when a new value is measured or copied Mea suring a new value for white balance automatically sets Preset to Measure Measuring a Value for White Balance 1Place a neutral gray or white object under the lighting that will be used in the final photograph In studio settings an 18 diffusion panel can be used to make the reference object appear gray 2Se...

Page 63: ...e is selected No photograph will be recorded white bal ance can be measured accurately even when the camera is not in focus To exit without measuring a new value for white balance press the WB button 5If the camera was able to measure a value for white balance will flash in the control panel while the viewfinder will show a flashing To return to shooting mode press the shutter release button halfw...

Page 64: ...py a value for white balance from a photograph on the memory card display the white balance menu 49 and follow the steps below To use white balance value for current photo proceed to Step 11 If no photo is displayed preset white balance will be set to 5 200K Dir sunlight Highlight Select image 5 Display folder list 6 Highlight folder 7 Display images in selected folder 8 ...

Page 65: ...e balance to value for selected photograph 12 To select different photo repeat steps 5 12 Using the Current Value for Preset White Balance To set white balance to the value currently selected for preset white bal ance 1Highlight Preset in the white balance menu 49 and press the multi selector to the right 2Highlight Measure and press the multi se lector to the right to set white balance to the cur...

Page 66: ...bjects or when taking pictures that will be sharpened in image application Softer SF Optimizes images for printing as is via direct USB connection 175 Images will be sharp and clear even when enlarged Direct Print DP Lowers contrast while lending natural texture and rounded feel to skin of portrait subjects Portrait PO Enhances saturation and sharpness to produce landscapes with vibrant greens and...

Page 67: ... best results use type G or D lens All images are sharpened by same standard amount Description Images are sharpened less than standard amount Images are sharpened slightly less than standard amount Images are sharpened slightly more than standard amount Images are sharpened more than standard amount Images are not sharpened None High Medium high Medium low Low Option Normal Auto default Customizi...

Page 68: ...multiple shots with same curve choose different setting For best results use type G or D lens Auto default Camera uses same standard curve for all images Suited to most scenes whether dark or bright Normal Description Option Produces softer images Prevents highlights on portrait subjects from being washed out in direct sunlight Low contrast Slightly less contrast than Normal Medium low Custom curv...

Page 69: ... photographs that will be printed with ExifPrint the direct printing option on some household printers or kiosk printing or other commercial print services Photos taken in Mode II can also be printed using these options but colors will not be as vivid JPEG photographs taken in Mode II are Exif 2 21 and DCF 2 0 compliant applications and printers that support Exif 2 21 and DCF 2 0 will select the c...

Page 70: ...reen are mixed in equal amounts yel low results while a smaller amount of red produces a yellow green Mixing different amounts of red and blue light produces colors ranging from a reddish purple through purple to navy while mixing different amounts of green and blue light produces colors ranging from emerald to turquoise Adding a third color of light results in lighter hues if all three are mixed ...

Page 71: ...ection 4 Highlight optimization option 1 Display sub menu 2 Choosing Custom Image Optimization Options Choosing Custom in the Optimize image menu 57 displays the menu shown in Step 1 Repeat steps 1 4 to adjust other options 5 Highlight Done 6 Return to shooting menu 7 ...

Page 72: ...sponse can be used to reduce blurring caused by camera shake Quick response remote Camera records photographs at up to about three frames per second while shutter release button is held down Continuous Use self timer for self portraits or to reduce blurring caused by camera shake 105 Self timer Average frame rate in mode M with manual focus shutter speed of 50 s or faster noise reduction off and m...

Page 73: ... until the access lamp has gone out If the camera is switched off while data remain in the buffer the power will not turn off until all images in the buffer have been recorded to the memory card If the battery is exhausted while images remain in the buffer the shutter release will be disabled and all images will be transferred to the memory card The approximate time required to write the entire bu...

Page 74: ...il focusing is complete and the shutter can be released predictive focus tracking 65 If subject stops moving before shutter is released in focus indicator will appear in viewfinder and focus will lock at this distance AF C continuous servo autofocus Camera focuses continuously while shutter release button is pressed halfway If subject moves fo cus will be adjusted to compensate predictive focus tr...

Page 75: ...edict where the subject will be when the shutter is released In single servo autofocus the camera will initiate predictive focus tracking if the subject was moving when the shutter release button was pressed halfway Focus will lock when the subject stops moving In continuous servo AF the camera will also initiate predictive focus tracking if the subject starts moving after the shutter release butt...

Page 76: ...cted when the mode dial is rotated to or to enable manual focus area selection in these modes select Single area or Dynamic area for Custom Setting 3 AF area mode 140 Manual Focus Area Selection To select the focus area slide the focus selector lock to The multi selector can then be used to select the focus area The selected focus area will be displayed in the viewfinder highlighted in red if nece...

Page 77: ...nder 8 when focus area is selected and when camera focuses If subject leaves selected focus area even briefly camera will still be able to focus based on information from other focus areas focus area selection does not change Use when following erratically moving subjects and in other situations in which it is difficult to keep subject in selected focus area Dynamic area Camera automatically selec...

Page 78: ...tom Setting 2 Autofocus AF S AF C View finder Manual Shown in viewfinder and control panel Single area Manual Shown in viewfinder and control panel Single area Manual Shown in viewfinder and control panel Dynamic area Automatic Not shown Closest subjct Manual Shown in viewfinder and control panel Dynamic area Automatic Not shown Closest subjct ...

Page 79: ...hutter release button is pressed halfway Use with relatively static sub jects when time is available to compose photo As above except that camera automatically selects focus area containing subject closest to camera Beep sounds and active focus area is highlighted in viewfinder when camera has focused Use when sure that subject will be closest object to cam era but unsure where it will appear in f...

Page 80: ... AE L AF L button To recompose a photograph using focus lock 1Position the subject in the selected focus area and press the shutter re lease button halfway to initiate focus 2Check that the in focus indicator appears in the viewfinder AF S Single servo AF Focus will lock automatically when the in focus indicator appears and remain locked until you remove your finger from the shutter release button...

Page 81: ...ots while the AE L AF L button is pressed Do not change the distance between the camera and the subject while focus lock is in effect If the subject moves focus again at the new distance AF Area Mode Select Single area or Dynamic area for Custom Setting 3 AF area mode 140 when focusing using focus lock Mode AF C is selected automatically when the mode dial is rotated to 15 AE L AF L 147 This optio...

Page 82: ...nator has a range of about 0 5 3m 1 8 9 10 With the following lenses autofocus with AF assist illumination is not available at ranges under 1m 3 3 AF Micro ED 200mm f 4 AF S DX ED 12 24mm f 4 AF S ED 17 35mm f 2 8 AF ED 18 35mm f 3 5 4 5 AF S DX 18 70mm f 3 5 4 5 AF 20 35mm f 2 8 AF ED 24 85mm f 2 8 4 AF ED 24 85mm f 3 5 4 5 AF S VR ED 24 120mm f 3 5 5 6 AF 24 120mm f 3 5 5 6 AF ED 28 200mm f 3 5 ...

Page 83: ...ocus 74 or use focus lock 70 to focus on another subject at the same distance and then recompose the photograph Continuous Use of the AF Assist Illuminator 72 After the AF assist illuminator has been used for several consecutive shots it may turn off briefly to protect the lamp The illuminator can be used again after a short pause Note that the illuminator may become hot with continuous use ...

Page 84: ...firm whether the subject in the selected fo cus area is in focus After positioning the subject in the active focus area press the shutter release button halfway and rotate the lens focusing ring until the in focus indicator is displayed V V A M Selection Autofocus with Manual Priority When using a lens that offers A M selection select M when focusing manually With lenses that support M A autofocus...

Page 85: ... using filters with exposure factor filter factor over 1 191 Center weighted Description Method Metering is performed by 1 005 pixel RGB sensor which sets exposure based on variety of information from all areas of frame This method is particularly effective where frame is dominated by bright white or yel low or dark black or dark green colors when its results approach what is seen by human eyes 3D...

Page 86: ...e value chosen by the user A and M modes allowing depth of field to be previewed in the viewfinder depth of field preview is not available with non CPU lenses 5 ISO Auto 142 When On is selected for Custom Setting 5 ISO auto the camera automatically varies sensitivity in the range 200 1600 ISO equivalent to help ensure optimum exposure and flash level In P and A modes the camera adjusts sensitivity...

Page 87: ...photographs in auto multi program 1Rotate the mode dial to P 2Frame a photograph focus and shoot Flexible Program In mode P different combinations of shutter speed and aperture can be selected by rotating the main command dial flexible program All combinations produce the same exposure While flexible program is in effect a icon appears in the control panel To restore the default shutter speed and ...

Page 88: ...vary with sensitivity ISO equivalency the above graph assumes a sensitivity of ISO 200 equivalent When matrix metering is used values over 171 3 EV are reduced to 171 3 EV AF 50mm f 1 4D AF ED 180mm f 2 8D AF S ED 300mm f 4D Aperture Shutter speed Subject too dark Raise sensitivity 46 Description Indicator Subject too bright Use optional Neutral Density ND filter or lower sensitivity 46 Exposure W...

Page 89: ...Rotate the main command dial to choose the desired shutter speed 3Frame a photograph focus and shoot If the flash ready indicator blinks in the viewfinder the flash can be used for ad ditional lighting The flash ready indicator will not be displayed if Off is selected for Custom Setting 20 Flash sign Subject too dark Choose slower shutter speed or higher sensitivity 46 Description Indicator Subjec...

Page 90: ... to select a different shutter speed before shooting Shutter Speed and Camera Shake To prevent blurring caused by camera shake the shutter speed should be faster than the inverse of the focal length of the lens in seconds for example if a lens has a fo cal length of 300mm shutter speed should be faster than 1 300 s Use of a tripod is recommended when shooting at slower shutter speeds To prevent bl...

Page 91: ...y auto 1Rotate the mode dial to A 2Rotate the sub command dial to choose the desired aperture 3Frame a photograph focus and shoot If the flash ready indicator blinks in the viewfinder the flash can be used for ad ditional lighting The flash ready indicator will not be displayed if Off is selected for Custom Setting 20 Flash sign Subject too dark Choose larger aperture smaller f number or higher se...

Page 92: ... lens Using the electronic analog exposure display in the viewfinder you can adjust exposure according to shooting conditions and the task at hand To take photographs in manual exposure mode 1Rotate the mode dial to M 2Rotate the main command dial to choose a shutter speed and the sub command dial to set aperture Check exposure in the electronic analog exposure display see opposite and continue to...

Page 93: ...ter is open for more than approximately 1s at any setting noise in the form of randomly spaced brightly colored pixels may appear in the final photograph Non CPU Lenses If a non CPU lens is attached in mode M will appear in the aperture displays in the control panel and viewfinder Aperture must be adjusted manually using the lens aperture ring and depth of field preview is not available The camera...

Page 94: ...ck 1Rotate the mode dial to P S or A and select center weighted or spot metering exposure lock has no effect in mode M while Digital Vari Program modes are not recommended as center weighted and spot metering can not be selected in these modes While exposure lock is in effect an EL indicator will appear in the view finder 2Position the subject in the selected focus area and press the shutter re le...

Page 95: ...e metered value for exposure The new values can be confirmed in the viewfinder and control panel Note that the metering method can not be changed while exposure lock is in effect 15 AE L AF L 147 Depending on the option selected the AE L AF L button locks both focus and exposure the default setting only focus or only exposure Options are available for keeping exposure locked until the AE L AF L bu...

Page 96: ... in the control panel or the elec tronic analog exposure display the 0 in the electronic analog exposure display will flash Exposure compensation can be set to values between 5EV underexposure and 5EV overexposure in increments of 1 3 EV The current value for exposure compensation can be confirmed by pressing the button The current value is shown in the control panel with a icon in the viewfinder ...

Page 97: ...lash or AE only Camera varies flash level by maximum of 2EV with each shot One photograph is produced each time shutter is released up to three shots are required to complete bracketing sequence Available only in i TTL and auto aperture flash control modes 150 Flash bracketing AE flash or Flash only Camera creates up to three images each time shutter is released bracketing current white balance se...

Page 98: ...ary both exposure and flash level the default setting AE only to vary only exposure or Flash only to vary only flash level 2Pressing the button rotate the main com mand dial until is displayed in the control panel and the icons in the control panel and viewfinder start to blink 3Press the button and rotate the sub com mand dial to choose a bracketing program 90 91 ...

Page 99: ...mpensa tion is taken Bracketing begins again when all shots in the sequence have been taken To cancel bracketing press the button and rotate the main command dial until is no longer displayed in the control panel The program last in effect will be restored the next time bracketing is activated Brack eting can also be cancelled by selecting WB bracketing for Custom Set ting 12 or by performing a tw...

Page 100: ... 3 3 2 3 EV 0 0 7 0 7 Bracketing order EVs 3 1EV 0 1 0 1 0 3 11 3 EV 0 1 3 1 3 3 12 3 EV 0 1 7 1 7 3 2EV 0 2 0 2 0 2 1 3 EV 0 0 3 2 2 3 EV 0 0 7 2 1EV 0 1 0 2 11 3 EV 0 1 3 2 12 3 EV 0 1 7 2 2EV 0 2 0 2 1 3 EV 0 0 3 2 2 3 EV 0 0 7 2 1EV 0 1 0 2 11 3 EV 0 1 3 2 12 3 EV 0 1 7 2 2EV 0 2 0 Custom Setting 9 EV step 1 3 step default 13 BKT Order 146 This option can be used to change the bracketing order...

Page 101: ...d from the next shot in the sequence after the memory card has been replaced or shots have been deleted to make room on the memory card If the camera is turned off before all shots in the sequence have been taken bracketing will resume from the next shot in the sequence when the camera is turned on Exposure and Flash Bracketing The camera modifies exposure by varying shutter speed and aperture mod...

Page 102: ... Raw or NEF JPEG Basic is selected for im age quality 2Pressing the button rotate the main com mand dial until is displayed in the control panel The icon in the control panel and the arrows and at the ends of the electronic analog exposure display will start to blink Shooting Mode In all modes including continuous mode the shutter is released only once each time the shutter release button is press...

Page 103: ...el display 3 1 0 1 1 3 2 0 2 2 Bracketing order 3 3 0 3 3 2 1 0 1 2 2 0 2 2 3 0 3 No of shots Control panel display Bracketing order 2 1 0 1 2 2 0 2 2 3 0 3 WB WB 13 BKT Order 146 This option can be used to change the bracketing order To cancel bracketing press the button and rotate the main command dial until is no longer displayed in the control panel The program last in effect will be restored ...

Page 104: ...flash output for natural balance between main subject and ambient background lighting If type G or D lens is used distance information is included when calculating flash output i TTL Balanced Fill Flash for Digital SLR Standard i TTL Flash for Digital SLR is activated automatically in mode M and when spot metering is selected in modes P S and A Flash output adjusted to ensure main subject is corre...

Page 105: ...prevent blurring caused by camera shake Rear curtain sync Slow rear curtain sync Combines red eye reduction with slow sync Available only in P and A modes Use of tripod is recommended to prevent blurring caused by camera shake Slow sync with red eye reduction Flash is combined with shutter speeds as slow as 30s to capture both subject and background at night or under dim light Available only in P ...

Page 106: ... automatically when mode dial is rotated to or Auto front curtain sync The following flash sync settings are available in mode Description Flash sync mode Combines red eye reduction 95 with auto slow sync Use of tripod is recommended to prevent blurring caused by camera shake Auto slow sync with red eye reduction Flash does not fire even when lighting is poor or built in Speedlight is raised Flash...

Page 107: ...lash for Digital SLR is activated automati cally in mode M and when spot metering is selected in modes P S and A 3Press the button The built in Speedlight will pop up and begin charging When the Speedlight is fully charged the flash ready indicator will light Auto Flash and Modes The built in Speedlight can not be raised and fired manually in and modes Once raised the built in Speedlight will only...

Page 108: ...ction Off Auto slow sync Auto slow sync red eye reduction Off 1 Available only in P and A modes If mode dial is rotated to S or M after this option has been selected in P or A mode flash sync mode will be set to red eye reduction 2 Available only in P and A modes If mode dial is rotated to S or M after this option has been selected in P or A mode flash sync mode will be set to front curtain sync 3...

Page 109: ...ustom Setting 21 Shutter spd 152 Regardless of option selected camera may set shutter to speeds as slow as 30s at flash sync settings of slow sync slow rear curtain sync and slow sync with red eye reduction 2 Speeds faster than 1 500 s will be reduced to 1 500 s when built in Speedlight is raised or optional Speedlight is attached and turned on 3 Flash range varies with aperture Consult table of f...

Page 110: ...3 24 7 5 6 2 8 3 2 3 5 4 4 5 5 6 5 6 3 7 1 0 7 5 4 2 4 17 8 8 Range 8 9 10 11 13 14 16 18 20 22 0 6 1 9 2 6 3 4 4 5 5 5 6 6 3 7 1 8 9 10 11 0 6 3 8 2 12 6 5 6 6 3 7 1 8 9 10 11 13 14 16 0 6 2 7 2 8 9 11 13 14 16 18 20 22 25 29 32 0 6 1 4 2 4 7 16 18 20 22 25 29 32 0 6 0 9 2 2 11 22 25 29 32 0 6 0 7 2 2 4 The minimum distance at which the built in Speedlight can be used is 0 6m 2 In P and modes the...

Page 111: ...5 50mm f 4 Ai 25 50mm f 4 and Ai S 35 70mm f 3 5 can be used at 35mm at a range of 1 0m 3 3 or above Ai 50 300mm f 4 5 Ai modified 50 300mm f 4 5 Ai S ED 50 300mm f 4 5 and Ai modified 85 250mm f 4 use at 135mm and above Ai ED 50 300mm f 4 5 use at 105mm and above Ai S ED and Ai ED 200mm f 2 can not be used Lens Zoom position Minimum range 20mm AF S DX ED 12 24mm f 4G 2 5m 8 2 24mm 1 0m 3 3 20mm 2...

Page 112: ...essing the button rotate the sub com mand dial and confirm flash exposure com pensation in the control panel or viewfinder Flash exposure compensation can be set to values between 3EV darker and 1EV brighter in increments of 1 3 EV At values other than 0 a icon will be displayed in the control panel and viewfinder after you release the button The current value for flash exposure compensation can b...

Page 113: ...ash level This ensures that flash output is appropriate to the subject even when the subject is not positioned in the center of the frame Flash output is adjusted automatically for any changes in sensitivity ISO equivalency or aperture To use FV lock 1Select FV Lock for Custom Setting 15 AE L AF L 147 4After confirming that the flash ready indicator is displayed in the viewfinder press the AE L AF...

Page 114: ...viewfinder Using FV Lock with the Built in Speedlight FV lock is only available with the built in Speedlight when TTL the default setting is selected for Custom Setting 19 Flash mode 150 Using FV Lock with Optional Speedlights FV lock is also available with SB 800 and SB 600 Speedlights available separately Set the Speedlight to TTL mode the SB 800 can also be used in AA mode see the Speed light m...

Page 115: ...us is in effect be sure not to block the lens when activating the self timer In single servo autofocus 139 photographs can only be taken if the in focus indicator appears in the viewfinder Cover the Viewfinder To ensure correct exposure in modes other than M cover the viewfinder eyepiece with your hand or with the supplied DK 5 eyepiece cap before pressing the shutter release button This will prev...

Page 116: ... timer will be cancelled if the built in Speedlight is raised before the picture is taken To start the timer after raising the Speedlight wait until the flash ready indicator is displayed in the viewfinder and then press the shutter release button The self timer can be cancelled by selecting another shooting mode Turning the camera off cancels the self timer and restores the shooting mode in ef fe...

Page 117: ...ss of power while the shutter is open Note that if the shutter is open for more than approximately 1s at any setting noise in the form of randomly spaced brightly colored pixels may appear in the final photograph Using the Built in Speedlight In situations in which the flash is required the camera will only respond to the shutter release button on the ML L3 once the flash has charged In and modes ...

Page 118: ...oexposure operation The DK 5 can be attached by removing the viewfinder eyepiece cup and slid ing the DK 5 down to cover the viewfinder eyepiece To use the remote control 1Mount the camera on a tripod recommended or place the camera on a stable level surface 2Press the button and rotate main com mand dial until delayed remote or quick response remote is displayed in the control panel 1 Beep 138 Th...

Page 119: ...rformed for the time selected for Custom Setting 25 Remote 154 The default setting is one minute AF S Single servo AF AF C Continuous servo AF Shutter is released immediately after camera focuses Self timer lamp will flash when shooting is complete If unable to focus camera will return to standby without releasing shutter Quick response remote Camera releases shutter immedi ately without focusing ...

Page 120: ...atch the battery holder remove the holder as shown in 2Remove the battery from the battery holder 3Insert a fresh battery with the face marked on top 4Slide the battery holder into the remote until the latch clicks into place Keep out of Reach of Children Care should be taken to prevent infants from putting the battery or other small parts in their mouths Should a child swallow the battery consult...

Page 121: ...Single frame Focus area Center Metering Matrix Flexible program Off AE hold Off Option Default Flash compensation Off FV lock Off LCD illuminator Off Shooting mode is not reset in self timer and remote modes Not reset when Closest subjct is selected for Custom Setting 3 AF area mode Custom Setting 15 AE L AF L is unaffected The following shooting menu options will also be reset Option Default ISO ...

Page 122: ...112 ...

Page 123: ...113 This section details the operations that can be performed during playback including thumbnail playback playback zoom and photo information display More About Playback Playback Options ...

Page 124: ...tion selected for Rotate tall 7 Image Review 144 Photographs will not be displayed in the monitor during recording if Off is selected for Custom Setting 7 Image review 22 Monitor Off 153 The monitor will turn off automatically to save power if no operations are performed for the time specified in Custom Setting 22 Monitor off Single Image Playback Photographs are displayed in the monitor during re...

Page 125: ...nt photograph 120 Delete photograph Press button to delete current photograph 122 Confirmation dialog will be displayed press again to delete photo or press any other button to exit without deleting photo Protect remove protection from photograph Images marked by icon can not be deleted using button or Delete option in playback menu note that protected images will be deleted when memory card is fo...

Page 126: ...ity 41 1 Protect status 121 2 Frame number total number of images 126 3 Camera name 4 Date of recording 16 5 Time of recording 16 6 Metering 75 7 Shutter speed 76 8 Aperture 76 9 Exposure mode 76 Exposure compensation 86 10 Focal length 185 11 Flash control 94 Shooting Data Page 2 1 Protect status 121 2 Frame number total number of images 126 3 Image optimization 56 4 Sensitivity ISO equivalency 4...

Page 127: ...ess with dark tones to the left and bright tones to the right The vertical axis shows the num ber of pixels of each brightness in the image Highlights 1 Protect status 121 2 Image highlights brightest areas of image are marked by a flashing border 3 Frame number total number of images 126 Histograms Camera histograms are for use only as a guide and may differ from those displayed in imaging applic...

Page 128: ...ss button for enlarged view of highlighted photo graph 120 Delete photograph Press button to delete highlighted photograph 122 Confirmation dialog will be displayed press again to delete photo or press any other button to exit without deleting photo Protect remove protection from photograph Images marked by icon can not be deleted using button or Delete option in playback menu note that protected ...

Page 129: ...e used at any time when the monitor is on The focus selector lock switch only takes effect when the monitor is off 22 Monitor Off 153 The monitor will turn off automatically to save power if no operations are performed for the time specified in Custom Setting 22 Monitor off ...

Page 130: ...in bottom right corner of monitor shows area that will be displayed when button is released Keeping button pressed rotate main command dial to change size of area selected or use multi se lector to move frame in navigation window to another location Selected area will be displayed in monitor when button is released Cancel resume zoom Press to cancel zoom and return to single image or thumbnail pla...

Page 131: ...DOS read only status when viewed on a Windows computer Note that protected images will be deleted when the memory card is formatted To protect a photograph 1Display the image in full frame playback or highlight it in the thumbnail list 2Press the button The photograph will be marked with a icon To remove protection from the photograph so that it can be deleted display the photograph in full frame ...

Page 132: ...ghlight it in the thumbnail list 2Press the button A confirmation dialog will be displayed 3To delete the photograph press the button again Press any other button to exit without deleting the photograph Protected and Hidden Images Images marked with a icon are protected and can not be deleted Hidden images are not displayed in single image or thumbnail playback and can not be selected for deletion...

Page 133: ...ry cards and for play ing pictures back in automated slide shows The Shooting Menu The shooting menu contains advanced shooting options such as image optimization and noise reduction Custom Settings The CSM Custom Settings menu controls fine details of camera operation The Setup Menu This menu is used for basic camera setup includ ing formatting memory cards and setting the time and date Menu Guid...

Page 134: ...the right to make a selection High Capacity Memory Cards If the memory card contains a large number of files or folders and the number of pic tures to be deleted is very large deletion can sometimes take more than half an hour Protected and Hidden Images Images marked with a icon are protected and can not be deleted Hidden images 129 are not displayed in the thumbnail list and can not be selected ...

Page 135: ...ed image Selected image marked by icon 2 Highlight image 1 Deleting All Photographs All Choosing All displays the confirmation dialog shown at right Press the multi selector up or down to highlight an option then press the button to make a selection Yes delete all images in the folder or folders selected in the Playback fldr menu 126 Pictures that are protect ed or hidden will not be deleted No ex...

Page 136: ...nform to Design Rule for Camera File System DCF all Nikon digital cameras and most other makes of digital camera will be visible during playback Rotate Tall To choose whether photographs taken in tall portrait orientation are automatically rotated for display in the monitor highlight Rotate tall in the playback menu 124 and press the multi selector to the right Press the multi selector up or down ...

Page 137: ... be played back in the order recorded with a pause between each image Hidden photographs 129 will not be played back The following operations can be performed during a slide show To Press To Description Go forward or back one frame Press multi selector up to return to previous frame down to skip to next frame View photo info Press multi selector left or right to change photo info displayed during ...

Page 138: ...ngth of time each picture is displayed To exit the slide show and return to the playback menu press the multi se lector to the left or press the button Changing the Display Interval Frame Intvl Selecting Frame intvl from the Slide show menu or the pause menu displays the menu shown at right To change the length of time each image is displayed press the multi selector up or down to highlight the ap...

Page 139: ...lete operation and return to playback menu Repeat steps 1 and 2 to select additional pictures To deselect picture highlight and press center of multi selector To exit without changing hidden status of pictures press button 3 4 Select highlighted image Selected image marked by icon 2 File Attributes for Hidden Images Hidden images have hidden and read only status when viewed on a Windows computer I...

Page 140: ...here is not enough space on the memory card to store the print order Delete some pictures and try again Taking Pictures for Direct Printing When taking photographs to be printed without modification choose Direct Print for Optimize image 56 or select Custom and set Color mode to Ia sRGB or IIIa sRGB After Creating a Print Order After creating a print order do not change the hidden status of images...

Page 141: ...es in print order highlight Imprint date and press multi selector to right will appear next to item To deselect checked item highlight and press multi selector to right To complete print order and return to playback menu highlight Done and press multi selector to right To exit without altering print order press button 1 2 Press multi selector up to select high lighted image and set number of print...

Page 142: ... 46 47 Optimize Image When the mode dial is set to P S A or M pho tographs are enhanced according to the option selected in the Optimize image menu See Tak ing Photographs Optimizing Images for details 56 Using the Multi Selector The multi selector can be used at any time when the monitor is on The focus selector lock switch only takes effect when the monitor is off Available only when mode dial i...

Page 143: ... The maximum number of shots that can be stored in the memory buffer when noise reduction is on is as follows Option Description Off default Noise reduction off camera functions normally On Noise reduction takes effect at shutter speeds of about 1s or slower Time required to process im ages more than doubles if this option is selected in continuous shooting mode 62 frame rate will drop to under 3f...

Page 144: ...rom L 3008 2000 M 2240 1488 and S 1504 1000 See Tak ing Photographs Image Quality and Size 43 for more information White Bal This option is only available when the mode dial is rotated to P S A or M For more information see Taking Photographs White Balance 48 ISO Sensitivity ISO equivalency can be raised above the default setting of ISO 200 equivalent See Taking Photographs Sensitivity ISO Equival...

Page 145: ...enu reset 136 137 R Beep 138 01 Autofocus 139 02 AF area mode 140 03 AF assist 141 04 Option ISO auto 142 143 05 No CF Card 143 06 Image review 144 07 Grid display 144 08 EV step 144 09 Option Exp comp 145 10 Center wtd 145 11 BKT set 146 12 BKT Order 146 13 Command dial 147 14 Option AF area illm 149 18 Flash mode 150 151 19 Flash sign 152 20 Shutter spd 152 21 Monitor off 153 22 AE L AF L 147 15...

Page 146: ...ttings are not reset when a two button reset is performed 111 Custom Setting R Menu Reset To restore Custom Settings to default values highlight Menu reset in the CSM menu 135 and press the multi selector to the right Press the multi selector up or down to highlight an option then press to the right to make a selection Option Description No default Exit menu leaving settings unchanged Reset Restor...

Page 147: ...e review On 07 Grid display Off 08 EV step 1 3 Step 09 Exp comp Off 10 Center wtd 얒 8mm 11 BKT set AE flash 12 BKT Order MTR Under Over 13 Command dial No 14 AF area illm Auto 18 Flash mode TTL 19 Flash sign On 20 Shutter spd 1 60 21 Monitor off 20s 22 AE L AF L AE AF Lock 15 AE Lock AE L button 16 Focus area No wrap 17 Meter off 6s 23 Self timer 10s 24 Remote 1min 25 Default for mode is AF C Defa...

Page 148: ...tion then press to the right to make a selection Option Description On default Speaker on displayed in control panel Beep sounds while release timer is running self timer and delayed remote modes when photo is taken in quick response remote mode or when camera has focused in single servo AF focus mode selector set to AF and AF S selected for Custom Setting 2 Off Speaker off beep does not sound dis...

Page 149: ...ocus indicator appears in viewfinder photographs can only be taken when camera is in focus AF S displayed in control panel when focus mode se lector is set to AF AF C Continuous servo AF 64 Camera focuses continuously while shutter release button is pressed halfway photographs can be taken even when camera is not in focus AF C displayed in control panel when focus mode selector is set to AF Defaul...

Page 150: ...latively static compositions with subjects that will stay in selected focus area Also recommended with telephoto lenses or when subject is poorly lit Single area1 2 User selects focus area manually 66 but camera uses information from multiple focus areas to determine focus If subject leaves se lected focus area even briefly camera will focus based on information from other focus areas focus area s...

Page 151: ...lit highlight AF assist in the CSM menu 135 and press the multi selector to the right Press the multi selector up or down to highlight an option then press to the right to make a selection Option Description On default AF assist illuminator lights when conditions are appropriate 72 AF as sist illuminator does not light when mode dial is set to or Off AF assist illuminator off ...

Page 152: ...e is more likely at high sensitivities When mode dial is set to P A or camera au tomatically adjusts sensitivity when shutter speed needed to obtain opti mum exposure would be faster than 1 8000 s or slower than value specified for P A DVP mode 143 shutter speed may drop below specified value if optimal exposure can not be achieved at ISO 1600 equivalent When mode dial is set to S camera automatic...

Page 153: ...s the camera will automatically raise sensitivity when the shutter speed needed to obtain optimum exposure would be slower than the selected value Custom Setting 6 No CF Card To choose whether the shutter can be released when no memory card is inserted in the camera highlight No CF Card in the CSM menu 135 and press the multi selector to the right Press the multi selector up or down to highlight a...

Page 154: ...ce when composing pho tographs taking landscape shots or shifting or tilting a PC Nikkor lens To turn the grid line display on or off highlight Grid display in the CSM menu 135 and press the multi selector to the right Press the multi selector up or down to highlight an option then press to the right to make a selection To display the grid select On The default setting is Off no grid displayed Cus...

Page 155: ...mpensation set by pressing button and rotating main command dial Custom Setting 14 Yes Sub command dial Main command dial Sub command dial Main command dial Sub command dial Sub command dial No Mode S A P This option has no effect in M and modes Custom Setting 11 Center Wtd When calculating exposure center weighted metering available in P S A and M modes 75 assigns the greatest weight to a circle ...

Page 156: ...eting Camera performs white balance bracketing Flash only Camera performs flash level bracketing only White Balance Bracketing White balance bracketing is not available at image qualities of NEF Raw or NEF JPEG Basic Custom Setting 13 BKT Order This option controls the order in which bracket ing is performed Highlight BKT Order in the detailed CSM menu 135 and press the multi selector to the right...

Page 157: ...ighlight AE L AF L in the detailed CSM menu 135 and press the multi selector to the right Press the multi selector up or down to high light an option then press to the right to make a selection Option Description FV Lock Flash level locks when AE L AF L button is pressed and remains locked until button is pressed again or exposure meters turn off 103 AE Lock hold Exposure locks when AE L AF L butt...

Page 158: ...r down to highlight an option then press to the right to make a selection Option Description No wrap default Wrap around disabled Wrap Wrap around enabled Custom Setting 16 AE Lock This option controls whether exposure locks while the shutter release button is pressed halfway Highlight AE Lock in the detailed CSM menu 135 and press the multi selector to the right Press the multi selector up or dow...

Page 159: ... right Press the multi selector up or down to highlight an option then press to the right to make a selec tion Option Description Off Selected focus area is not highlighted Auto default Selected focus area is automatically highlighted as needed to provided contrast with background On Selected focus area is always highlighted regardless of brightness of back ground Depending on brightness of backgr...

Page 160: ...ower built in Speedlight has GN m ft of 17 56 ISO 200 or 12 39 ISO 100 icons blink in control panel and viewfinder No monitor preflash is emitted allowing built in Speedlight to function as master flash for optional slave flash units Commander mode Choose this option to allow camera to con trol flash level when one or more SB 800 or SB 600 Speedlights are used for wireless flash photography in P S...

Page 161: ... strong reflections from the optional Speedlights do not enter the camera lens in TTL mode or the photocell on the optional Speedlight AA mode as this may interfere with exposure To prevent the timing flashes emitted by the built in Speedlight from appear ing in photographs taken at short ranges use a low sensitivity and small aperture large f number and choose a flash sync mode other than rear cu...

Page 162: ... not flicker when built in Speedlight is required On default indicator flickers to warn that built in Speedlight is required P S A and M modes only indicator not displayed when built in Speedlight is raised or optional Speedlight is attached Custom Setting 21 Shutter Spd This option determines the slowest shutter speed possible when using a flash with the mode dial set to P or A Options range from...

Page 163: ...e detailed CSM menu 135 and press the multi selector to the right Press the multi selector up or down to highlight an option then press to the right to make a selection Choose a shorter me ter off delay for longer battery life Custom Setting 24 Self Timer This option controls the length of the shutter release delay in self timer mode Shutter release can be delayed by approximately 2s 5s 10s the de...

Page 164: ...mote modes 1minute the default option 5 minutes 10 min utes or 15 minutes If no signal is received in the specified period or the camera is turned off the camera will revert to single frame or continuous mode whichever was last in effect Highlight Remote in the detailed CSM menu 135 and press the multi selector to the right Press the multi selector up or down to highlight an op tion then press to ...

Page 165: ...r can be used at any time when the monitor is on The focus selector lock switch only takes effect when the monitor is off Option Folders 156 158 File No Seq 159 Format 160 CSM menu 161 Date 161 LCD brightness 161 Mirror lock up 162 Video mode 162 Language 163 Image comment 163 164 USB 165 Dust ref photo 166 167 Firmware Ver 167 Image rotation 168 ...

Page 166: ...t im ages will be stored highlight Select folder in the Folders menu and press the multi selector to the right Press the multi selector up or down to highlight a folder then press to the right to select the folder and return to the setup menu The se lected folder will also be used for playback when Current is selected in the Playback fldr menu 126 The folder currently selected is listed first foll...

Page 167: ...eleted 2Press the button to create the folder and return to the setup menu Until another folder is selected all subsequent photographs will be stored in the new folder The folder will also be used for playback when Cur rent is selected in the Playback fldr menu 126 Folder Names On the memory card folder names are preceded by a three digit folder number as signed automatically by the camera e g 100...

Page 168: ...ging the folder name press the button 3Press the button to rename the folder and return to the setup menu Delete To delete any folders on the memory card that contain no photographs highlight Delete in the Folders menu and press the multi selector to the right The dialog shown at right will be displayed press the multi selector up or down to highlight an option then press to the right to select No...

Page 169: ...r new memory card inserted in camera file numbering continues from last number used If photograph is taken when current folder contains photograph numbered 9999 new folder will be created automatically and file numbering will be gin again from 0001 Off default File numbering reset to 0001 when new folder is created memory card is formatted or new memory card is inserted in camera Reset As for On e...

Page 170: ...mory cards permanently deletes all data they contain including hidden and protected pictures and any other data that may be on the card Before formatting be sure to transfer to a computer any pictures you would like to keep FAT 32 The D70S supports FAT 32 allowing use of memory cards with capacities of over 2GB FAT 16 is used when reformatting cards already formatted in FAT 16 Two Button Format Me...

Page 171: ... 7 Image review 8 Grid display R Menu reset 1 Beep 2 Autofocus Date To set the camera clock to the current date and time highlight Date in the setup menu 155 and press the multi selector to the right See First Steps Basic Setup Step 4 for details 16 The Date menu is displayed automatically the first time the camera is turned on LCD Brightness To adjust monitor brightness highlight LCD brightness i...

Page 172: ...own position when camera is turned off To ensure power is available to lower mirror Nikon recommends using this option only when camera is powered by EH 5 AC adapter Video Mode Before connecting the camera to a video device such as a television or VCR 170 choose a video mode setting that matches the video stan dard used in the device Highlight Video mode in the setup menu 155 and press the multi s...

Page 173: ...ureProject or Nikon Capture 4 version 4 2 or later Highlight Image comment in the setup menu 155 and press the multi selector to the right Press the multi selector up or down to highlight an option then press to the right to make a selection Option Description Done Save comment and return to setup menu Input comment Edit comment Attach comment Attach comment to all new photographs Input Comment To...

Page 174: ...ter the thirty sixth will be deleted After editing the comment press the button to return to the image com ment menu Attach Comment To add the comment to all subsequent photographs highlight Attach com ment in the input comment menu and press the multi selector to the right A will appear in the box next to Attach comment highlight Done and press the multi selector to the right to return to the set...

Page 175: ...py pic tures to the computer choose an option accord ing to the computer operating system as shown below Windows XP Home Edition Windows XP Professional Choose PTP or Mass Storage Mac OS X Windows 2000 Professional Windows Millennium Edition Me Windows 98 Second Edition SE Choose Mass Storage The default setting for USB is Mass Storage To change the USB setting highlight USB in the setup menu 155 ...

Page 176: ... in Nikon Capture 4 version 4 2 or later available separately for more infor mation on Image Dust Off see the Nikon Capture 4 User s Manual To acquire Image Dust Off reference data 1Attach a CPU lens Dust ref photo is only available when a CPU lens is mounted on the camera We recommend using a lens with a focal length of at least 50mm If using a zoom lens zoom in to the maximum telephoto position ...

Page 177: ...ded to record the data The monitor turns off when the shutter release but ton is pressed If the reference object is too bright or too dark the camera may be unable to acquire Image Dust Off reference data and the mes sage shown at right will be displayed Choose another reference object and repeat the pro cess from Step 3 Firmware Ver To display the current camera firmware version highlight Firmwar...

Page 178: ... is not recorded Nikon Capture 4 version 4 2 or later and PictureProject display all photographs in landscape wide orientation and camera rotation icon in Nikon Capture 4 Camera Control shows camera in horizontal landscape orientation Choose this option when taking photographs with lens pointing up or lens pointing down Camera records whether shots are in landscape wide orientation por trait tall ...

Page 179: ...talled the camera can be connected to a computer and photographs copied to disk for editing viewing printing or long term storage Television Playback Read this section for information on connecting the camera to a television or VCR Connecting to a Computer This section describes how to connect the camera to a computer Connections Connecting to External Devices ...

Page 180: ...rop when images are output on a PAL device The supplied EG D100 video cable can be used to connect the D70S to a television or VCR for playback or recording 1Turn the camera off The EG D100 Turn the camera off before connecting or dis connecting the EG D100 2Open the cover protecting the video out and DC in connectors 3Connect the EG D100 as shown Connect to camera Connect to video device 4Tune th...

Page 181: ...he manuals and reviewing the system requirements To ensure that data transfer is not interrupted be sure the camera battery is fully charged If in doubt charge the battery before use or use an EH 5 AC adapter available separately Before connecting the camera set the USB option in the setup menu 165 according to the com puter operating system and whether the camera is being controlled using Nikon C...

Page 182: ...b or key board Windows 2000 Professional Windows Millennium Edition Me Windows 98 Second Edition SE Do NOT select PTP when using PictureProject under one of the above operating sys tems If the camera has been connected to a computer running one of the above operating systems with PTP selected the Windows hardware wizard will be displayed Click Cancel to exit the wizard and then disconnect the came...

Page 183: ...ctureProject For more information see the PictureProject Reference Manual on CD If the Nikon Capture 4 Camera Control compo nent is running the control panel and view finder will show in place of the number of exposures remaining Any photographs taken will be recorded to the computer hard disk rather than the camera memory card See the Nikon Capture 4 User s Manual for more information 4Turn the c...

Page 184: ...Edition Windows XP Professional Click the Safely Remove Hardware icon in the taskbar and select Safely remove USB Mass Storage Device from the menu that appears Windows 2000 Professional Click the Unplug or Eject Hardware icon in the taskbar and select Stop USB Mass Storage Device from the menu that appears Windows Millennium Edition Me Click the Unplug or Eject Hardware icon in the taskbar and se...

Page 185: ...175 When the camera is connected to a PictBridge compatible printer photographs can be printed directly from the camera Printing Photographs Connecting to a PictBridge Printer ...

Page 186: ...ore use or use an EH 5 AC adapter avail able separately 1Set the USB option in the setup menu 165 to PTP photographs can not be printed at the default setting of Mass Storage 2Turn the printer on 3Turn the camera off 4Connect the UC E4 USB cable as shown below Connect the camera directly to the printer do not connect the cable via a USB hub Taking Pictures for Direct Printing When taking photograp...

Page 187: ...printer 3 5 x5 5 x7 Hagaki 100mmx150mm 4 x6 8 x10 Letter A3 or A4 then press to right to select Imprint date Check to print date of recording on each picture No border Check to print pictures without white border if supported some printers will ignore this option 7To select photographs for printing or create an index print of all JPEG images on the memory card highlight Print in the PictBridge men...

Page 188: ... selector to right do not select for Page size when creating index prints Photos in current folder will be displayed with JPEG images marked by icon Press to begin printing To interrupt print ing and exit to PictBridge menu press button again Highlight Choose folder 1 Display list of folders 2 Highlight folder 3 Return to print menu 4 To display photos in all folders highlight All To make selectio...

Page 189: ...nting is complete 8 Press multi selector up to select photo and set number of prints to 1 Selected photos are marked by icon Press multi selector up or down to specify number of prints up to 99 If printer supports cropping photo can be cropped for printing by pressing button Dialog shown at right will be displayed rotate main command dial to zoom in or out and use multi selector to scroll to other...

Page 190: ... as described on page 131 To exit to PictBridge menu without printing press button Data Imprint Imprint Date Selecting Print DPOF resets the Data imprint and Imprint date options for the current print order 131 To print the date of recording on photographs select Imprint date in the PictBridge Setup menu 177 Error Messages If the dialog shown at right is displayed an error has occurred After check...

Page 191: ...ies Lists the lenses and other accessories available for the D70S Caring for Your Camera Provides information on storage and mainte nance Troubleshooting Lists the error messages displayed by your camera and how to deal with them Specifications Principal specifications for the D70S Technical Notes Camera Care Options and Resources ...

Page 192: ...r built in Speedlight Auto pop up for built in Speedlight Flash exposure compensation1 Custom Setting 2 Autofocus1 5 Custom Setting 3 AF area mode1 5 Custom Setting 4 AF assist Custom Setting 5 ISO auto Custom Setting 19 Flash mode 1 Setting last in effect is restored next time P S A or M mode is selected 2 If self timer delayed remote or quick response remote mode is selected when cam era is turn...

Page 193: ...tering and flash control systems do not work properly when shifting and or tilting the lens or when an aperture other than the maximum aperture is used 5 Electronic range finder can not be used with shifting or tilting 6 Compatible with AF I Nikkor lenses and with all AF S lenses except DX 12 24mm f 4G ED 17 35mm f 2 8D DX 17 55mm f 2 8G DX ED 18 70mm f3 5 4 5G ED 24 85mm f 3 5 4 5G VR ED 24 120mm...

Page 194: ...old type 1000mm f 6 3 Reflex old type 1000mm f 11 Reflex serial numbers 142361 143000 2000mm f 11 Reflex serial numbers 200111 200310 Compatible Non CPU Lenses Non CPU lenses not included in the list above can be used but only in mode M Aper ture must be adjusted manually using the lens aperture ring and the camera exposure meter depth of field preview and i TTL flash control can not be used If an...

Page 195: ...6mm As a result the picture angle of photographs taken with the D70S differs from the picture angle for 35 mm cameras even when the focal length of the lens and the distance to the subject are the same Picture Angle and Focal Length A 35 mm camera has a diagonal picture angle approximately one and a half times that of the D70S When calculating the focal length of lenses for the D70S in 35 mm forma...

Page 196: ...nel can be used for angles of 14mm and 17mm An illuminator is included to assist in adjusting settings in the dark and custom settings are available for fine tun ing all aspects of flash operation SB 600 This high performance Speedlight has a Guide Number of 42 138 m ft 35 mm zoom head position ISO 200 20 C 68 F GN at ISO 100 is 30 98 and accepts four AA batteries see the SB 600 manual for details...

Page 197: ...ital SLR is used 3 Use Speedlight controls to select flash mode 4 Available only with non CPU lenses 5 Adjusted automatically according to camera aperture setting when CPU lens is used When non CPU lens is used must be adjusted manually to match aperture selected with lens aperture ring 6 Available with CPU AF lenses only IX Nikkor lenses excluded The Accessory Shoe The D70S is equipped with an ac...

Page 198: ...Front curtain sync and red eye reduction If off or auto front curtain sync is selected when an optional Speedlight is attached the flash sync mode selection will change to front curtain sync Auto with red eye reduction becomes red eye reduction and modes Front curtain sync is selected automatically Red eye reduction can also be selected mode Slow sync slow sync with red eye reduction and front cur...

Page 199: ...al Speedlight With other Speedlights AF assist illumination is performed using the AF assist illuminator on the camera 72 Auto power zoom is available only with SB 800 and SB 600 Speedlights In P and modes the maximum aperture minimum f number is limited according to sensitivity ISO equivalency as shown below For each one step increase in sensitivity e g from 200 to 400 aperture is stopped down by...

Page 200: ...l of four batteries and comes with a twelve volt cable for connection to a cigarette lighter socket Viewfinder eyepiece accessories Diopter AdjustmentViewfinder Lenses To accommodate individual dif ferences in vision viewfinder lenses are available with diopters of 5 4 3 2 0 0 5 1 2 and 3m 1 Diopter adjustment lenses can be inserted simply by sliding them over the viewfinder eyepiece note that the...

Page 201: ...matrix metering may not produce the desired results when used with filters with an exposure factor filter factor over 1 Y44 Y48 Y52 O56 R60 X0 X1 C PL ND2S ND4S ND4 ND8S ND8 ND400 A2 A12 B2 B8 B12 We recommend center weighted metering For details see the manual provided with the filter Body caps BF 1A Body Cap The BF 1A keeps the mirror viewfinder screen and low pass filter free of dust when no le...

Page 202: ...ot guaranteed with other makes of card For more details on the above cards please contact the manufacturer Memory Cards Memory cards may be hot after use Observe due caution when removing memory cards from the camera Format memory cards before first use Turn the power off before inserting or removing memory cards Do not remove memory cards from the camera turn the camera off or remove or disconnec...

Page 203: ...uth The Control Panel Rarely static electricity may cause the control panel to brighten or darken This does not indicate a malfunction the display will shortly return to normal Lens mirror and viewfinder These elements are made of glass and are easily damaged Remove dust and lint with a blower If using an aerosol blower keep the can vertical to prevent the discharge of liquid To remove fingerprint...

Page 204: ...ow 1Remove the lens and turn the camera on 2Press the button and select Mirror lock up from the setup menu 162 Highlight Yes and press the multi selector to the right The message Press shutter release button will be displayed in the camera monitor and a row of dashes will be displayed in the control panel and viewfinder 4Holding the camera so that light falls on the low pass filter examine the fil...

Page 205: ...o circumstances should you touch or wipe the filter 3Turn the camera off The mirror will return to the down position and the shutter curtain will close Replace the lens or body cap Servicing the Camera and Accessories The D70S is a precision device and requires regular servicing Nikon recommends that the camera be inspected by the original retailer or Nikon service representative once every one to...

Page 206: ... the CCD either by choosing a slow shutter speed and small aperture or by using an ND filter Do not touch the shutter curtain The shutter curtain is extremely thin and easily damaged Under no circumstances should you exert pressure on the curtain poke it with cleaning tools or subject it to powerful air currents from a blower These actions could scratch deform or tear the curtain Handle all moving...

Page 207: ...e liquid crystal from the monitor touching the skin or entering the eyes or mouth Replace the monitor cover when transporting the camera or leaving it unattended Turn the product off before removing or dis connecting the power source Do not unplug the product or remove the battery while the product is on or while images are being recorded or deleted Forc ibly cutting power to the product in these ...

Page 208: ...ed blinks blinks Replace battery 74 Camera unable to focus using autofocus blinks Focus manually 46 191 79 81 Subject too bright photo will be overexposed If sensitivity ISO equivalency is over 200 lower sensitivity Use ND filter In mode S Increase shutter speed A Choose a smaller aperture larger f number 46 94 79 81 Subject too dark photo will be underexposed If sensitivity ISO equivalency is und...

Page 209: ...ease shutter If error per sists or appears frequently consult with Nikon authorized service representative Problem 41 124 20 Memory insufficient to record further photos at current set tings or camera has run out of file or folder numbers blinks blinks Reduce quality or size Delete photographs Insert new memory card Indicator Solution 20 Camera cannot detect memory card NO CARD PRESENT Turn camera...

Page 210: ... of any data not recorded to the memory card at the time the problem occurred Data already recorded to the card will not be affected Indicator Control panel Solution Problem Monitor 20 126 Memory card contains no images Current folder is empty FOLDER CONTAINS NO IMAGES Insert another card Set Playback fldr to All 126 129 All photos in current folder are hidden ALL IMAGES HIDDEN Set Playback fldr t...

Page 211: ...does not func tion electronic range finder can be used if maximum aper ture is f 5 6 or faster Picture angle Equivalent in 35 mm format is approximately 1 5 times lens focal length Viewfinder Diopter adjustment 1 6 0 5m 1 Focusing screen Type B BriteView clear matte screen Mark V with superim posed focus brackets and On Demand grid lines Eyepoint 18mm 1 0m 1 Frame coverage Approximately 95 of lens...

Page 212: ...rame centered on ac tive focus area Range ISO 100 equivalent f 1 4 lens 20 C 68 F 0 20EV 3D color matrix or center weighted metering 2 20EV spot metering Exposure meter coupling CPU coupling Exposure control Operating mode Digital Vari Program auto portrait landscape close up sports night landscape night portrait programmed auto P with flexible program shutter priority auto S aperture priority aut...

Page 213: ...slow sync with red eye reduction Flash ready indicator Lights when SB series Speedlight such as 800 600 80DX 28DX 50DX 28 27 or 22s is fully charged blinks for 3s after flash is fired at full output Flash control TTL TTL flash control by 1 005 pixel RGB sensor CPU lenses only Built in Speedlight i TTL balanced fill flash for digital SLR or standard i TTL flash for digital SLR spot metering or mode...

Page 214: ...wise stated all figures are for a camera with a fully charged battery operating at an ambient temperature of 20 C 68 F Nikon reserves the right to change the specifications of the hardware and software described this manual at any time and without prior notice Nikon will not be held liable for damages that may result from any mistakes that this manual may contain Self timer Electronically controll...

Page 215: ...ed off Example 2 500 shots AF S DX 18 70mm f 3 5 4 5G IF ED lens single frame shooting mode single servo autofocus image quality set to JPEG Normal image size set to L shutter speed 50 s shutter release pressed halfway for five seconds and focus cycled from infinity to min imum range once with each shot built in Speedlight fired at full power with every other shot AF assist illuminator lights when...

Page 216: ...s Lighting 187 AF See focus mode auto focus AF area mode 140 AF assist illuminator 72 Aperture 76 83 auto mode 32 Auto meter off 12 Autoexposure lock 84 Autofocus 64 139 AF C 139 AF S 139 B Backlight control panel 7 BASIC See Shooting menu Image quality Battery 14 15 CR2 14 EN EL3a 14 inserting 14 15 life 205 storage 196 197 BKT See bracketing Blur reducing 80 Bracketing 87 93 See also Exposure br...

Page 217: ...ompatible 183 184 CPU 183 184 non CPU 183 184 type G or D 183 184 Long time exposures 82 83 Low pass filter 194 195 M M See Shooting menu Image size manual focus mode Manual focus 74 Mass storage 165 Memory buffer 62 63 Memory card 20 21 approved 192 capacity of 45 formatting 21 Metering 75 Microdrive See memory card Mode 10 11 Digital Vari Program 32 34 P S A M 77 83 Monitor 193 auto off 153 cove...

Page 218: ...e Playback menu Slide show Speedlight 94 104 186 189 See also flash built in 94 104 optional 186 189 sRGB See Color mode T Television 170 Time See Setup menu Date Time exposures See Long time exposures Thumbnail playback 118 119 Tone comp 58 Two button reset 111 U USB See Setup menu USB V Vari brite focus areas 8 Video device 162 170 VIDEO OUT 170 Viewfinder 8 9 focus See diopter W White balance 4...

Page 219: ...production in any form of this manual in whole or in part except for brief quotation in critical articles or reviews may be made without written authorization from NIKON CORPORATION SB5B04200101 11 6MBA2811 ...

Reviews: