background image

48

IT

• Notare che è possibile solo la regolazione manuale della messa a fuoco (con l'anello

impostato su 

M

L

affiancata a 

M

) quando l'obiettivo viene montato su macchina

fotografica con regolazione manuale della messa a fuoco o su macchina fotografica con
la regolazione automatica della messa a fuoco impostata in modalità M.

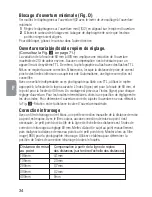
Uso dell'interruttore di limite di messa a fuoco (Fig. B)

In modalità di regolazione manuale della messa a fuoco, a seconda della distanza di scatto,
si può utilizzare questo interruttore per limitare il campo di messa a fuoco e ridurre il
tempo di messa a fuoco. L’interruttore di limite di messa a fuoco non può essere impostato
su una posizione compresa all’incirca tra 3,5 m e 5 m.

Modalità di riduzione delle vibrazioni (Fig. C)

Sono utilizzabili le seguenti macchine fotografiche:
• Macchine SLR di 35 mm: F5, F100, Serie F80, Serie F75, Serie F65
• Fotocamere digitali: D2H, serie D1

D100

Quando si utilizza l'obiettivo con macchine fotografiche diverse da quelle elencate sopra,
impostare l'interruttore della modalità di riduzione delle vibrazioni su OFF in modo da
disattivare la modalità di riduzione delle vibrazioni.
Con la macchina fotografica Pronea 600i, in particolare, la pila si scarica rapidamente se
questo interruttore viene lasciato in posizione ON (attivazione).

Impostazione dell'interruttore della modalità di riduzione delle vibrazioni

• Nella Modalità 1 e nella Modalità 2, dopo avere premuto leggermente il tasto di scatto

attendere almeno un secondo prima di premerlo a fondo. Nella Modalità 1 si consiglia di fare
scattare l’otturatore solamente dopo che l’immagine presente nel mirino ha smesso di vibrare. 

• Il meccanismo di riduzione delle vibrazioni riduce il tremolio della macchina fotografica.

Tuttavia, se la si sposta di scatto, le vibrazioni nella direzione in cui viene mossa potrebbero
permanere inalterate. Per esempio, se si usa la macchina per panoramica in orizzontale,
vengono ridotte solo le vibrazioni in direzione verticale, e ciò semplifica lo scatto di
panoramiche.

Posizione

Distanza di scatto

LIMIT

Approx. da 2,3 m a 3,5 m, circa
o approx. da 5 m all'infinito

FULL

Approx. da 2,3 m all'infinito

La vibrazione risulta ridotta al momento del rilascio del tasto di scatto e anche
mentre questo si trova premuto a metà. Siccome le vibrazioni sono ridotte nel
mirino, risultano semplificate sia la regolazione manuale/automatica della messa a
fuoco che l'esatta inquadratura del soggetto.

Le vibrazioni vengono ridotte solo nell'istante in cui il tasto di scatto viene
rilasciato. In questa modalità, le vibrazioni dell'immagine nel mirino non vengono
ridotte fintanto che il tasto di scatto si trova leggermente premuto.

Le vibrazioni non vengono ridotte.

Modalità 1:

Modalità 2:

Summary of Contents for AF VR Zoom-Nikkor 80-400mm f/4.5-5.6D ED

Page 1: ... Instruction Manual PP 14 21 Bedienungsanleitung S 22 29 Manuel d utilisation P 30 37 Manual de instrucciones PP 38 45 Manuale di istruzioni PP 46 53 P 54 61 P 62 69 AF Zoom Nikkor ED 80 400mm f 4 5 5 6D AF Zoom Nikkor ED 80 400mm f 4 5 5 6D ...

Page 2: ...なる方がいつでも見られる所に必ず保管してくだ さい 表示について 表示と意味は次のようになっています 注意 警告 警 告 分解したり修理 改造をしないこと 感電したり 異常動作をしてケガの原因となります 落下などによって破損し 内部が露出したときは 露出 部に手を触れないこと 感電したり 破損部でケガをする原因となります カメラの電池を抜いて 販売店または当社サービス機関に修理を 依頼してください 接触禁止 すぐに修理依頼を 分解禁止 お守りいただく内容の種類を 次の絵表示で区分し 説明しています 絵表示の例 記号は 注意 警告を含む を促す内容を告げるものです 図の中や近くに具 体的な注意内容 左図の場合は感電注意 が描かれています 記号は 禁止 してはいけないこと の行為を告げるものです 図の中や近く に具体的な禁止内容 左図の場合は分解禁止 が描かれています 記号は 行為を強制するこ...

Page 3: ...たり感電の原因となります 引火 爆発のおそれのある場所では使用しないこと プロパンガス ガソリンなど引火性ガスや粉塵の発生する場所で 使用すると 爆発や火災の原因となります レンズまたはカメラで直接太陽や強い光を見ないこと 失明や視力障害の原因となります 注 意 ぬれた手でさわらないこと 感電の原因になることがあります 製品は幼児の手の届かないところに置くこと ケガの原因になることがあります 使用しないときは レンズにキャップをつけるか太陽光の あたらない所に保管すること 太陽光が焦点を結び 火災の原因になることがあります 三脚にカメラやレンズを取り付けたまま移動しないこと 転倒したりぶつけたりしてケガの原因になることがあります 電池を取る 水かけ禁止 使用禁止 見ないこと 感電注意 放置禁止 移動禁止 保管注意 ...

Page 4: ...4 A C B D ...

Page 5: ...5 F E ...

Page 6: ...までの距離情報をカメラボディ側に伝達する機能を備え 3D測光機 能を持ったカメラとの組み合わせ時には より的確な露出制御を実現 ニコン独自のED 特殊低分散 ガラスによる色収差の補正とともに 良好な ボケ味を再現する円形絞りの採用により優れた光学性能 描写性能を発揮 最短撮影距離2 3mまでの近接撮影が可能 三脚座は 取り外し可能な着脱式三脚座を採用 デジタルカメラとの組み合わせ 各部の名称 1ズーミングリング 2焦点距離目盛基準線 3距離目盛基準線 4距離目盛 5距離リング 6赤外指標 焦点距離80mm時 7フォーカスモード解除ボタン 8フード取り付け指標 9フォーカス制限切り換えスイ ッチ フォーカスモード切り換えリング 焦点距離目盛 三脚座取り付け指標 位置指標 絞り指標 線 着脱指標 絞り指標 最小絞りロックレバー 絞り目盛 ファインダー内直読用絞り目盛 露出計連動ガイ ド CPU...

Page 7: ...があります ファインダー像を確認してから シャッターレリーズしてください ピント合わせの方法 フォーカスモード切り換えリングとフォーカスモード解除ボタン 図A リングを回してA側のL A MまたはM側のLを に合わせます A側のL リングがロックします AF撮影が可能です 解除する場合は 解除ボタンを押しながらリングを回します A リングがクリックス トップします AF撮影が可能です M リングがクリックス トップします MF撮影が可能です M側のL リングがロックします MF撮影が可能です 解除する場合は 解除ボタンを押しながらリングを回します 頻繁にモード切り換えするときは AまたはMのクリックス トップの使用をお すすめします MF マニュアルフォーカス 専用機またはMFモードのときは MF撮影 M またはM側のL のみの使用となります フォーカス制限切り換えスイッチ 図B AFモー...

Page 8: ...ッターレリーズ後にファインダー像がずれることがあります 手ブレ補正中にカメラの電源スイッチをOFFにしないでください 電源スイッチOFFの 状態でレンズを振るとカタカタ音がすることがありますが 故障ではありません カメ ラの電源スイッチを再度ONにすれば 音は消えます 手ブレ補正中にレンズを取り外した時 レンズを振るとカタカタ音がすることがありま すが 故障ではありません 再度 カメラに取り付けシャッターボタンを半押しすれば 音は消えます F80シリーズの内蔵スピードライト充電中には シャッターボタン半押し中の手ブレ補 正は行いません 三脚を使用するときは 手ブレ補正モード切り換えスイッチをOFFにしてください ただし 三脚を使っても雲台を固定しないときや 一脚を使用するときには このスイ ッチをONにすることをおすすめします 乗り物上からの手ブレ補正撮影は 補正効果が少なくなることがあり...

Page 9: ...い数値 を絞り指標に合わせます 次に 最小絞 りロックレバーを絞りリングの方向にスライ ドして2つのオレンジ指標を合わ せます これで絞りリングは最小絞りでロックされます ロックレバーを反対 方向にスライ ドするとロックは解除されます 開放F値の変化と2つの絞り指標 図3参照 71ページ このレンズはズーミングにより 開放F値が最大約2 3段変化します TTL露出計内蔵カメラの場合 カメラが自動補正しますので補正の必要がな く 常に適正な露出が得られます また ニコン製スピードライ トのTTLモー ドによるフラッシュ撮影の場合も 適正な露出が得られます ただし 絞り値 の変化に伴い調光距離も変わりますので 調光距離範囲に被写体が入るよう に 絞り値や撮影距離を調節して撮影してください 外部露出計で測光したり TTLモード以外のフラッシュ撮影を行う場合は 次 のように絞り値を設定してください...

Page 10: ...ないファインダースクリーンを指しています 中央部重点測光時の補正値です 空欄 使用不適当です ただし Mスクリーンの場合 撮影倍率1 1倍以上の近接撮影に用いら れるため この限りではありません 注意 上記以外のカメラでB E K2 B2 E2スクリーンをご使用の場合は それぞれB E K スクリーンの欄をご覧ください ファインダースクリーンとの組み合わせ 赤外指標 赤外フィルムで撮影する場合には ピント合わせを補正する必要があります 距離目盛基準線の左側の金点は 焦点距離80mm時の補正位置指標です まず マニュアルでピン トを合わせ そのときの撮影距離を金点に合わせ直し てから 赤外撮影用フ ィルター R60 を付けて撮影してください その他の焦 点距離での補正位置は 下表を参考にしてください 焦点距離 補正位置の目安 距離目盛窓上の展開長で 105mm 4 1mm 135mm 2 3...

Page 11: ...2 3 レンズを回転し レンズの三脚座取り付け指標を三脚座の任意の位置指標 3 90 ごとに3ヵ所あります に合わせ 三脚座止めネジを締めてロック します ロックしない場合 不用意にレンズが外れることがありますの で ご注意ください 三脚座を取り外す まず 三脚座がスムーズに回転できる状態まで三脚座止めネジを緩めます この ときに止めネジを完全に外すことはしないでください そして レンズの三脚座 取り付け指標を三脚座の に合わせ 引き抜きます フー ドHB 24取り付けの際のご注意 フードを取り付けるときは レンズ先端のフード取り付け指標とフードの指標 白 を合わせフー ド前方より見て右回りにクリックが入るまで回転させ確実に 取り付けます また フードの着脱は フード先端を強く掴みますと困難になりますので フ ードの根本 取り付け部分 付近を持って行ってください 収納時はフードをレ ンズに...

Page 12: ... レンズをケースに入れるときは 必ず レンズキャップを前後に取り付けて ください レンズを長期間使用しないときは カビやサビを防ぐために 高温多湿のと ころを避けて風通しのよい場所に保管してください また 直射日光のあた るところ ナフタリンや樟脳のあるところも避けてください レンズを水に濡らすと 部品がサビつくなどして故障の原因となりますので ご注意ください ス トーブの前など 高温になるところに置かないでください 極端に温度が 高くなると 外観の一部に使用している強化プラスチックが変形することが あります 付属アクセサリー 77mmスプリング式前キャップ 裏ぶた LF 1 バヨネッ トフード HB 24 セミソフ トケース CL M1 別売アクセサリー 77mmねじ込み式フィルター 円偏光フィルターを含む 77mm円偏光フィルター専用フード HN 34 テレコンバーター TC 201S...

Page 13: ...mm 撮影距離情報 カメラボディへの撮影距離情報出力可能 ズーミング ズーミングリングによる回転式 最大撮影倍率 0 04倍 80mm 0 21倍 400mm ピント合わせ 距離リングによる回転式 マニュアルフォーカス可能 手ブレ補正 ボイスコイルモータ VCM によるレンズシフト方式 撮影距離目盛 2 3m 8ft 併記 絞り目盛 4 5 5 6 8 11 16 22 32 ファインダー内直読用目盛併記 絞り方式 自動絞り 最小絞りロックレバーでロック可能 測光方式 CPU AI方式のカメラボディでは開放測光 従来方式の カメラボディでは絞り込み測光 アタッチメントサイズ 77mm P 0 75mm 大きさ 約91mm 最大径 約171mm 長さ バヨネッ ト基準 面からレンズ先端まで 全長約179mm 質量 重さ 約1360g 三脚座取り付け時 約1210g 三脚座なし ...

Page 14: ...ble when this lens is mounted on a Nikon camera having 3D Matrix Metering capability because subject distance information is transferred from the lens to the camera body The use of three ED extra low dispersion lens elements ensures sharp pictures virtually free of color fringing Also by utilizing a 9 blade diaphragm that produces a nearly circular aperture out of focus images in front of or behin...

Page 15: ...wfinder to confirm the composition before releasing the shutter Focusing Focus mode select ring and focus mode release button Fig A Rotate the focus mode select ring to align the mark with A autofocus or M manual focus The Ls on either side of A and M are the locked positions for autofocus or manual focus Setting the ring at the A or M click stop position is recommended if you frequently change fo...

Page 16: ...nfinity Vibration is reduced at the instant the shutter is released and also while the shutter release button is lightly pressed Because vibration is reduced in the viewfinder auto manual focusing and exact framing of the subject are easier Vibration is reduced only at the instant the shutter is released In this mode vibration of the image in the viewfinder is not reduced while the shutter release...

Page 17: ...s 1 and 2 on page 70 In the A autofocus mode first turn the zoom ring until the desired composition is framed in the viewfinder before autofocusing In the M manual focus mode focusing is possible at any focal length but the longer the focal length the larger the image and the shallower the depth of field making focusing easier If your camera has a depth of field preview stop down button or lever d...

Page 18: ...the aperture index line for each aperture setting For zoom settings between 80 and 400mm align the aperture ring between the two indexes to obtain the best overall exposure To determine the correct aperture refer to the chart 3 on page 71 Relationship between focal length and maximum aperture Infrared compensation When shooting black and white infrared film it is necessary to make slight manual co...

Page 19: ...o and for photomicrography it has different applications than other screens When using the B E K2 B2 and E2 focusing screens in cameras other than those listed above refer to the columns for the B E and K screens Taking flash pictures with cameras having built in flash Check the focal length and shooting distance before taking flash pictures to prevent vignetting With F80 Series N80 Series F70 Ser...

Page 20: ...ens and turn the hood clockwise as viewed from the front of the lens until it click stops To facilitate attachment or removal of the hood hold it by its base rather than its outer edge To store the lens hood you can attach it in the reverse position Reproduction ratio and shooting distance Normal focusing extends from infinity to 2 3m 7 5 ft A maximum reproduction ratio of approx 1 25 is obtained ...

Page 21: ...ing 3 ED lens elements Picture angle 30 10 6 10 24 20 5 with IX240 system cameras 20 4 with the Nikon digital SLR cameras D2H D1 Series and D100 Focal length scale 80 105 135 200 300 400mm Distance information Output to camera body Zooming Manually via separate zoom ring Max reproduction ratio 1 25 at 80mm 1 4 8 at 400mm Focusing Autofocus or manual focus via separate focus ring Vibration reductio...

Page 22: ...eil die Aufnahmedistanz vom Objektiv an die Kamera übertragen wird Drei Linsenelemente aus hochwertigem ED Glas extra geringe Dispersion gewährleisten scharfe Abbildungen frei von Farbsaumbildung Neun Blendenlamellen sorgen für eine nahezu kreisrunde Blendenöffnung so daß außerhalb des Schärfenbereichs vor und hinter dem Motiv liegende Elemente in ansprechende Unschärfe getaucht werden Die kürzest...

Page 23: ...e Bildkomposition anhand des Sucherbilds Fokussieren Fokussierbetriebsarten Wählring und Fokussierbegrenzungsschalter Abb A Drehen Sie den Fokussierbetriebsarten Wählring so daß die Marke wunschgemäß mit A Autofokus oder M manuelle Scharfeinstellung ausgerichtet ist Das L seitlich von je A und M kennzeichnet die verriegelten Positionen für die zwei Fokussierbetriebsarten Wenn Sie relativ oft die F...

Page 24: ... Betriebsart 1 sollten Sie erst dann auslösen nachdem sich das Bild im Sucher stabilisiert hat Die VR Funktion reduziert Kameraverwacklung Bei rascher Kamerabewegung in eine Richtung spricht die Funktion jedoch nicht für diese Richtung an Bei horizontalem Mitziehen der Kamera wird daher nur auf senkrechte Unruhe korrigiert so daß Kameraschwenks wesentlich vereinfacht werden Aufgrund der Eigenschaf...

Page 25: ...nnen Im M Modus manueller Fokus ist die Scharfeinstellung bei jeder Brennweite möglich Allerdings gilt je länger die Brennweite desto größer das Bild und desto flacher die Schärfentiefe so daß die Fokussierung vereinfacht wird Verfügt die Kamera über eine Taste oder einen Hebel zur Schärfentiefe Vorschau Abblendung so läßt sich die Schärfentiefe im Kamerasucher verfolgen Zur Ermittlung der Schärfe...

Page 26: ... Extremen verwenden Sie eine Mittelstellung zwischen beiden Blendenindizes Zur Bestimmung der korrekten Blende siehe Abb 3 Zusammenhang zwischen Brennweite und größter Öffnung Infrarotkompensierung Bei Aufnahmen auf Schwarzweiß Infrarotfilm muß die Scharfeinstellung geringfügig von Hand korrigiert werden Farb Infrarotfilm dagegen benötigt keine Fokuskompensierung Der kleine goldfarbene Punkt links...

Page 27: ...ellscheibe M sowohl für Maktrofotografie bis zum Abbildungsmaßstab 1 1 als auch Mikrofotografie eingesetzt werden kann unterscheidet sich ihr Anwendungsbereich von dem anderer Einstellscheiben Bei Verwendung der Scheiben B E K2 B2 bzw E2 in anderen als den obengenannten Kameras gelten die Spalten für die Scheiben B E und K Blitzaufnahmen mit Kameras mit eingebautem Blitz Zur Vermeidung von Vignett...

Page 28: ...HB 24 Fluchten Sie den weißen Index der Gegenlichtblende mit dem Montageindex vorn am Objektiv und drehen Sie die Gegenlichtblende bis zum Einrasten im Uhrzeigersinn mit Blick auf das Objektiv Zum Anbringen und Abnehmen der Gegenlichtblende halten Sie diese an ihrer Basis nicht am Außenrand Zum Verstauen der Gegenlichtblende können Sie diese in Umkehrstellung anbringen Abbildungsmaßstab und Aufnah...

Page 29: ...tion VR Brennweite 80 400 mm Maximale Blendenöffnung f 4 5 5 6 Optischer Aufbau 17 Linsen in 11 Gruppen 3 ED Linsenelemente Bildwinkel 30 10 6 10 24 20 5 mit IX240 Kameras 20 4 mit Nikons digitalen Spiegelreflexkameras D2H Serie D1 und D100 Brennweitenskala 80 105 135 200 300 400 mm Entfernungsdaten Ausgabe an die Kamera Zoomen Manuell über separaten Zoomring Max Abbildungsverhältnis 1 25 bei 80 m...

Page 30: ...lle 3D parce que l information de distance au sujet est transférée de l objectif au boîtier L emploi de trois éléments ED dispersion extra basse assure des images nettes virtuellement exemptes de frangeage couleur Et l emploi d un diaphragme à 9 lames produisant une ouverture quasi circulaire estompe agréablement les images floues à l avant ou à l arrière du sujet La distance de mise au point la p...

Page 31: ...u point et bouton de libération du mode de mise au point Fig A Tournez la bague de sélection de mode de mise au point pour aligner la marque avec A autofocus ou M mise au point manuelle Les L des deux côtés de A et M sont les positions de blocage pour l autofocus ou la mise au point manuelle Le réglage de la bague à la position d arrêt avec déclic A ou M est recommandé si vous changez souvent de m...

Page 32: ...r le déclencheur après la légère sollicitation En mode 1 il est recommandé de libérer le déclencheur après l arrêt de la vibration de l image dans le viseur Le mécanisme de réduction de la vibration réduit le bougé de l appareil Mais si l appareil est déplacé rapidement la vibration dans la direction du mouvement pourra ne pas être affectée Par exemple si vous prenez un panoramique horizontal la v...

Page 33: ...r les appareils qui ont sont équipés Mise au point cadrage au zoom et profondeur de champ Consultez les tableaux 1 et 2 de référence rapide en page 70 En mode A mise au point automatique tournez d abord la bague de zoom jusqu à ce que la composition souhaitée soit cadrée dans le viseur avant la mise au point automatique En mode M mise au point manuelle la mise au point est possible à toutes les fo...

Page 34: ...a focale de la façon suivante L index ligne sert pour la focale de 80 mm et le point pour la focale do 400 mm Un crantage est prévu sur l index ligne pour chaque réglage d ouverture Pour les focales intermédiaires choisir une position de réglage entre les deux index Pour déterminer l ouverture correcte ajustez l ouverture en vous référant à la Fig 3 Relation entre la distance focale et l ouverture...

Page 35: ...ilisé pour la macrophotographie à un rapport d agradissement 1 1 et pour la photomicrographie il a des applications diffèrentes de celles des autres verres Lors de l utilisation de verres B E K2 B2 ou E2 dans des appareils autres que ceux indiqués ci dessus se reporter aux colonnes sur les verres B E et K Prise de vues avec un appareil à flash intégré Vérifiez la focale et la distance de prise de ...

Page 36: ...pare soleil baïonnette HB 24 Alignez l index blanc sur le pare soleil sur l index de montage de pare soleil sur l avant de l objectif et tournez le pare soleil dans le sens horaire vu de l avant de l objectif jusqu au déclic de mise en place Pour faciliter le montage ou le retrait du pare soleil saisissez le par sa base plutôt que par son bord extérieur Pour ranger le pare soleil de l objectif vou...

Page 37: ...ré Focale 80 400 mm Ouverture maximale f 4 5 5 6 Construction optique 17 éléments en 11 groupes 3 éléments ED Champ angulaire 30 10 6 10 24 20 5 avec les appareils de système IX240 20 4 avec les appareils numériques Nikon SLR D2H Série D1 et D100 Echelle de focale 80 105 135 200 300 400 mm Informations sur la distance A l appareil Zooming Manuel avec bague de zoom séparée Rapport de reproduction m...

Page 38: ...icial tridimensional porque la información de distancia del sujeto se transfiere del objetivo a la cámara El uso de tres lentes ED dispersión extra baja en el objetivo garantiza que las imágenes serán más nítidas sin mezcla de colores Además con el uso de un diafragma de 9 hojas que produce una abertura casi circular las imágenes fuera de enfoque delante o detrás del sujeto aparecen más borrosas p...

Page 39: ...botón del obturador Enfoque Aro de selección de modo de enfoque y botón de liberación del modo de enfoque Fig A Gire el aro de selección de modo de enfoque para alinear la marca con A enfoque automático o M enfoque manual El L a ambos lados de A y M están en las posiciones bloqueadas para el enfoque automático o manual Se recomienda mover el aro a la posición de tope A o M si se cambia frecuenteme...

Page 40: ...e presionar a fondo el botón del obturador después de presionar ligeramente el botón del obturador En el modo 1 se recomienda levantar el obturador después de que la imagen en el visor haya dejado de vibrar El mecanismo de reducción de la vibración reduce el movimiento de la cámara Sin embargo si mueve rápidamente la cámara la vibración en el sentido del movimiento puede no verse afectada Por ejem...

Page 41: ...l modo de reducción de vibración no funciona cuando se conecta el botón de inicio de AF AF ON en las cámaras que lo tienen Enfoque zoom y profundidad de campo Consulte los cuadros de referencia rápida 1 y 2 en la página 70 Con el modo A enfoque automática gire primero el anillo del zoom hasta que se obtenga una composición deseada dentro del marco del visor antes de lograr el enfoque automático En...

Page 42: ...a se usa para el ajuste de distancia focal de 80 mm y el punto para el ajuste a 400 mm En el índice de apertura línea hay topes de en cada ajuste apertura Para los ajustes de zoom entre 80 mm y 400 mm alinear el anillo de aperturas entre los dos índices de manera que se obtenga la mejor exposición global Para determinar la abertura correcta ajuste la abertura consultando la figura 3 Relación entre...

Page 43: ...ografía su aplicación es distinta a la de las demás pantallas Cuando se utilicen las pantallas de enfoque B E K2 B2 y E2 en cámaras distintas de las relacionadas arriba ver las columnas correspondientes a las pantallas B E y K Haga fotografías con flash en la cámara que tengan flash incorporado Confirme la distancia focal y distancia de la fotografía antes de hacer fotografías con flash para evita...

Page 44: ...blanco en la visera con el índice de montaje de visera en el lado delantero del objetivo y gire la visera hacia la derecha vista desde el frente del objetivo hasta que se cierre con un chasquido Para facilitar la instalación o desmontaje de la visera sujétela por su base y no por el borde exterior Para guardar la visera del objetivo puede enroscarlo al revés Relación de reproducción y distancia de...

Page 45: ... 400 mm Abertura máxima f 4 5 5 6 Estructura del objetivo 17 lentes en 11 grupos 3 lentes ED Angulo de imagen 30 10 6 10 24 20 5 con las cámaras del sistema IX240 20 4 con las cámaras SLR digitales Nikon D2H de la serie D1 y D100 Escala de distancias focales 80 105 135 200 300 400 mm Información de distancia Salida al cuerpo de la cámara Zoom Manual mediante anillo de zoom independiente Relación d...

Page 46: ...pacità di misurazione a matrice 3D in quanto le informazioni relative a soggetto e distanza vengono trasferite dall obiettivo alla macchina fotografica L uso di tre elementi di obiettivo ED dispersione extra bassa assicura fotografie brillanti virtualmente senza frangiatura Inoltre utilizzando un diaframma a 9 lame che produce un apertura quasi circolare le immagini non a fuoco davanti o dietro il...

Page 47: ...ine prima di scattare la foto Messa a fuoco Anello di selezione della modalità di messa a fuoco e tasto di rilascio modalità di messa a fuoco Fig A Ruotare l anello di selezione della modalità di messa a fuoco per allineare il segno con A messa a fuoco automatica o con M messa a fuoco manuale Le posizioni L di fianco A e M sono le posizioni di blocco per la messa a fuoco automatica o la messa a fu...

Page 48: ...sciato in posizione ON attivazione Impostazione dell interruttore della modalità di riduzione delle vibrazioni Nella Modalità 1 e nella Modalità 2 dopo avere premuto leggermente il tasto di scatto attendere almeno un secondo prima di premerlo a fondo Nella Modalità 1 si consiglia di fare scattare l otturatore solamente dopo che l immagine presente nel mirino ha smesso di vibrare Il meccanismo di r...

Page 49: ...razioni non è operativa quando il tasto di avvio AF AF ON è attivato nelle fotocamere così equipaggiate Rapporto di riproduzione e distanza di ripresa La messa a fuoco normale va dall infinito a 2 3m Il rapporto massimo di riproduzione pari a circa 1 25 è ottenible con impostanzione sui 80 mm mentre un rapporto di riproduzione pari a 1 4 8 è possibile a 400 mm Messa a fuoco zoom e profondità di ca...

Page 50: ...r la focale 80 mm mentre il punto serve per la focale 400 mm I fermi a scatto dei diversi diaframmi sono riferiti all indice linea Per ottenere l esposizione ottimale con le lunghezze focali intermedie tra 80 mm e 400 mm allineate l anello diaframmi in posizione intermedia tra i due indici Per determinare l apertura corretta regolare l apertura facendo riferimento alla Fig 3 Rapporto tra lunghezza...

Page 51: ...o M può essere utilizzato per macrofotografia con rapporto di ingrandimento 1 1 e fotomicrografia esso presenta differenti applicazioni che agli altri schermi Impiegando gli schermi B E K2 B2 ed E2 con fotocamere diverse da quelle elencate sopra fate riferimento alle rispettive colonne delle versioni B E e K Per scattare foto con flash con macchine con flash incorporato Per evitare la riduzione de...

Page 52: ...ll obiettivo quindi ruotare il paraluce in senso orario se lo si guarda dal davanti dell obiettivo finché rimane bloccato con un clic Per agevolare il montaggio e lo smontaggio tenere il paraluce per la base anziché per il bordo esterno Per riporre il paraluce potete fissarlo in posizione inversa Rapporto di riproduzione e distanza di ripresa La messa a fuoco normale va dall infinito a 2 3m Il rap...

Page 53: ...ivo ED Angolo di campo 30 10 6 10 24 20 5 con fotocamere sistema IX240 20 4 con le fotocamere digitali Nikon SLR delle serie D1 D2H e D100 Scala della lunghezza focale 80 105 135 200 300 400 mm Dati distanze Uscita verso il corpo fotocamera Zoom Manuale mediante anello dello zoom separato Rapporto di riproduzione max 1 25 a 80 mm 1 4 8 a 400 mm Messa a fuoco Messa a fuoco automatica e messa a fuoc...

Page 54: ...況分辨出搖鏡拍攝的動作 除了F3AF之外 用尼康所有AF相機機身時都可憑對焦助理作手動 對焦及自動對焦 用對焦模式選擇環很容易選擇A 自動對焦 或M 手動對焦 模式 當此鏡頭裝在有3D矩陣測光能力的尼康相機身上時 還可以進行更精 確的曝光控制 因為這時鏡頭會將主體距離的信息傳送到相機身上 採用三片ED 特低色散 鏡片單元確保影像清晰絕無彩色干涉邊 紋 同時 又利用9葉片光闡使形成一個近乎圓形的光圈開孔 使 焦點前後的景物會形成逐漸模糊的影像 提供最短拍攝距離2 3米 7 5英尺 配備可裝拆的腳架接頭 1 變焦環 2 焦距刻度線 3 距離標線 4 距離刻度 5 對焦環 6 紅外線補償指示 於80mm 7 對焦模式釋放鈕 8 遮光罩安裝標誌 9 對焦限制開關 對焦模式選擇環 焦距刻度 三腳架軛具校準標誌 位置指標 光圈標誌 線 安裝標誌 光圈標誌 最小光圈鎖定桿 光圈刻度 光圈直接讀取刻度 測...

Page 55: ... 相機朝下時 小心別抓圖F中黑色標誌所示的鏡頭端部 因為變焦 環或對焦環一轉動就可能夾痛你的手指 此鏡頭以AF 自動對焦 模式操作時 可能會帶動變焦環略微偏 轉 特別是在低溫及在廣角位置時 因此 請先查看觀景器中的影 像 確定構圖無誤后才好按快門 對焦 對焦模式選擇環和對焦模式釋放鈕 圖A 轉對焦模式選擇環使 標誌對準A 自動對焦 或M 手動對 焦 A和M另一側的L字分別是自動對焦或手動對焦的鎖定位置 A 旁邊的 L 對焦模式選擇環被鎖定 可作自動對焦 想解脫鎖定 只需 按 對焦模式釋放鈕而旋轉對焦模式選擇環就可 A 對焦模式選擇環卡嗒一下停定於此位 可作自動對焦 M 對焦模式選擇環卡嗒一下停定於此位 可作手動對焦 M 旁邊的 L 對焦模式選擇環被鎖定 可作手動對焦 想解脫鎖定 只需 按 對焦模式釋放鈕而旋轉對焦模式選擇環就可 安裝在尼康數字式相機上時 如果您經常改變對焦模式 建議您將對焦...

Page 56: ... 手動對焦及對主體取景構圖都 變得較容易 只在快門起動的瞬間振動被減弱 在此模式下輕按快門鈕時 觀景窗中的影像振動並不減少 振動不減少 位置 拍攝距離 LIMIT 限制 約2 3米 7 5英尺 3 5米 11 5英尺 或 約5米 16 4英尺 無限遠 FULL 全程 約2 3米 7 5英尺 無限遠 開 開 關 使用對焦限制開關 圖B 在自動對焦或手動對焦模式 你可依拍攝距離用此開關來限制對焦 範圍而減少對焦的時間 此對焦限制開關不能設定在大約3 5米 11 5英尺 和5米 16 4英尺 之間的位置 用模式1和模式2時 在輕按快門鈕之後至少要等一秒鐘才可完全按 下快門鈕 用模式1時 最好等觀景窗中的影像停止振動後才完全 按下快門鈕 減振機構可以減弱相機的振動 不過 如果您將相機快速移動 在 移動方向上就沒有減振作用 例如 如果您沿水平方向搖鏡拍攝全 景 就只能減弱垂直方向的振動 使搖鏡拍攝比...

Page 57: ...效果可能會減少 在如此裝備的相机上 開啟AF起動鈕 AF ON 時減振模式不起 作用 聚焦 變焦與景深 請參閱70頁上速查圖表1和2 在A 自動對焦 模式下 首先旋轉變焦鏡 直到取景窗框架內獲得 滿意的構圖 然後再自動聚焦 在M 手控對焦 模式時 對焦可用 於任何焦距 但長焦距 大畫面及淺景深 則更易對焦 如您的相機 上有景深預檢 定格 鈕桿 則可通過相機取景窗來觀察景深 利用 70頁上提供的刻度尺可以定出景深 如何使用景深刻度 1 沿指示線把刻度指示尺剪下 2 把刻度2蓋在刻度1上 並把2上端對準所使用的焦距上 以及 把距離指示對準刻度1上的中央指示線 3 讀取相對使用中光圈的刻度2數字 例如 焦距為105mm 攝影對 象的距離為4m 而光圈為f 22時 則景深範圍大約從3 3米至5 5米 最小光圈鎖定 圖D 請用最小光圈鎖定桿將鏡頭的光圈鎖定在f 32的位置上 1 將鏡頭對準光圈指示 ...

Page 58: ...小金 點 再安裝紅色過濾鏡 R60 拍攝紅外線相片 可用下表 來測定任 何焦距時的紅外線補償指示位置 可變光圈 兩個光圈標誌 請參閱71頁上圖3 鏡頭自80mm到400mm將減小最大光圈大約2 3 f stop 擁有TTL測量功能 的相機將無須調整光圈 同樣 當使用尼康閃光燈進行TTL自動閃光 攝影時 也無調整的必要 但當閃光燈到主體的距離接近自動拍攝 範圍的近限或遠限時 光圈便須作略微的調整 當使用分離曝光表或 在非TTL閃光模式中拍攝照片時 請依據如下設定的焦距選擇適當 的光圈標誌使用 光圈標記 線 用於80mm焦距設定 而圓點用於400mm設定 光圈 標記 線 上的每個光圈設定值都設有停定點 在80mm和400mm之間作 變焦設定時 將光圈環對準該兩標記之間 可獲得最佳的整體曝光量 在決定正確光圈時 可參照圖3焦點距離和最大光圈的相互關係來 調整光圈指數 ...

Page 59: ...接受的聚焦 中心點的聚焦圖象在膠卷上可能略為散焦 在四周的暗淡地方聚焦 是指相機上不帶取景器屏 顯示光圈補償值 僅在中央重點測光時 空白意為不宜使用 因為M型聚焦屏可同時用1 1放大倍率進行宏觀攝影和微縮攝影 因此 不在此限 使用B E K2 B2和E2聚焦屏時 請參閱B E和K的聚焦屏一欄 以有內置閃光燈的相機拍攝閃光照片 拍攝閃光照片之前請先檢查焦距長度及拍攝距離以避免產生暈影 以F80系列 N80系列 F70系列 N70 F65系列 N65系列 F60系列 N60 Pronea 600i 6i 適用於任何焦距長度 以F50系列 N50 F 601系列 N6006 F 601M N6000 F 401x N5005 F 401s N4004s F 401 N4004 適用於任何焦距長度 不過在80mm時 拍攝距離必須為4 0米 13 1英尺 以上 Pronea S 適用於135mm或更...

Page 60: ...設定下 最大成像比是1 25 而在400mm的設定下 成像比則是1 4 8 使用腳架 圖E 此鏡頭配備一個可裝拆的旋轉式腳架接頭 使用腳架時 應該將腳 架裝到此鏡頭的腳架接頭上 而不是裝在相機機身上 想將腳架接 頭裝到鏡頭上時可按下列步驟進行 1略微擰鬆腳架接頭鎖緊螺絲1 2將鏡頭上的腳架接頭對準指標對正腳架接頭2上的 標誌而插入 鏡頭 3使鏡頭上的腳架接頭對準指標對正 將鏡頭轉至腳架接頭上適當的 位置指標3 每90 有三個指標 然後擰緊螺絲 螺絲如果不 擰緊 鏡頭隨時都可能從腳架接頭上脫落 拆除腳架接頭 首先擰松腳架接頭鎖緊螺絲 直至腳架接頭可自由旋轉為止 不要 將鎖緊螺絲擰得太多以免脫出 然后使鏡頭上的腳架接頭校準標志 對正腳架接頭上的 標記 就可將腳架接頭抽脫 裝上卡口式鏡頭罩HB 24 將鏡頭罩上的白色標記與鏡頭前面的鏡頭罩安裝標記對齊 然後順 時針 從鏡頭的前面看時 旋轉鏡頭罩 ...

Page 61: ...0mm 刻 度 數 據 在相機上 變 焦 手控用獨立變焦環 最大重現比率 1 25 於80mm 1 4 8 於400mm 對焦方式 通過分開的對焦環進行自動或手動對焦 減振作用 利用音圈馬達 VCMs 鏡頭偏移法 拍攝距離刻度 刻度自2 3m 8ft 至無限遠 光 圈 刻 度 f 4 5 f 32 標準型和光圈直接讀取刻度 最小光圈鎖定 配備 光 闌 全自動 曝 光 測 量 AI相機或連接CPU的系列相機 採用全光圈方式 其他相機則 採用縮小光圈的方式 安 裝 尺 寸 77mm P 0 75mm 尺 寸 直徑約91mm 從相機鏡頭安裝凸緣起的長度約為171mm 總 長度約為179mm 重 量 約1360g 48盎斯 帶三腳架 約1210g 42 7盎斯 僅鏡頭 附件 77mm按扣式前鏡蓋鏡 鏡蓋LF 1鏡 卡口座HB 24鏡 半軟殼套CL M1 當鏡頭準備長時間不用時 一定要保存在涼爽乾燥...

Page 62: ...分辨出搖鏡拍攝的動作 除了F3AF之外 用尼康所有AF相機機身時都可憑對焦助理作手 動對焦及自動對焦 用對焦模式選擇環很容易選擇A 自動對焦 或M 手動對焦 模 式 當此鏡頭裝在有3D矩陣測光能力的尼康相機身上時 還可以進行更精 確的曝光控制 因為這時鏡頭會將主體距離的信息傳送到相機身上 採用三片ED 特低色散 鏡片單元確保影像清晰絕無彩色干涉邊 紋 同時 又利用9葉片光闡使形成一個近乎圓形的光圈開孔 使 焦點前後的景物會形成逐漸模糊的影像 提供最短拍攝距離2 3米 7 5英尺 配備可裝拆的腳架接頭 1 變焦環 2 焦距刻度標線 3 距離標線 4 距離刻度 5 對焦環 6 紅外線補償指示 於80mm 7 對焦模式釋放鈕 8 遮光罩安裝標誌 9 對焦限制開關 對焦模式選擇環 焦距刻度 三腳架軛具校準標誌 位置指標 光圈標誌 線 安裝標誌 光圈標誌 最小光圈鎖定桿 光圈刻度 光圈直接讀取刻度 ...

Page 63: ...用 相機朝下時 小心別抓圖F中黑色標誌所示的鏡頭端部 因為變焦 環或對焦環一轉動就可能夾痛你的手指 此鏡頭以AF 自動對焦 模式操作時 可能會帶動變焦環略微偏 轉 特別是在低溫及在廣角位置時 因此 請先查看觀景器中的影 像 確定構圖無誤後才好按快門 對焦 對焦模式選擇環和對焦模式釋放鈕 圖A 轉對焦模式選擇環使 標誌對準A 自動對焦 或M 手動對 焦 A和M另一側的L字分別是自動對焦或手動對焦的鎖定位置 A 旁邊的 L 對焦模式選擇環被鎖定 可作自動對焦 想解脫鎖定 只需 按著對焦模式釋放鈕而旋轉對焦模式選擇環就可 A 對焦模式選擇環卡嗒一下停定於此位 可作自動對焦 M 對焦模式選擇環卡嗒一下停定於此位 可作手動對焦 M 旁邊的 L 對焦模式選擇環被鎖定 可作手動對焦 想解脫鎖定 只需 按著對焦模式釋放鈕而旋轉對焦模式選擇環就可 安裝在尼康數字式相機上時 如果您經常改變對焦模式 建議您將對...

Page 64: ...動 手動對焦及對主體取景構圖都 變得較容易 只在快門起動的瞬間振動被減弱 在此模式下輕按快門鈕時 觀景窗中的影像振動並不減少 振動不減少 位置 拍攝距離 LIMIT 限制 約2 3米 7 5英尺 3 5米 11 5英尺 或 約5米 16 4英尺 無限遠 FULL 全程 約2 3米 7 5英尺 無限遠 使用對焦限制開關 圖B 在自動對焦或手動對焦模式 你可依拍攝距離用此開關來限制對焦 範圍而減少對焦的時間 此對焦限制開關不能設定在大約3 5米 11 5英尺 和5米 16 4英尺 之間的位置 用模式1和模式2時 在輕按快門鈕之後至少要等一秒鐘才可完全 按下快門鈕 用模式1時 最好等觀景窗中的影像停止振動後才完 全按下快門鈕 減振機構可以減弱相機的振動 不過 如果您將相機快速移動 在 移動方向上就沒有減振作用 例如 如果您沿水平方向搖鏡拍攝全 景 就只能減弱垂直方向的振動 使搖鏡拍攝比較平順 快...

Page 65: ...效果可能會減少 在如此裝備的相機上 開啟AF起動鈕 AF ON 時減振模式不起 作用 聚焦 變焦與景深 請參閱70頁上速查圖表1和2 在A 自動對焦 模式下 首先旋轉變焦鏡 直到取景窗框架內獲得 滿意的構圖 然後再自動聚焦 在M 手控對焦 模式時 對焦可用 於任何焦距 但長焦距 大畫面及淺景深 則更易對焦 如您的相機 上有景深預檢 定格 鈕桿 則可通過相機取景窗來觀察景深 利用 70頁上提供的刻度尺可以定出景深 如何使用景深刻度 1 沿指示線把刻度指示尺剪下 2 把刻度2蓋在刻度1上 並把2上端對準所使用的焦距上 以及 把距離指示對準刻度1上的中央指示線 3 讀取相對使用中光圈的刻度2數字 例如 焦距為105mm 攝影 對象的距離為4m 而光圈為f 22時 則景深範圍大約從3 3米至 5 5米 最小光圈鎖定 圖D 請用最小光圈鎖定桿將鏡頭的光圈鎖定在f 32的位置上 1 將鏡頭對準光圈指示...

Page 66: ...金 點 再安裝紅色過濾鏡 R60 拍攝紅外線相片 可用下表 來測定任 何焦距時的紅外線補償指示位置 可變光圈 兩個光圈標誌 請參閱71頁上圖3 鏡頭自80mm到400mm將減小最大光圈大約2 3 f stop 擁有TTL測量 功能的相機將無須調整光圈 同樣 當使用尼康閃光燈進行TTL自動 閃光攝影時 也無調整的必要 但當閃光燈到主體的距離接近自動 拍攝範圍的近限或遠限時 光圈便須作略微的調整 當使用分離曝光 表或在非TTL閃光模式中拍攝照片時 請依據如下設定的焦距選擇 適當的光圈標誌使用 光圈標記 線 用於80mm焦距設定 而圓點用於400mm設定 光 圈標記 線 上的每個光圈設定值都設有停定點 在80mm和 400mm之間作變焦設定時 將光圈環對準該兩標記之間 可獲得最 佳的整體曝光量 在決定正確光圈時 可參照圖3焦點距離和最大光圈的相互關係來調 整光圈指數 ...

Page 67: ...接受的聚焦 中心點的聚焦圖象在膠卷上可能略為散焦 在四周的暗淡地方聚焦 是指相機上不帶取景器屏 顯示光圈補償值 僅在中央重點測光時 空白意為不宜使用 因為M型聚焦屏可同時用1 1放大倍率進行宏觀攝影和微縮攝影 因 此 不在此限 使用B E K2 B2和E2聚焦屏時 請參閱B E和K的聚焦屏一欄 以有內置閃光燈的相機拍攝閃光照片 拍攝閃光照片之前請先檢查焦距長度及拍攝距離以避免產生暈影 以F80系列 N80系列 F70系列 N70 F65系列 N65系列 F60系列 N60 Pronea 600i 6i 適用於任何焦距長度 以F50系列 N50 F 601系列 N6006 F 601M N6000 F 401x N5005 F 401s N4004s F 401 N4004 適用於任何焦距長度 不過在80mm時 拍攝距離必須為4 0米 13 1英尺 以上 Pronea S 適用於135mm或...

Page 68: ...設定下 最大成像比是1 25 而在400mm的設定下 成像比則是1 4 8 使用腳架 圖E 此鏡頭配備一個可裝拆的旋轉式腳架接頭 使用腳架時 應該將腳 架裝到此鏡頭的腳架接頭上 而不是裝在相機機身上 想將腳架接 頭裝到鏡頭上時可按下列步驟進行 1略微擰鬆腳架接頭鎖緊螺絲1 2將鏡頭上的腳架接頭對準指標對正腳架接頭2上的 標誌而插入 鏡頭 3使鏡頭上的腳架接頭對準指標對正 將鏡頭轉至腳架接頭上適當的 位置指標3 每90 有三個指標 然後擰緊螺絲 螺絲如果不 擰緊 鏡頭隨時都可能從腳架接頭上脫落 拆除腳架接頭 首先擰松腳架接頭鎖緊螺絲 直至腳架接頭可自由旋轉為止 不要 將鎖緊螺絲擰得太多以免脫出 然後使鏡頭上的腳架接頭校準標誌 對正腳架接頭上的 標記 就可將腳架接頭抽脫 裝上卡口式鏡頭罩HB 24 將鏡頭罩上的白色標記與鏡頭前面的鏡頭罩安裝標記對齊 然後順 時針 從鏡頭的前面看時 旋轉鏡頭罩 ...

Page 69: ...mm 刻 度 數 據 在相機上 變 焦 手控用獨立變焦環 最大重現比率 1 25 於80mm 1 4 8 於400mm 對焦方式 通過分開的對焦環進行自動或手動對焦 減振作用 利用音圈馬達 VCMs 鏡頭偏移法 拍攝距離刻度 刻度自2 3m 8ft 至無限遠 光 圈 刻 度 f 4 5 f 32 標準型和光圈直接讀取刻度 最小光圈鎖定 配備 光 闌 全自動 曝 光 測 量 AI相機或連接CPU的系列相機 採用全光圈方式 其他相 機則採用縮小光圈的方式 安 裝 尺 寸 77mm P 0 75mm 尺 寸 直徑約91mm 從相機鏡頭安裝凸緣起的長度約為 171mm 總長度約為179mm 重 量 約1360g 48盎斯 帶三腳架 約1210g 42 7盎斯 僅鏡頭 附件 77mm按扣式前鏡蓋鏡 鏡蓋LF 1鏡 卡口座HB 24鏡 半軟殼套CL M1 當鏡頭準備長時間不用時 一定要保存在涼爽乾燥的...

Page 70: ...ala profondità di campo 撮影距離目盛 Distance scale Entfernungsskala Échelles des distances Escale de distancias Scala distanze 2を切り離し 1に重ねて使います 2 is used by placing on 1 Zur Anwendung wird 2 auf 1 gelegt Pour l emploi placez 2 sur 1 2 se usa colocándo sobre 1 2 viene usato ponendo su 1 被写界深度早見表 Depth of field quick reference chart Tableau synoptique des profondeurs de champ Schärfentiefentabelle Tabla ...

Page 71: ...n focal length and maximum aperture Zusammenhang zwischen Brennweite und größter Öffnung Relation entre la distance focale et l ouverture maximale Relación entre la distancia focal y la abertura máxima Rapporto tra lunghezza focale e apertura massima 焦点距離 Focal length Brennweite Distance focale Distancia focal Lunghezza focale 105 200 300 4 8 3 ...

Page 72: ...使用説明書の内容が破損などによって判読できなくなったときは 当社サービス機関にて 新しい使用説明書をお求めください 有料 No reproduction in any form of this manual in whole or in part except for brief quotation in critical articles or reviews may be made without written authorization from NIKON CORPORATION Printed in Japan TT3L01400801 K373 80 ...

Reviews: