1
CONTENTS P A G E
Contents Page
1
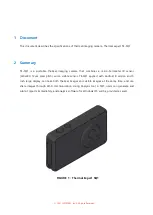
Introduction
2
Safety Instructions
2
Important Safety Precautions
4
Product Specification
5
Box Contents
6
Getting to know your Action Camera
7
Using the Action Camera
9
Action Camera Operation
11
Connection Via TV/HDTV
23
Using the Mounting Accessories
23
Downloading files to your Computer
29
Troubleshooting
36
Summary of Contents for Extreme X1
Page 1: ......
Page 32: ...31 computer 4 Press on Import pictures and videos 5 Welcome menu will appear Press Next...
Page 33: ...32 6 Select the Review organize And group items to import...
Page 34: ...33 7 Press on More options to select the directory where you want your files saved...
Page 35: ...34 8 Press OK 9 Press Import to start transfer image to your computer...