CS-6.3 Ci is going to serve as rear (surround) channels in a home theater system, make sure to install them toward the
“rear” of the room (the opposite side from where the television will likely be). If you wish to get an idea how they will look,
try taping the supplied cutout templates to the ceiling.
Parts List (each speaker):
“Speaker” pack includes:
(1) Bezel with driver
(1) Metal grille
(2) Absorptive foam pads
(1) paint shield - cutout template
“Mounting Bracket” pack includes:
(1) Mounting bracket
(2) Mounting wings
(4) 5 x 50mm flathead screws
Tools Needed:
#2 Philips screwdriver
Pencil
Tape measure
Utility knife or keyhole saw
Level
Wire strippers
Safety goggles
Protective gloves
Tech Tips: Pre-Wiring for New Construction
1.
For best results, avoid running speaker cable near electrical wire, as it may induce a 60Hz hum in the audio signal.
It’s a good idea to run the speaker cable after the electrical wiring has already been completed, so that you can route the
speaker cable at least three feet away from the electrical wiring. If speaker cable and electrical wiring must run parallel,
install the cable within a metal conduit. Note that low-voltage wiring (doorbell, intercom, telephone, security, etc.) are
unlikely to induce hum and can typically be run parallel to speaker cable with no detrimental effects.
2.
When drilling holes through wall studs or ceiling joists, use a drill bit that is at least as wide as the speaker cable that
will be routed through them. Always drill through the center of the stud or joist. If the hole must be drilled within one inch
of the edge of a wall stud, add a nail plate to the drywall side to protect the cable from possible nails and screws put in
the wall later. Line up the holes in the studs or joists as you go, so that pulling the cable through them will be easier.
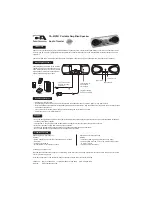
fig.1
fig.2