NexxTech 2513092 Instruction Manual Download Page 9

8


12.  Follow the on-screen instructions to complete the scanner calibration


Attention  • 

If the scanner installation is not started and displayed 


automatically on the screen, click “START”, select “Run” and type  


in  “D:\Install” (where D: is the drive letter assigned to the 


CD-ROM drive of your computer.)


• Alternatively you may also use any plain white sheet of paper  


sized in Letter size (8.5” x 11.69”) instead; however, the calibration  


effect may not be as good as with the special calibration sheet.

Step 3. Testing the Scanner

The following test procedure checks to see if the scanner is properly function-

ing with your computer and the scanning software. Before testing your scanner, 

double check to make sure that all connections are securely.

To properly test your scanner, please perform the following steps: 

1. Do one of the following to open the Button Configuration window:

• Double-click the DocAction icon          in the Windows system tray.

• Right-click the DocAction icon          in the Windows system tray, and then 

  choose Button Configuration… in the pop-up menu that opens.

2. Clicking the Scan icon on the left pane in the Button Configuration window 

    displays its current button settings on the right pane. In the Button 

    Configuration window, choose from the dropdown list of Button Template to 

    select “File Utility”, and keep in mind the default saving folder show in the 

    “Saving folder” dropdown list.

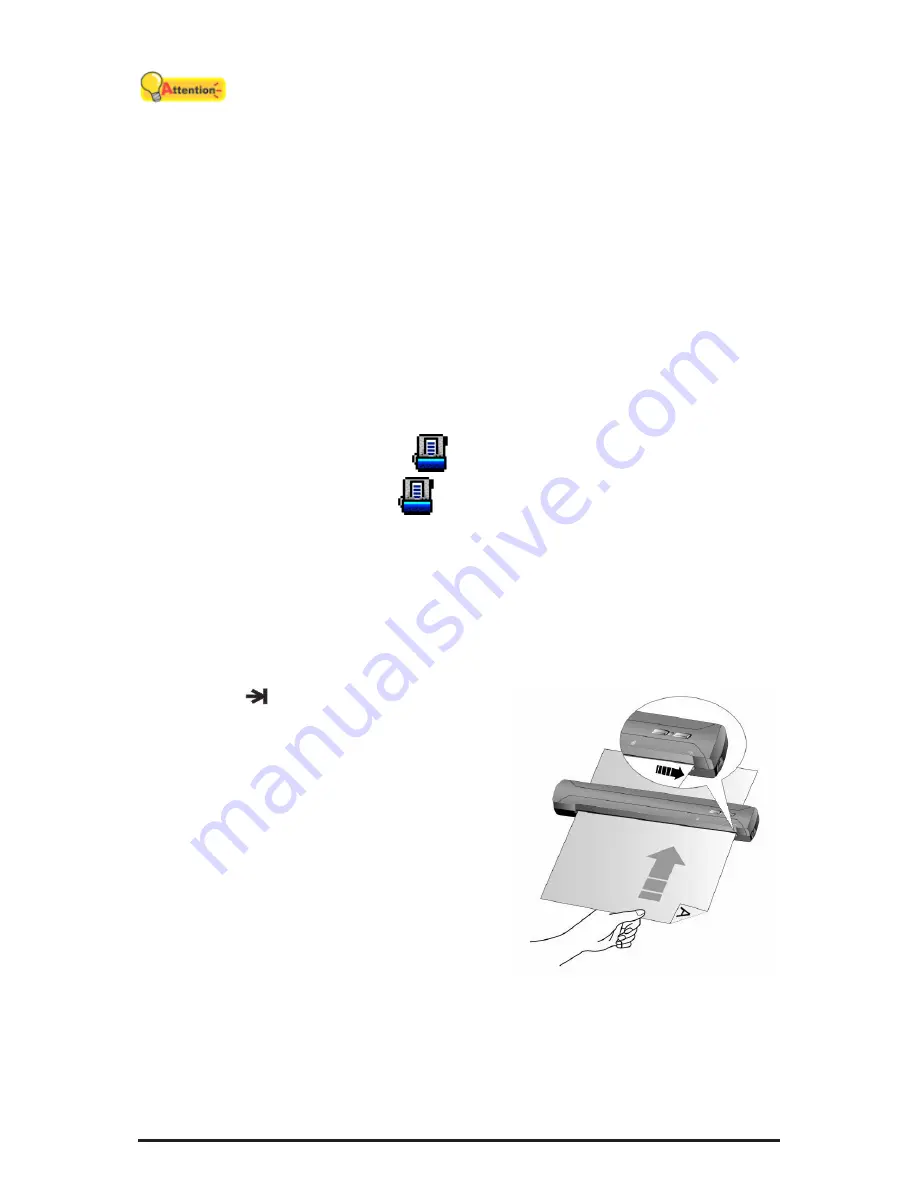
3. Insert the document face down into the scanner. Align the document to the   

    arrow sign


on the right of the scanner.

4. Press the Scan button on the scanner and 

    the scanning starts immediately. After the 

    scanner pulls through the paper, you’ll see 

    a scanned image of the document in the 

    default saving folder; your scanner is 

    working properly. 


Installing Additional Software

Your scanner is TWAIN compliant and 

functions with virtually all available TWAIN 

compatible software. If you purchase 

additional software to be used with your 

scanner, please make sure that it conforms to the TWAIN standard.


Summary of Contents for 2513092

Page 1: ...Portable Colour Scanner 2513092 INSTRUCTION MANUAL...

Page 2: ...allation Requirements 4 Hardware Requirements 4 Installing and Setting up the Scanner 5 Step 1 Connecting the Scanner to Your Computer 5 Step 2 Installing the Software 6 Step 3 Testing the Scanner 8 I...

Page 3: ...s USB ready and has a free USB port Conventions of This Guide Bold Important note or first use of an important term in a chapter XXX Represents commands or contents on your computer screen A Note abou...

Page 4: ...during lightning storms or when unused for long periods of time 13 Refer all servicing to qualified personnel System Requirements PC with Intel Pentium IV 2 0G processor or compatible 256 MB RAM 512 M...

Page 5: ...rovided in the Package Contents section of this guide Software Installation Requirements Your scanner comes with the OCR software ABBYY FineReader Sprint business card recognition software HotCard Biz...

Page 6: ...find one or two rectangular USB ports which usually appear as shown below USB connector s If you don t find such USB ports on your computer then you need to purchase a certified USB interface card to...

Page 7: ...a Click on the Next button when the Add New Hardware Wizard window is displayed b Select Search For The Best Driver For Your Device Recommended and click on the Next button c The next window will ask...

Page 8: ...tton Afterwards please skip to procedure 8 When the Setup Application CD is for one scanner model a Insert the Setup Application CD ROM included with your scanner into your CD ROM drive Click Run inst...

Page 9: ...Action icon in the Windows system tray Right click the DocAction icon in the Windows system tray and then choose Button Configuration in the pop up menu that opens 2 Clicking the Scan icon on the left...

Page 10: ...s in the designated folder If you are not familiar with scanning the Scan Wizard will guide you through each scanning task The DocAction program seamlessly integrating the operation of your scanner wi...

Page 11: ...t to the arrow sign on the right of the scanner 2 Steps 2 to 4 please are the same steps as for Card scanning Scanning Methods There are four different ways to operate the scanner 1 By acquiring image...

Page 12: ...ively use other TWAIN compatible scanning program or image editing application to do your scanning projects Scan within NewSoft Presto PageManager Click the Windows Start button to launch Presto PageM...

Page 13: ...asks Click the Help button within the TWAIN window for more information about the settings Scan within HotCard BizCard Finder 1 Click on the Windows Start button point to All Programs Business card Re...

Page 14: ...he Windows Start button to launch DI Capture 2 Within DI Capture select this scanner from the drop down list of 3 Select a document from the Folder Pane to store the scanned images To create a new fol...

Page 15: ...Configuration window you can find a row of icons running along the left side of the window Each icon corresponds to a single touch button on your scanner s front panel as well as DocAction s on screen...

Page 16: ...per in a safe and clean place when you finish using it Do not use anything other than our cleaning paper to clean your scanner Using other sheet will influence the scan quality or even lead to scanner...

Page 17: ...process is finished the scanner light source will turn itself off and the scanner will enter a lower power mode Using the Wall Mount You may save your desk space and the scanner can be within each rea...

Page 18: ...lick FAQ Scanner Connection The first step to take when troubleshooting connection problems with your scanner is to check all physical connections The icon located on the Windows system tray indicates...

Page 19: ...le 300dpi A4 Scan Method Single pass Scan Modes Color Input 48 bit Output 24 bit Grayscale Input 16 bit Output 8 bit Black and White 1 bit Resolution Optical 600 dpi 1200 dpi software interpolated Sca...

Page 20: ...the equipment off and on the user is encouraged to try to correct the interference by one or more of the following measures Reorient or relocate the receiving antenna Increase the separation between...

Page 21: ...able to a product purchased through The Source company owned stores and dealers and to a product that is presented for repair in a country where The Source offers the product for sale While this warra...

Reviews: