


1080p IP Streaming Encoder/Decoder
Nexxia Audio Solutions 14 www.nexxia.co.uk
important for high-bandwidths of up to 1080p@60Hz resolution, requiring a "HDMI
Premium High Speed" cable.
To assign a different input source to a Decoder (RX), repeat the steps mentioned
above, dragging a different TX over an RX to associate the decoder itself to the new
source device.
5.3.2 Video Recording
To record video by the below steps:
1) Plug a storage device (e.g. U-disk) to the “Storage (Type-A USB)” port of Decoder
(RX).
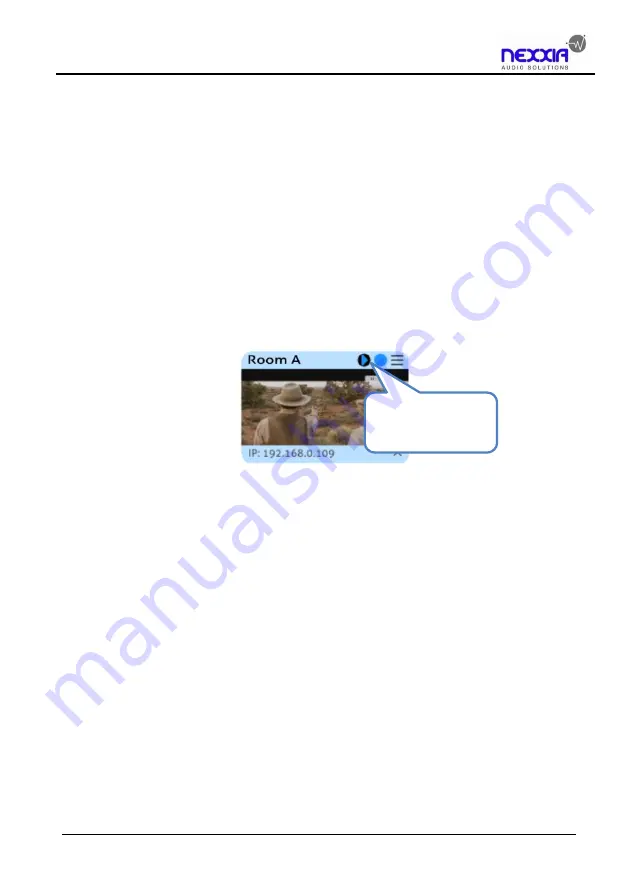
2) Press the “Start/Stop” button on the front panel of Decoder (RX) or left-click the
“Start/Stop” icon on the Decoder (RX) title as below.
3) After starting video recording, the “Recording” LED on the front panel of Decoder
(RX) will illuminate blue.
4) Click the “Start/Stop” icon again to stop video recording, and the “Recording” LED
will go out.
5) Wait at least 1 minute, and then remove the U-disk.
Note:
The recorded video format is MP4, and the video details show that the sound has
only one channel, but the audio output (PCM) of the device is two channels.
The storage device format needs to support exFAT, FAT32 or NTFS.
Click the menu icon of the respective RX tile, and then click "Video File
Management" can enter the interface to manage video recording file.
Start/Stop
Video Recording