background image

27

6 Maintenance and fault finding

6.1 Maintenance

 To clean the instrument, use only mild soap solution and rinse with water.

 Do not use detergents or high pressure washing equipment.

 At least once a year, check all your connections and apply additional

silicon paste at each connection point.

 Always use the instrument cover for protection, when not in use.

 Storing transducers and instruments when not in use for longer periods: It

is advisable to remove the instruments and transducers, and store them
inside  the boat or at home in room temperature, if possible.

6.2 Fault finding

Before you contact your Nexus dealer, and to assist your dealer to give
you a better service, please check the following points and make a list of:

 All connected instrument and transducers, including their software

versions.

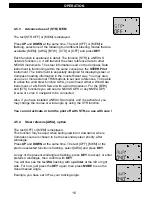
 Nexus Network ID numbers for each instrument (displayed at power up).

6.2.1 General

In most cases, the reason for faults in electronic equipment is to be found
in poor installations. Therefore, always first check that:

 installation and connection is made per instructions for instrument and

transducers, (see 2.1.1).

 screw terminals are carefully tightened.

 no corrosion on any connection points.

 no loose ends in the wires causing short cuts to adjacent wires.

 cables for damage, that no cables are squeezed or worn.

 battery voltage is sufficient, should be at least 10 V DC.

 the fuse is not blown and the circuit-breaker has not opened.

 the fuse is of the right type.

 two instruments do not have the same ID number, (see 3).

 the dampening for course and speed is equally set in all instruments (The

dampening is individually set for each instrument).

Fault - action

1. Compass: No reading [ --- ] or wrong head

Check that setting C71 is

according to your installation.

 Check that the local magnetic variation is properly set C32.

 Make sure the Autodeviation have been carried out. C33

Check for magnetic disturbences.

 Make sure the transducer is aligned correctly, (see C36, 5.3.4).

MAINTENANCE AND FAULT FINDING

Summary of Contents for Compass Data

Page 1: ...0 Installation and Operation Manual ...

Page 2: ...ns regarding installation and operation If the instrument is to be used in a Nexus Network it is preferable to connected the Compass transducer to the Server You must then change the configuration Se chapter 5 Calibration Set up Note in US the Compass Data is named Tactical Data This manual is valid for both This manual is written for the NEXUS Compass Tactical Data instrument version 1 00 Edition...

Page 3: ...WA option 16 4 5 5 Steer referens BTW option 17 4 5 6 Steer referens CTS option 17 4 5 7 Tactical use of MEM 18 4 5 8 Battery voltage BAT 18 4 5 9 Boat speed BSP option 18 4 5 10 Trip log TRP option 19 4 5 11 Water temperature TMP option 19 4 5 12 Dead reckoning CMG DMG 19 4 5 13 X track error XTE Option 19 4 5 14 In a small NEXUS network 19 5 Calibration Set up 21 5 1 C10 User settings 21 5 1 1 C...

Page 4: ...C70 Configure Nexus 25 5 4 1 C71 HDC master 25 5 4 2 C72 Log master 25 5 4 3 C73 Function on terminal In3 25 5 4 4 Connection of trim button 26 5 4 5 C74 Demo mode 26 6 Maintenance and fault finding 27 6 1 Maintenance 27 6 2 Fault finding 27 6 2 1 General 27 6 2 2 Fault action 27 6 2 3 Error messages 28 7 Specifications 29 7 1 Technical specifications 29 7 2 Nexus data bus introduction and user po...

Page 5: ...icon grease 9 1 Connection cover 9 2 4 pol screw terminal 9 Additional items with Compass Data Instrument complete with transducer 1 Compass transducer Nexus 10 4 Mounting screws for Compass 12 Registering of this product Once you have checked that you have all the listed parts please take time to fill in the warranty document and return it to your national distributor By returning the warranty ca...

Page 6: ...5 PART SPCIFICATIONS ...

Page 7: ...le as your boat will allow Plan where to position the transducers the Server and the instruments Think about leaving space for additional instruments in the future A few do nots you should consider Do not cut the cables too short Allow extra cable length at the instrument or at the Server so it can be disconnected for inspection without having to disconnect all attached cables Do not place sealant...

Page 8: ... 1 4 from the 3 isolated wires the 4th wire is an earth screen Attach the 4 cable protectors to the wires using a pair of flat pliers Connect the 4 cable protectors to the 4 pole jack plug as shown Apply silicon paste to all areas as shown Note Must be done to avoid corrosion Apply silicon paste to the instrument connection pins at the back of the instrument Press the jack plug onto the instrument...

Page 9: ...rument 2 1 3 Connections in Nexus Network If you already have a Nexus Network i e a Server it is more practical to connect the transducer to the Server due to the single instrument cable installation Note set C71 OFF see 5 5 1 The instrument is then connected to the Server s Nexus Network terminal pin 5 6 7 and 8 or at any NEXUS instruments terminal Server Transducer INSTALLATION Transducer Black ...

Page 10: ...og a 2200 log or a 220 log you may connect the single log pulse wire from that instrument to the Compass Data instrument terminal 4 If you don t have a log instrument but want to install a log transducer use the connection box Art no 21453 From log transducer NEXUS Star D 20 2200 or 220 3A Fuse INSTALLATION ...

Page 11: ...ts will be addressed by the Remote Control if used The example shows that the instrument version number is 1 00 and the given logical ID number is 16 The ID number will always be 8 if the Compass transducer is connected to this instrument If the instrument is a repeater it may have any number from 16 and up 3 2 Re initialising the instrument If and when two instruments by mistake have the same ID ...

Page 12: ...played e g MEM This manual has been written to be Compatible with Compass Tactical Data instrument from software version 1 0 All functions followed by the text option is not valid in a factory set up instrument See calibration to be able to display these functions Note We have put in a lot of effort in order to make this manual correct and complete However since we continuously make our products b...

Page 13: ... When in editing mode a long press 2sec on MODE will escape from that editing mode 4 2 2 DOWN A press on DOWN moves to the next sub function In edit mode it decreases a digit by one 4 2 3 UP A press on UP moves to the previous sub function In edit mode it increases a digit by one 4 2 4 KEY A press on KEY unlocks a digit to access edit mode When unlocked the digits are active flashes and can be edi...

Page 14: ... and the 4 push buttons The light can be set at 4 different levels To access the light control press and hold MODE for more than 2 seconds The flashing text Lit OFF will be displayed and the display will be lit momentarily To select between the 4 light levels press UP LOW MID MAX and OFF To lock the selected level press KEY The selected light level will be copied to all Nexus instruments connected...

Page 15: ...pass heading to steer reference The LCD arrow will then point at the text STEER instead of HEADING HDC 360 The text HDC 360 means true or magnetic course for the LCD pointer in a 360 scale STR 60 The text STR 60 means that the course deviation is amplified 3 times and displayed in a 60 scale At 360 scale each sector represent 5 and at 60 scale each sector represent 1 2 3 Three sectors in steer mod...

Page 16: ...rse when the LCD pointer is displayed as a vertical line strait up A course deviation is displayed as a filled sector The LCD segments will lit up one by one to form a course deviation sector of max 30 Every new press on KEY will set a new course in MEM 4 5 2 Set a numeric steer reference STR in MEM The text STR OFF or MEM if activated is displayed 1 Press UP and DOWN at the same time The text OFF...

Page 17: ...t or a NEXUS Server with a wind transducer For the BTW and CTS functions you will need a NEXUS GPS or any NMEA GPS Decca or Loran C navigator to be connected Also if you have installed a NEXUS Autopilot and it is activated you may change the course or wind angle by using the STR function You can not activate or turn the pilot off with STR so use with care 4 5 4 Steer referens AWA option The text O...

Page 18: ...ayed This steer function will give Compass course true or magnetic relative bearing to Waypoint It must be used together with a GPS or Decca Loran C navigator connected to the NEXUS network at the Server or at the GPS instrument Press UP and DOWN at the same time The text OFF MEM or the previous selected function is flashing select BTW and press KEY The steer referens BTW is automatically calculat...

Page 19: ... to use the MEM function When you are sailing at a good speed and with the sail trimmed press trim or KEY The Compass Data will then store the present course in memory MEM as a reference If you then have a lifter press TRIM again but if you have a header more then 5º 10º tack After you tack re trim the sails and get a good boat speed before you press trim or KEY again Now you have set a new refere...

Page 20: ...dead reckoning manually by pressing UP and DOWN simultaneously 4 5 13 X track error XTE Option To get this function set NAV On C14 See 5 1 4 The text XTE is displayed shortly when this function is selected then a symbolic boat is displayed on one side of the road which is displayed as three vertical lines Your boat will be displayed on the right or left side of the symbol The distance is also disp...

Page 21: ...e is used to connect all instruments You will have NMEA 0183 in out Depth information will if used be repeated at more than one NEXUS instrument Network bonus function When you are using the race timer on the Multi or Log instrument a graphical countdown timer will pop up the last 60 seconds In this example there is 45 seconds to the start ...

Page 22: ...1 C10 User settings To return to normal mode press KEY when the text rET is displayed 5 1 1 C11 Select the dampening The dampening will effect wind angle wind speed boat speed and VMG Dampening is between d0 0s and d9 1 20 To change the dampening press KEY and change with UP or DOWN and enter with KEY 5 1 2 C13 Displaying boat speed trip log and temperature option When set to OFF the functions wil...

Page 23: ...00 it is OFF Example when KTR is set to 15 and you are knocked i e sailing 15 lower than the reference set course for more than 5 seconds a timer will pop up telling you the elapsed time spent at knocked angle Also read chapter 4 5 3 Tactical use of MEM 5 2 C20 Calibration of Log To return to normal mode press KEY when the text rET is displayed 5 2 1 C21 Select unit for speed Unit for speed knots ...

Page 24: ...etic deviation VAR Set the deviation direction first i e E East or W West then enter the magnetic value in 1 10 of a degree 5 3 3 C33 Autodeviation This function is used to autodeviate your Compass Take the boat into a turn in calm sea when steady press KEY to start The text DEV starts flashing and a LCD sector will show you the course where to end When you have taken the boat through the minimum ...

Page 25: ...ntreline Make sure that the local magnetic variation is entered before you make the alignment adjustment otherwise you are unable to see the difference between local magnetic variation and alignment error The Compass may be installed reversed 180 but never at perpendicular or 90 relative the centreline Press the KEY and adjust ADJ the angle by entering the error If you want to add 5 enter 005 If y...

Page 26: ...d the log and wind transducer This is important because you may optionally install those transducers at the Server instead of the instrument 5 4 1 C71 HDC master On the Compass transducer is connected at the Compass Data instrument OFF the wind transducer is connected at the Nexus Server 5 4 2 C72 Log master On the log transducer is connected at the Compass Data instrument OFF the log transducer i...

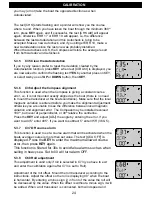
Page 27: ...uch an installation gives you the opportunity to trim both speed and steer with separate buttons 5 4 4 Connection of trim button Connect the trim button as per the drawing The button should make a short connection when pressed It is also possible to connect more than one button in parallel for example one on starboard and one on port side Article number for the push button 19763 5 4 5 C74 Demo mod...

Page 28: ...ost cases the reason for faults in electronic equipment is to be found in poor installations Therefore always first check that installation and connection is made per instructions for instrument and transducers see 2 1 1 screw terminals are carefully tightened no corrosion on any connection points no loose ends in the wires causing short cuts to adjacent wires cables for damage that no cables are ...

Page 29: ... The following messages may appear on the display ERR 2 Nexus Network is missing check colour coded connections ERR 3 No Network data received within a given time ERR 10 Range error caused by incorrectly entered value e g 430 ERR 11 Remote command that can not be performed ERR 17 Too small magnetic variation ERR 18 Busy with Autodeviation ERR 19 Autodeviation check error repeat again If other mess...

Page 30: ...ost important features are the high update rate fast response times very low data latency 25ms and very high data security even at very long distances Another important feature is that Data transfer efficiency will not degrade even when used in large and complex systems It utilises the RS485 standard with up to 32 senders and or receivers to form a Local Area Network Data is transmitted asynchrono...

Page 31: ...r Nexus NMEA 20445 5 Autopilot instrument 21210 Remote Control Nexus remote and instrument 21434 1 Compass Data Nexus Analogue Repeaters 20550 1 Wind 20550 2 Steer Pilot 20550 6 Compass 20550 3 Log 0 16 KTS 20550 4 Log 0 50 KTS 20550 5 Depth 0 200 m 20550 7 Depth 0 600 FT 20550 8 Speed Trim 20550 9 Rudder Angle indicator Nexus Transducers 20700 Log Temp 0 30 KTS retractable 8 m 26 ft cable 20711 2...

Page 32: ...ce PC interface with 1 m 3 3 ft cable Includes a 3 disc with software for Waypoint editing and a data bus manager and NMEA interface 19763 Push button for Tactical and MOB function 21154 High Speed Paddle wheel up to 40 KTS 19038 Internal mounting kit for depth transducer 19216 Bronze through hull fitting 18129 Instrument panel in aluminium for up to 6 Nexus instruments 18500 Through deck connecto...

Page 33: ...etre KTS KnoTS LCD Liquid Crystal Display LOW LOW MAG MAGnitic MAX MAX MH Miles per Hour MID MID MIX Mixture NAV NAVigation NXT NeXT leg RET RETurn SEA SEA dampening SOG Speed Over Ground STA STAtic TMP TeMPerature TRM TRiM TRP TRiP tru True TWA True Wind Angle TWD True Wind Direction TWS True Wind Speed Unt Unit USR USeR VAR VARiation VMG Velocity Made Good WIA WInd Angle WND WiND calibration XTE...

Page 34: ... national distributors or operation outside the environmental parameters specified for the Product The Manufacturer will not compensate for consequential damage caused directly or indirectly by the malfunction of its equipment The Manufacturer is not liable for any personal damage caused as a consequence of using its equipment The Manufacturer its national distributors or dealers are not liable fo...

Page 35: ...OR OWNER Name Street City Zip Code Country Product name Serial number A B C 1 2 3 4 5 6 7 Date of purchase _________________________Date installed ______________________________ Dealers stamp Tick here if you do not wish to receive news about future products WARRANTY ...

Reviews:

Related manuals for Compass Data