background image

ENG

34

MOBILE ENTERTAINMENT

L

VIDEO SETUP

L

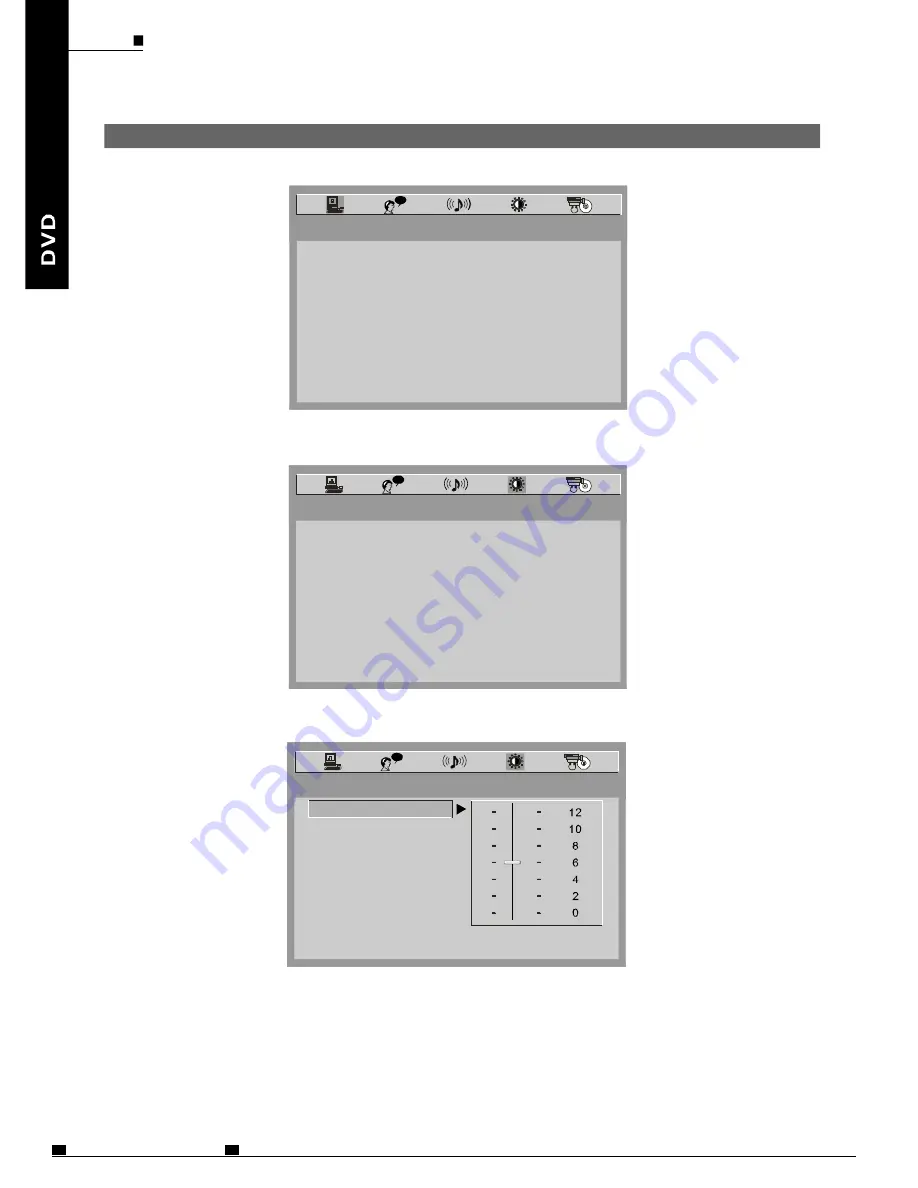
BRIGHTNESS

CONTRAST

HUE

SATURATION

EXIT SETUP

VIDEO SETUP

L

TV SYSTEM

TV TYPE

SCREEN FORMAT

TV SCREEN

PASSWORD

RATING
DEFAULT

EXIT SETUP

SYSTEM SETUP

GENERAL STEPS OF SETUP

BRIGHTNESS

CONTRAST

HUE

SATURATION

EXIT SETUP

1. Press the SETUP button on the remote control, the main setup menu appears.

2. Press the LEFT or RIGHT buttons to highlight the icon of the desired page, then press

the DOWN or UP button to activate that page.

3. Press the DO WN button to highlight the desired option. Press OK or RIGHT to select

the choices of that options appear .

4. Press LEFT/RIGHT/UP/DOWN button to highlight the EXIT SETUP option, then

press OK or SETUP again to exit SETUP MENU.

NOTE:

The pressing of the following buttons will turn off the setup menu, and the choices that
have been changed will be saved at the same time: Subtitle, Title, Return, Stop,
Play / Pause, Step, Next. Prev, Zoom, Program, Repeat, Angle, Mute.

SETUP THE PLAYER

PDF 

文件使用

 "pdfFactory Pro" 

试用版本创建


www.fineprint.cn

Summary of Contents for SDV685-AC

Page 1: ...MODEL NO SDV685 AC OPERATING INSTRUCTIONS ...

Page 2: ...xit from the apparatus 11 Only use attachments accessories specified by the manufacturer 12 Use only with the stand tripod bracket or mount specified by the manufacturer or sold with the apparatus When a cart is used use caution when moving the cart apparatus combination to avoid injury from tip over 13 Unplug this apparatus during lightning storms or when unused for long periods of time 14 Refer ...

Page 3: ...ou if you encounter any operational problem PRECAUTIONS ENG 02 MOBILE ENTERTAINMENT This Digital Video Disc player employs a Laser System To ensure proper use of this product please read this operating instructions manual carefully and retain it for future reference Should the unit require maintenance contact an authorized service location LASER Use of controls adjustments or the performance of pr...

Page 4: ... ENTERTAINMENT 03 PRECAUTIONS CAUTION To reduce the risk of electric shock do not remove cover or back No user serviceable parts inside Refer servicing to qualified service personnel INSTRUCTION DANGEROUS VOLTAGE ...

Page 5: ...er limited playback uses Reverse engineering or disassembly is prohibited Manufactured under license from Dolby Laboratories Dolby and the double D symbol are trademarks of Dolby Laboratories DOLBY This device incorporates copyright protection technology that is protected by DivX Inc DivX DivX Certified and associated logos are trademarks of DivX Inc and used under license Please do not throw elec...

Page 6: ... KEY DESCRIPTION OF REMOTE CONTROL FITTING HEADREST MOUNT CONNECTING THE PLAYER TO A TV SET CONNECTING 12V DC SUPPLY USING THE EARPHONE CONNECTING TO A DOLBY DIGITAL MPEG DECODER OR AN AMPLIFIER WITH BUILT IN DECODER CONNECTING TO A DOLBY DIGTAL AMPLIFIER THAT IS NOT DOLBY DIGITAL MPEG COMPATIBLE CONNECTING TO ACTIVE SPEAKER SYSTEMS AVP CABLE MOVIE SHARE OPERATION TURNING ON THE POWER TURNING OFF ...

Page 7: ... MP3 FORMAT DISC AND JPEG CD PLAYING DivX FILES USING THE USB PORT GENERAL STEPS OF SETUP TV SYSTEM TV TYPE SCREEN FORMAT TV SCREEN PASSWORD RATING DEFAULT OSD LANGUAGE AUDIO LANG SUBTITLE LANG MENU LANG AUDIO OUT IR HEADPHONE FM TRANSMITTER BRIGHTNESS CONTRAST HUE SATURATION SOUND EFFECT DYNAMIC RANGE DivX R VOD SIZE AND PARAMETER BATTERY OPERATION INSTRUCTION TROUBLE SHOOTING SMASHED SCREEN IDEN...

Page 8: ...power cord 4 DO N OT PLACE OBJECTS ON TOP OF THE PLAYER Do not expose this apparatus to rain moisture dipping or splashing and no objects filled with liquids such as vases shall be placed on the apparatus 5 TURN OFF THE POWER WHEN NOT USING THE PLAYER If the player is in use switch the power off We strongly advise against using the player in the front seat whilst driving Most countries and states ...

Page 9: ...When using chemically treated cloths read the cloth s instructions carefully Always unplug the power cord from the power outlet before cleaning the player 7 WHEN USING THE DVD PLAYE R IN A CAR Always switch the engine on before connection power to the DVD player 8 CLEANING THE PLAYER 9 COPYRIGHTS 10 SPECIAL NOTE REGARDING USE ON AEROPLANES Unauthorized duplication broadcast public performance or r...

Page 10: ...audio signals recorded on the disc and the functions that can be used Meaning Mark Indicates the number of audio tracks Indicates the number of angles Indicates the selectable picture aspect ratio Indicates the playable region number 74 minutes CD 8 cm single sided Playback time MPEG 2 format 133 minutes 4 7GB 242 minutes 8 5GB 266 minutes 9 4GB 484 minutes 17GB Types of playable discs and their m...

Page 11: ...applied in two vehicles ENG 10 MOBILE ENTERTAINMENT PACKAGE CONTENTS PACKAGE CONTENTS Operating Manual Two Main Units Two AV Cables After unpacking first check the contents of your DVD player package as listed below AVP Cable Two AC DC Adapters Two Remote Controls Two Car Power Cables Two Headrest mounts Two Earphones Carrying Bag Two Batteries optional ...

Page 12: ...tput video signals to a connected device by setting AV IN OUT mode button on the remote control The included AV cable is connected here 2 USB port Support USB 1 1 use 1 EARPHONE jack For connecting a stereo earphone or an amplifier 3 DC OUT jack 12V 1A DC output for car use only Note this connector is for interconnection to a second NEXTBASE player only No other use intended or damage may result T...

Page 13: ... button to decrease the volume In the menu state press buttons to move the cursor right left Press it to stop playback Press for 3 seconds to turn the unit ON or OFF STOP button Power ON OFF button In the menu state press buttons to move the cursor down up Press it to play When pressing during playback pause mode is set Press again to resume playback In the menu state press PLAY PAUSE to accept a ...

Page 14: ...AND PARTS AND CONTROLS 1 The unit can stand with this device 1 Support 1 Pull out the support to the full extent 2 Lean the player lock to rest upon the support NOTE Do not press down upon the DVD player when using the support or damage will result ...

Page 15: ...ENG 14 MOBILE ENTERTAINMENT PARTS AND CONTROLS REMOTE CONTROL 30 31 32 ...

Page 16: ...y the disc s information 8 PROGRAM Program playing order of tracks Move the cursor up 6 Jump to previous track 13 PREV Move the cursor left 9 12 SEARCH Locate title chapter playtime to play Move the cursor right 11 10 Move the cursor down Jump to next track 15 NEXT 14 16 STOP 17 REV Press this button to stop playback During playing status press it to switch to SLOW mode while switch to STEP mode a...

Page 17: ...hildren and do not dispose of in fire 1 2 3 32 NUMBER KEYS Input number 28 SHIFT 27 ANGL E Press this button to switch between number function Default function Press this button to switch angle 29 MUTE Press this button to mute the player Do not drop or step on the remote control unit or subject it to shocks Note that the remote control unit may not work if there are obstacles between the remote s...

Page 18: ...kpanel groove with the headrest mount until you hear the click sound See diagram below down ENG MOBILE ENTERTAINMENT 17 PARTS AND CONTROLS FITTING HEADREST MOUNT The headrest mount is designed to fit the wide variety of shapes and sizes of headrests in modern cars The foam pad allows you to set the angle of the screen and will eliminate vibration when the car is moving NOTE The headrest is a prima...

Page 19: ...ONNECTIONS CONNECTING THE PLAYER TO A TV SET Yellow Yellow Red White Black US B VID EO IN OUT AUD IO IN OUT CO AXI AL OUT DC IN 12V DC OUT 12V 1A CAR USE ONLY Use the supplied AV cable to connect between the DVD player and your TV set as shown ...

Page 20: ...CTING THE ADAPTER TO THE DC IN 12V SOCKET USING THE EARPHONE CONNECTIONS 1 Set the volume control to minimum sound level 2 Connect the plug of earphone to the player s jack 3 Adjust the volume control to the preferred sound level AT HOME IN CAR NOTE Do not connect to 24V supply or damage will result NOTE Connecting the earphones will result in the disconnection of the internal speaker of the DVD p...

Page 21: ...PLIFIER WITH BUILT IN DECODER Left panel Coaxial cable not included Coaxial IN Front speaker Left Left speaker Right Hint For a compatible decoder or amplifier 5 speakers Front left right center and surround left right and a subwoofer are required to enjoy Dolby Digital channel sound See details of connections to the TV Surround speaker Center speaker Front speaker Right Subwoofer Surround Signal ...

Page 22: ...al audio input jack which is not Dolby Digital MPEG compatible ENG MOBILE ENTERTAINMENT 21 CONNECTING THE PLAYER TO OTHER DEVICES CONNECTING TO A DOLBY DIGTAL AMPLIFIER THAT IS NOT DOLBY DIGITAL MPEG COMPATIBLE Coaxial cable not included Coaxial IN See details of connections to the TV Signal flow Do not play DVDs when the audio settings are not correct Or it may cause strong noise and damage your ...

Page 23: ...E ENTERTAINMENT CONNECTING TO ACTIVE SPEAKER SYSTEMS AV cable To Video Input jack To audio input jacks Active speaker systems Signal flow Left side black yellow yellow USB V ID EO IN O UT AUDI OI N OUT C O AXIAL OUT D C IN12V DC OUT 12V 1A CAR USE ONLY ...

Page 24: ...TE There s no actual difference between master unit and slave DVD players Either of them can be appointed as master unit then the other one acts as slave unit accordingly Master ENG MOBILE ENTERTAINMENT 23 DC IN Black Video Yellow Audio White Bl ck DC OUT a Video Yellow Audio White Slave MOVIE SHARE OPERATION WHEN SHARING THE SAME MOVIE IN CAR 1 Connect the two players with AVP cable first and the...

Page 25: ...th DVD players now show the same movie NOTE 1 There s no actual difference between master unit and slave unit Any of them can be appointed as master unit then the other one acts as slave unit accordingly 2 One AC DC adapter cannot supply enough power for two DVD players simultaneously For home using two adapters are provided Each adapter can only service one DVD player Simply Connect each adapter ...

Page 26: ...hannel B respectively Or interference will occur See diagram below 3 The relevant IR headphones should be switched to the corresponding channels in compliance with the IR channel options of DVD players CHANNE L A B CONNECTION BETWEEN PLAYERS L AUDIO SETUP AUDIO OUT EXIT SETUP FM TRANSMITTER IR HEADPHONE CHANNEL A CHANNEL B OFF NOTE Cordless IR headphones are available from your NEXTBASE distributo...

Page 27: ... the AC DC adapter to socket or connect the cigarette plug to the outlet on your vehicle 3 2 1 Hold on the Power button for 3 secs to turn on the unit Connect the DC output plug of the cable to the DC input jack on the main DVD player Hint The included AC DC adapter is compatible with voltage from 100 V to 240 V you can use it on trips overseas Note that you may need a converter plug Available in ...

Page 28: ...the label Printed side facing upwards For double sided DVDs check each side carefully then place the disc in securely Until a click is heard For CDs or one sided DVDs you do not have to worry about touching the label Printed side of the disc with your fingers Since two sided DVDs have signals recorded on both sides so be careful not to scratch them when removing them from the player Notes 3 Close ...

Page 29: ...ot play push the button 1 Press on the key board or on the remote control while playing 2 The player remembers the stopping place 3 Resume playback from the point where it stopped by pressing the key 4 To clear stopping mark press again at stop status The player will not play from the stopping place when pressing next time 1 Press on the key board or on the remote control during playback 2 Press a...

Page 30: ... repeatedly The REPEAT mode will be changed each time when the repeat button is pressed During fast or slow motion playback the sound is muted expect playing CD MP3 disc To resume normal playback press PLAY PAUSE REPEAT A B 1 Press or button on the key board or on the remote control during playback 2 The playback speed will be changed each time you press the or The speed will be changed to 2X 4X 8...

Page 31: ... number to choose specific time or title chapter or track 4 press OK button to play the specific scene 5 Press SEARCH button to resume normal screen You can select a preferred subtitle from those included on the DVD video disc by pressing SUBTITLE button on the remote control during playback SUBTITLE Press the ANGLE button on the remote control while playing a scene recorded with multiple angles I...

Page 32: ...RAM button on the remote control At this time menu appears as below Selecting an inexistent title or chapter program playback will be canceled automatically The program playback function can automatically play titles chapters or tracks in accordance with the programmed order 4 To exit press the PROGRAM again When the DVD video player is turned off or the discs are removed the programmed items will...

Page 33: ... Choose the desired file and press OK to play Press A B button to get A B REPEAT function Press REPEAT button to switch repeat mode REP1 REP DIR REP ALL REP OFF REP1 means repeating the track REP DIR means repeating the folder REP ALL means repeating the whole disc 1 This DVD video player allows you to view the operational status and disc information on screen s 2 Press OSD button on the remote co...

Page 34: ...To guarantee playback of DivX files the audio must be MP3 format DivX Certified devices can play any interleaved MP3 audio at any bitrate both CBR and VBR The audio must be sampled at standard frequencies such as 32 kHz 44 1 kHz and 48 kHz and must conform to the AVI file specification Apart from MP3 the audio formats recognised by your player are MPEG layer 1 2 AC3 PCM Formats such as AAC and Ogg...

Page 35: ...o highlight the icon of the desired page then press the DOWN or UP button to activate that page 3 Press the DOWN button to highlight the desired option Press OK or RIGHT to select the choices of that options appear 4 Press LEFT RIGHT UP DOWN button to highlight the EXIT SETUP option then press OK or SETUP again to exit SETUP MENU NOTE The pressing of the following buttons will turn off the setup m...

Page 36: ...NTSC Choose this setting if your DVD player is connected to a NTSC TV PAL Choose this setting if your DVD player is connected to a PAL TV The default setting is AUTO L SYSTEM SETUP TV SYSTEM TV SYSTEM TV TYPE SCREEN FORMAT TV SCREEN PASSWORD RATING DEFAULT EXIT SETUP NTSC PAL AUTO The system setup options are illustrated below If you want to connect the player to a TV please choose a correct TV sy...

Page 37: ...g if your DVD player is connected to a wide screen TV If you choose this setting and you don t have a wide screen TV the images on the screen may appear distorted due to vertical compression 4 3 LB Letter Box Choose this setting if your DVD player is connected to a normal ratio TV You ll see the movies in their original aspect ratio height to width ratio You ll see the entire frame of the movie Th...

Page 38: ... setting is 16 9 TV SCREEN NORMAL Choose this setting to have normal display ROTATE 180 C Choose this setting to have upside down display The default setting is NORMAL L SYSTEM SETUP TV SYSTEM TV TYPE TV SCREEN PASSWORD RATING DEFAULT EXIT SETUP SCREEN FORMAT L SYSTEM SETUP TV SYSTEM TV TYPE SCREEN FORMAT PASSWORD RATING DEFAULT EXIT SETUP TV SCREEN NORMAL ROTATE 180 ...

Page 39: ...p3 enter new password of your choose in 4 digit number to lock player rating If you forget your assigned password you can use 0000 to unlock the rating again PASSWORD RATING L SYSTEM SETUP TV SYSTEM TV TYPE SCREEN FORMAT TV SCREEN RATING DEFAULT EXIT SETUP PASSWORD L SYSTEM SETUP TV SYSTEM TV TYPE SCREEN FORMAT TV SCREEN PASSWORD DEFAULT EXIT SETUP RATING 1 KID SAFE 2 G 3 PG 4 PG13 5 PG R 6 R 7 NC...

Page 40: ...ENG MOBILE ENTERTAINMENT 39 SYSTEM SETUP DEFAULT L SYSTEM SETUP TV SYSTEM TV TYPE SCREEN FORMAT TV SCREEN PASSWORD RATING EXIT SETUP DEFAULT RESTORE Choose this option to resume factory settings ...

Page 41: ...l output audio in that language There are 8 optional audio languages Chinese English Japanese French Spanish Portuguese and OK German Italian OSD LANGUAGE AUDIO LANG L LANGUAGE SETUP OSD LANGUAGE AUDIO LANG SUBTITLE LANG MENU LANG EXIT SETUP ENGLISH GERMAN SPANISH FRENCH ITALIAN Highlight the OSD LANGUAGE option and press the arrow buttons to choose the OSD language you prefer Press OK to confirm ...

Page 42: ...ht the SUBTITLE LANG option and press the arrow buttons to choose the subtitle language you prefer Press OK to confirm If the disc you are playing has that language available it will display subtitles in that language There are 7 optional subtitle languages Chinese English Japanese French Spanish German and Italian Choose off to remove all subtitles from being displayed Highlight the MENU LANG opt...

Page 43: ...onal audio output modes SPDIF OFF SPDIF RAW and SPDIF PCM SPDIF OFF Choose this setting to output analog signal and there will be no digital signal output from an coaxial output jack SPDIF RAW Choose this setting if your DVD player is connected to a power amplifier with a coaxial cable When playing a disc recorded with Dolby Digital and MPEG audio formats the corresponding digital signals will be ...

Page 44: ...rease by 0 1 MHZ L AUDIO SETUP AUDIO OUT IR HEADPHONE EXIT SETUP FM TRANSMITTER OFF MHZ PLEASE PRESS ENTER TO INPUT FM 5 The input frequency range is from 87 6 107 9 MHZ for Europe and 87 0 108 0 for Asia The default is OFF 6 If the input number is out of the range the display frequency will be empty and the prompting message will be FM SHOULD BE 87 6 107 9 Europe or FM should be 87 0 108 0 Asia I...

Page 45: ... SETUP CONTRAST L VIDEO SETUP BRIGHTNESS CONTRAST HUE SATURATION EXIT SETUP BRIGHTNESS CONTRAST The video setup options are illustrated below Use the UP and DOWN buttons to move the scroll and adjust the brightness Use the UP and DOWN buttons to move the scroll and adjust the contrast ...

Page 46: ...UE EXIT SETUP SATURATION L VIDEO SETUP BRIGHTNESS CONTRAST SATURATION EXIT SETUP HUE HUE SATURATION Use the UP and DOWN buttons to move the scroll and adjust the hue Use the UP and DOWN buttons to move the scroll and adjust the saturation VIDEO SETUP 6 4 2 0 2 4 6 ...

Page 47: ...ssed to be minimum while adjusting to OFF to be maximum DYNAMIC RANGE Here are two sound output effect modes NORMAL and SURROUND You can choose SURROUND to enhance the output sound effect SOUND EFFECT L DIGITAL SETUP SOUND EFFECT DYNAMIC RANGE DivX R VOD EXIT SETUP NORMAL SURROUND L DIGITAL SETUP SOUND EFFECT DivX R VOD EXIT SETUP DYNAMIC RANGE The digital setup options are illustrated below ...

Page 48: ...on the purchase form on the site Write down the VOD 8 character registration number so that you can fill in the form on the website you purchase your DivX VOD files from Note If you cannot play a DivX VOD file recorded on a CD R disc after downloading it the rental period allocated during purchasing from the website may have expired It is also possible that the recorded file is not compatible with...

Page 49: ...PLAYER SIZE AND PARAMETER 22W 1760g 87 6 to 107 9 MHZ CHA L 2 3MHZ R 2 8MHZ CHB L 3 2MHZ R 3 8MHZ 12VDC 1A MAX Tablet DVD player Product name Power Consumption Audio out Video out Size Weight FM out put IR out put DC out put DC12V R L 2ch COAXIAL Composite ...

Page 50: ...unt 2 Battery connector Note Remember to insert back the rubber cover of the unit to BATTERY CONNECTOR after using the battery pack RECHARGING THE BATTERY PACK Connect the output plug of AC DC adapter to the battery pack Notes 1 The battery pack can be used for about 300 cycles of recharging and operations though this is variable depending on the operating conditions 2 Charge the battery pack full...

Page 51: ...c REMOTE CONTROL DOESN T WORK Approach player more closely or remove obstructions Replace battery for new Type Cr2025 USB WON T PLAY MPEG4 is an open format use only officially recorded quality media No correct format files found Mp3 JPG etc on the USB stick DIVX MOVIE NOT SYNCHRONISED FOR SOUND Reset the movie Record movies using only official DivX software POWER PROBLEMS No power from car power ...

Page 52: ...nce HEADREST MOUNT NOT FITTING CORRECTLY Adjust the straps and tension them to fit correctly Angle the mount towards the rear seat occupants HEADREST MOUNT SLIDES DOWN Tighten the straps to prevent slippage LENS CLEANING Poor playback may be caused by dirt on the laser lens which could come from even a fingerprint The first approach is to expose the DVD mechanism and clean the lens Use a clean dry...

Page 53: ... glass keeps all the glass intact underneath preventing shards from falling out This is a specific safety feature particularly implemented for the younger user and also for in car use The broken glass normally shows signs of the impact mark and also cracks radiating away The resultant fluid leakage renders the panel inoperable Symptoms are often a dark round mark a white screen without picture and...

Page 54: ...SDV685 AC ENG NB A2 ...

Reviews: