background image


Setup Menu

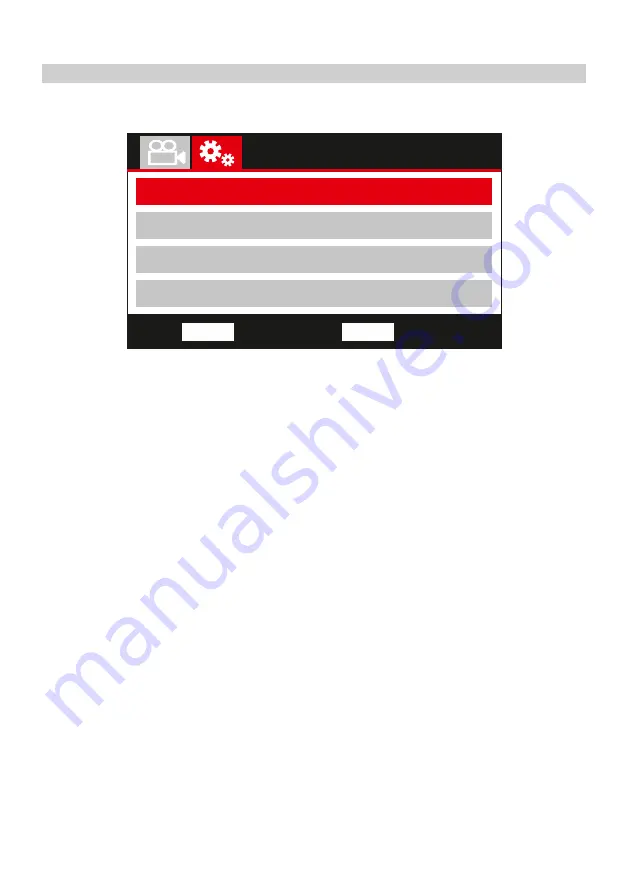
The Setup Menu is accessed by pressing the MENU button twice. 

The default settings have been carefully selected to allow you to use the iN-CAR CAM without the 
need to change any settings. However, should you wish to change a setting then please see below.

Use the up and down buttons to highlight the function that you’d like to change and press the OK 
button to enter the settings sub-menu. 

Once in the submenu, use the up and down buttons to highlight the required setting and then press 
OK to confirm your selection and return to the Video Menu.

Press the MENU button to return to the current mode.

     1.    Format SD Card

            Format the inserted memory card, this will delete all content. 
            
            Note:
            - For stable performance, it is recommended that you format the memory card every 2-3 
              weeks.
              Of course, you should only do this AFTER you've downloaded any files from the card 
              that you may want to keep.

     2.    Time & Date

            Adjust the date / time as required using the OK button to toggle through the fields and use 
            the up & down buttons to set variables. Press MENU to exit and return to the Setup Menu.

     
     3.    Time Zone / DST

            The Time and Date are automatically set based on the Country selected from within the
            First Time Use menu.

            The Time Zone / DST options are used should you want to manually select a Time Zone
            that falls outside of the available Country options.

     4.    Language

            Select preferred language.
            
            Options: English, Danish, German, Spanish, French, Italian, Dutch, Norwegian, Finnish
                          and Swedish.
            Default Setting: English
            

SETUP MENU

Video Menu

Resolution

Exposure

Audio Recording

Video Length

Back

MENU

Enter

OK

Setup Menu

Format SD Card

Time & Date

Time Zone / DST

Language

31

Summary of Contents for NBDVR312G

Page 1: ...Instruction Manual...

Page 2: ......

Page 3: ...as soon as the vehicle ignition is turned on and will start to record automatically When the ignition is turned o the iN CAR CAM will perform an automatic shutdown process 1 Tips for capturing best vi...

Page 4: ...NT PRODUCT SPECIFICATION PACKAGE CONTENTS PRODUCT FEATURES POWERED GPS MOUNT CAMERA PARTS CONTROLS IN VEHICLE INSTALLATION FIRST TIME USE VIDEO MODE PHOTO MODE PLAYBACK MODE SETUP MENU PC CONNECTION T...

Page 5: ...or grease before placing mount upon it Do not obscure the view of the road ahead or impede the deployment of any airbags in the event 2 of an accident When not in use please disconnect the car adapto...

Page 6: ...in a particular installation If this equipment does cause harmful interference to radio or television reception which can be determined by turning the equipment off and on the user is encouraged to t...

Page 7: ...usiness Park Van Road Caerphilly CF83 3ED UK Contact Graham Lambert Tel 44 02920 866429 Email Address support nextbase com 2 Product Info Product Name Dash Cam Model No NBDVR312G Brand Name Nextbase 3...

Page 8: ...le Multimedia Ltd Mailing Address Unit 2 Caerphilly Business Park Van Road Caerphilly CF83 3ED UK Contact person Graham Lambert Signature Email Address support nextbase com Tel 44 02920 866429 Date 14...

Page 9: ...tes of recording 64GB MicroSD 480 minutes of recording 128GB MicroSD 960 minutes of recording MOV 2 5mm Jack Video Audio Lithium ion 3 7V 450mAh approx 30mins recording time Battery design allows the...

Page 10: ...orded the journey can then be viewed using the supplied Windows Mac playback software The software is also available to download from www nextbase com G Sensor File Protection In the event of an impac...

Page 11: ...lever to lock the mount in place 2 Locking ring Loosen the locking ring to adjust the iN CAR CAM position if required remembering to re tighten before use 3 DC IN socket Connect the supplied car powe...

Page 12: ...CAM Front 1 Mounting point located under dust cover After removing the dust cover attach the supplied powered mount here 2 Camera lens Wide Angle 140 6 Element glass lens for optimum picture quality 3...

Page 13: ...successfully 6 Menu button Press to open the menu within current mode press twice to open the general settings 7 Down Screen Off button Down Press to navigate down within menus and to move to the next...

Page 14: ...hone audio recording only available whilst in video mode 10 Mode Screen Capture button Mode Press to change between video photo or playback modes Screen capture Whilst recording press to save a screen...

Page 15: ...the Car power cable is connected to the powered mount when in use not directly to this socket Sides 15 Reset button In the unlikely event the iN CAR CAM becomes unresponsive press the RESET button to...

Page 16: ...similar object to push the memory card in place if required Take care that card has clicked into place a second push inwards will release the memory card Do not remove or insert the memory card when t...

Page 17: ...ion for the mount and clean the windscreen with a dry clean cloth to achieve a good contact between the glass and suction cup Release the locking lever of the mount by pulling down and then whilst hol...

Page 18: ...tead Connect the USB cable supplied with your iN CAR CAM in place of the cigarette power cable Ensure you connect the USB cable to the Powered mount only NOT directly to the camera when using in car N...

Page 19: ...e power cable under trim Make sure that the iN CAR CAM power cable does not interfere with the drivers operating controls such as the steering wheel pedals or gear levers Do NOT mount the iN CAR CAM i...

Page 20: ...ter the Dash Cams settings have been reset by using the Defaults Settings option within the Setup Menu Simply follow the on screen instructions to select the Language Country and Speed Units The setti...

Page 21: ...is active when the microphone has been turned off a red cross will be seen upon the microphone icon 8 Protected shown on screen when a video file has been protected by activation of the G Sensor or by...

Page 22: ...and return to the Video Menu Press the MENU button twice to return to video mode Note Menus are not accessible whilst the iN CAR CAM is recording 1 Resolution Select recording resolution this will inc...

Page 23: ...etected for 3 minutes this is designed to allow use of a permanent 12Vdc supply i e hard wire kit Should physical movement of the vehicle be detected the iN CAR CAM will power on and start recording a...

Page 24: ...orner of recorded files Options On and Off Default Setting On 11 G Sensor Turn Off or adjust the sensitivity of the built in G Sensor The G Sensor detects forces which will automatically protect the c...

Page 25: ...icates the iN CAR CAM is in Photo mode 2 Exposure displays current exposure level setting 3 Date current date 4 Time current time 5 Memory Card indicates whether a memory card is present 6 Battery ind...

Page 26: ...light the required setting and then press OK to confirm your selection and return to the Video Menu Press the MENU button twice to return to photo mode 1 Exposure Adjust exposure level for different l...

Page 27: ...as recorded 4 Date displays date that the current file was recorded 5 Playback controls use the iN CAR CAM buttons as described below 6 Battery indicates whether iN CAR CAM is running on battery or ex...

Page 28: ...o move to next file 6 Battery indicates whether iN CAR CAM is running on battery or external power 7 Protected file indicates that the video file is protected Within Playback mode there are options av...

Page 29: ...nnot be deleted Playback Menu Delete Files Protect Files Back MENU Enter OK Delete File Once selected follow the on screen instructions to delete the current file Delete Files Delete File Delete ALL F...

Page 30: ...ete Files Protect Files Back MENU Enter OK Protect File Once selected follow the on screen instructions to Protect the current file Unprotect File Once selected follow the on screen instructions to Un...

Page 31: ...is recommended that you format the memory card every 2 3 weeks Of course you should only do this AFTER you ve downloaded any les from the card that you may want to keep 2 Time Date Adjust the date tim...

Page 32: ...our Time Zone Options UK Ireland Belgium Denmark Finland France Germany Italy Netherlands Norway Poland Spain Sweden USA Canada Mexico and Other Default Setting UK Ireland 6 Speed Units Select whether...

Page 33: ...Cam is displayed here SD Card Information is provided for the installed SD card within the Dash Cam 11 Keep User Settings Turn this to ON in order to keep your individual user settings during the Das...

Page 34: ...from your computer Mass Storage Mac When this option is selected the Dash Cam will function as a card reader for your MAC The Dash Cam will be seen as an external disk upon your MAC and you will be a...

Page 35: ...al device the red power LED on the iN CAR CAM will be lit indicating the unit is turned on Make sure that the iN CAR CAM battery is charged prior to use as power is not supplied to the iN CAR CAM via...

Page 36: ...ous files For best recording use a branded class 10 type 48MB s or UHS type 1 micro SD card of 8 to 128GB recommended size PC may not be sufficient for the playback task try a different PC Copy the re...

Page 37: ...reliable power source and that the supplied Car Power Cable is being used with the Green LED lit The battery will only receive charge when the iN CAR CAM is connected to power please reconnect the car...

Page 38: ...nload and install the playback software Reinstate previous Google Chrome settings thereafter Take the camera indoors and charge it for 90 minutes does the problem persist If not the car power supply m...

Page 39: ......

Page 40: ...NBDVR312G IM ENG R2 www nextbase com...

Reviews: