background image


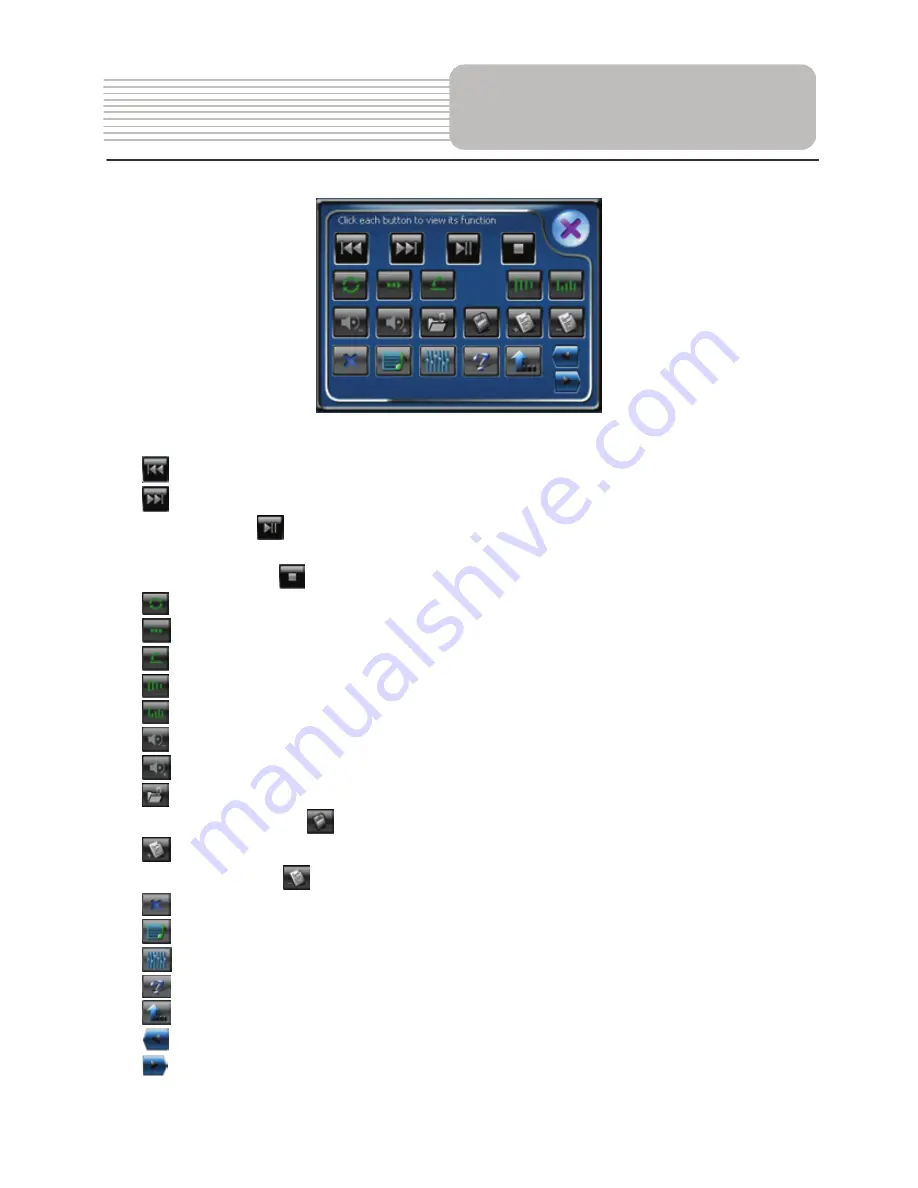
Tap each button to view its function. 
Tap 

  to skip to the previous song.   

Tap 

  to skip to the next song. 

In stop status, tap 

  to play the song; during playback, tap to pause playback and tap 

again to resume normal playback.   
During playback, tap 

  to stop playing current song. 

Tap 

  to repeat all the songs in the playlist. 

Tap 

  to play the current song only. 

Tap 

  to repeat playing selected song. 

Tap 

  to play songs in list sequence. 

Tap 

  to play songs in random sequence. 

Tap 

  to reduce volume. 

Tap 

  to increase volume. 

Tap 

  to open the playlist menu. 

After adding playlist, tap 

  to save playlist. 

Tap 

  to add songs to playlist. 

Select songs and tap 

  to delete it from playlist. 

Tap 

  to close the current window. 

Tap 

  to open playlist interface. 

Tap 

  to open equalizer interface. 

Tap 

  to open the help window. 

Tap 

  to return to the previous menu. 

Tap 

  to back to previous equalizer pre-setting. 

Tap 

  to skip to previous equalizer pre-setting. 

Playing Music 


17

Summary of Contents for W3 - 3.5 Inch Color Touch Navigation System

Page 1: ...panying the appliance WARNING TO REDUCE THE RISK OF FIRE OR ELECTRIC SHOCK DO NOT EXPOSE THIS APPLIANCE TO RAIN OF MOISTURE POWER SUPPLY Connect the supplied adapter to the side of the unit in the slo...

Page 2: ...e specified by the manufacturer or sold with the apparatus When a cart is used use caution when moving the cart apparatus combination to avoid injury from tip over 13 Unplug this apparatus during ligh...

Page 3: ...s Power Adapter Switch Automatically adapts to voltage requirements in U S and other countries SD Card and USB Input The unit is designed with SD card and USB ports and can be connected to SD card or...

Page 4: ...M NAME QTY Owner s Manual 1 Car Adaptor 1 USB Cable 1 Windshield mount bracket 1 Mount cradle 1 Dashboard mount disk 1 Pouch 1 NOTE Accessories and their part number are subject to modification withou...

Page 5: ...nt Safety Instructions Features System Connections Power Supply Preparation Troubleshooting General Setup Specifications Accessories View of Main Unit 3 4 6 8 10 11 15 Playing Music Use of the Mount A...

Page 6: ...ew 1 MENU button Press to enter the main menu 2 Speakers 3 POWER button Press to enter or exit the standby mode 4 Charge Indicator When charging the battery it is red when the battery is fully charged...

Page 7: ...into the port 2 USB port Used to connect to the USB device 1 Volume Control Used to adjust the volume of the headphone and speaker 2 Headphone Jack Used to connect headphones for private listening Wh...

Page 8: ...ned with a USB port which allows you to connect to a USB device via the USB cable Once connected you may use the device for downloading files from another device such as PC etc See the below figure fo...

Page 9: ...ng to Headphones Connect the headphones to the right side of the unit for private listening When headphone is connected the speakers will automatically turn off Note Excessively loud volume could dama...

Page 10: ...chargeable battery Charge the battery fully before initial use Charging time is normally about 3 5 hours A fully charged battery delivers about 3 hours of use Working conditions and precautions for th...

Page 11: ...ew Press the MENU button to return to the main menu In the main menu there are three items for selecting Touch the corresponding item to enter Tap to enter navigation mode Tap to enter the settings me...

Page 12: ...the sleep time There are 6 choices for sleep time 5 10 30 60 120 The system will keep backlight always on and will not enter sleep mode 5 The system will keep backlight on for 5 minutes and then enter...

Page 13: ...the proper Time Zone Tap the buttons of Date group to change the corresponding date and tap the buttons of Time group to change the corresponding time Tap to return Power Tap in the settings menu to...

Page 14: ...around the screen If you touch the center of every time it will disappear and tap the screen to return to the settings menu Note If doesn t disappear you should rectify again Volume Tap in the settin...

Page 15: ...h storage is used to store map data in order to avoid the misoperation which can result in the map data missing and lost Take the following steps to play Loading MP3 or WMA format files 1 Insert the S...

Page 16: ...icon to open the folder the songs in the folder will be displayed on the screen Select the songs that you want to add into the playlist and tap the D to confirm The songs selected will be added into t...

Page 17: ...playing selected song Tap to play songs in list sequence Tap to play songs in random sequence Tap to reduce volume Tap to increase volume Tap to open the playlist menu After adding playlist tap to sav...

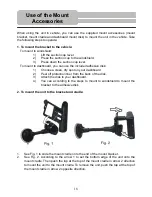
Page 18: ...k 1 Choose a clean dry spot on your dashboard 2 Peel off protection liner from the back of the disk 3 Attach the disk to your dashboard 4 You can according to the steps to mount to windshield to mount...

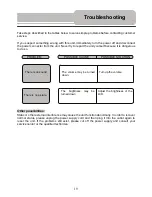
Page 19: ...other external interference may cause the unit function abnormally In order to recover normal status please unplug the power supply cord and then plug it into the outlet again to reset the unit If the...

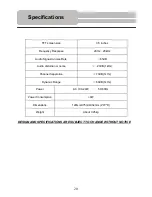
Page 20: ...ze 3 5 inches Frequency Response 20Hz 20kHz Audio Signal to noise Rate 65dB Audio distortion or noise 20dB 1kHz Channel Separation 70dB 1kHz Dynamic Range 80dB 1kHz Power AC 100 240V 50 60Hz Power Con...

Reviews: