background image

6 - SETTING WORKING TIME OF MOTORS

Default: no time set

NOTE: 

Before carrying out this procedure programme a remote control (see paragraph 5) 

Also check that the motor stops when it gets to the limit and the letter “L” appears on the display (the limit is detected if 

there is a mechanical stop or where there is a built-in limit switch).

If that does not occur, adjust the movement threshold with the VR1 trimmer “Sens.” (the trimmer adjusted full scale to “-” 

disables the movement threshold).

To obtain non-manual operation via radio set the operation to automatic, Venetian or Open-Stop-Close (see paragraph 

3.1).

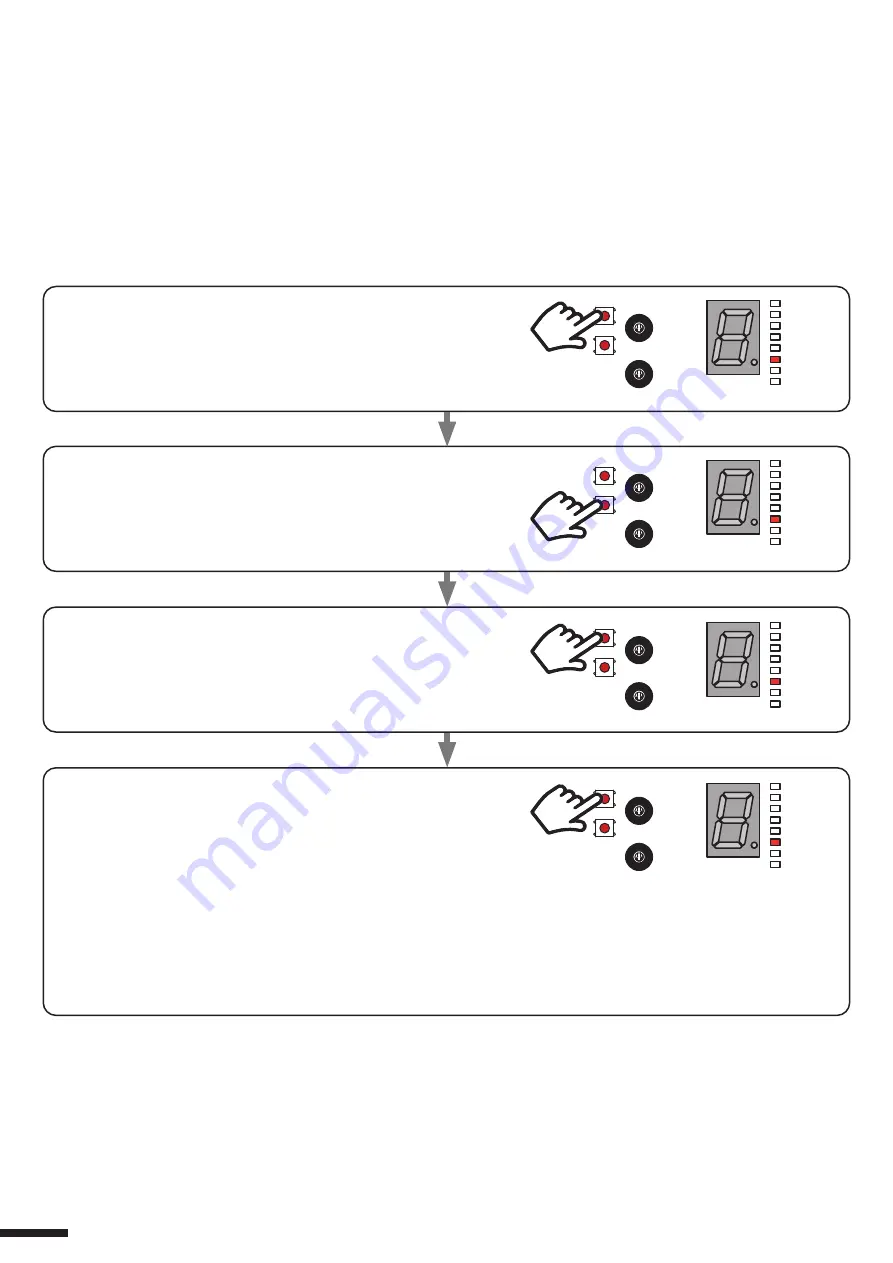
PROCEDURE

STEP 1 

Keep pressing and releasing the SEL key until the 

«T.MOT.» LED comes on.

STEP 2 

Press and release the SET button to confirm. The LED on 

the display flashes.

STEP 3 

By pressing and releasing the SEL key you can select value 

"0" on the display

STEP 4 

Press and release the SET button to start automatic programming.

The control unit will make a closing movement followed by opening 

and closing cycles at the end of which the maneuver times will be 

programmed.

ATTENTION: if the first movement is opening instead of closing, press 

the SET button to interrupt the programming of the run and invert the 

phases of the motor. Then repeat the procedure.

8

SOLE

NEVE

TEMP.

PIOGGIA

VENTO

T.MOT.

CODE

MOT.TYPE

SEL

Sens.

Rit. Neve

SET

SOLE

NEVE

TEMP.

PIOGGIA

VENTO

T.MOT.

CODE

MOT.TYPE

SEL

Sens.

Rit. Neve

SET

SOLE

NEVE

TEMP.

PIOGGIA

VENTO

T.MOT.

CODE

MOT.TYPE

SEL

Sens.

Rit. Neve

SET

SOLE

NEVE

TEMP.

PIOGGIA

VENTO

T.MOT.

CODE

MOT.TYPE

SEL

Sens.

Rit. Neve

SET

Summary of Contents for PRG-M24

Page 1: ...nit for the automation of outdoor pergolas with rotating slats and board for optional LED management 24 Vdc power supply Output for 1 or 2 x 24 VDC motors max 120 W each 433 92 MHz receiver for radio...

Page 2: ...TING OPERATING MODE page 6 5 REMOTE CONTROL MANAGEMENT page 7 6 SETTING WORKING TIME OF MOTORS page 8 7 MANAGEMENT OF SENSORS 7 1 SETTING WIND SENSOR 7 2 SETTING RAIN SENSOR 7 3 SETTING TEMPERATURE SE...

Page 3: ...pply Input 24 Vdc Type of load Output 1 or 2 x 24 VDC motors Max load power Output Max 120 W per output Number of programmable transmitters 150 Receiver frequency RF 433 920MHz Operating temperature 1...

Page 4: ...ed power supply units of the correct size for the load NOTE Connect maximum 120 W per output Operation of the inputs is manual The control unit can manage either the wind sensor wind gauge or the sun...

Page 5: ...ith the SEL key the display s LED flashes Confirm the selected value by pressing the SET key again the display s LED stays on After 20 seconds the control unit goes back into stand by LED DESCRIPTION...

Page 6: ...LED comes on The display shows the current setting STEP 2 Press and release the SET button to confirm The LED on the display flashes STEP 4 Press and release the SET button to confirm Wait 20 seconds...

Page 7: ...and the LED on the display flashes then send an UP command with the transmitter to be saved The display will show S remote control saved P remote control already saved r remote control not recognised...

Page 8: ...T LED comes on STEP 2 Press and release the SET button to confirm The LED on the display flashes STEP 3 By pressing and releasing the SEL key you can select value 0 on the display STEP 4 Press and rel...

Page 9: ...essing and releasing the SEL key select the value corresponding to the setting you want according to the following table DISPLAY NO DESCRIPTION d Wind sensor disabled 0 Wind sensor test 1 Wind sensor...

Page 10: ...g the SEL key select the value corresponding to the setting you want according to the following table DISPLAY NO DESCRIPTION d Rain sensor disabled 0 Rain sensor test y Rain sensor enabled E Exit STEP...

Page 11: ...e display flashes STEP 3 By pressing and releasing the SEL key select the value corresponding to the setting you want according to the following table DISPLAY NO DESCRIPTION d Temperature sensor disab...

Page 12: ...and release the SET button to confirm The LED on the display flashes STEP 3 By pressing and releasing the SEL key select the value corresponding to the setting you want according to the following tabl...

Page 13: ...button to confirm The LED on the display flashes STEP 3 By pressing and releasing the SEL key select the value corresponding to the setting you want according to the following table DISPLAY NO DESCRI...

Page 14: ...nit with the factory parameters PROCEDURE STEP 1 Press SET and SEL at the same time until all the red LEDs come on When the reset is completed the control unit will beep 3 times in confirmation 14 SOL...

Page 15: ...15...

Page 16: ...V2 0 Nexta Tech company brand of Team srl via G Oberdan 90 33074 Fontanafredda PN Italy Ph 39 0434 998682 Email info nexta tech com Web www nexta tech com...

Reviews: