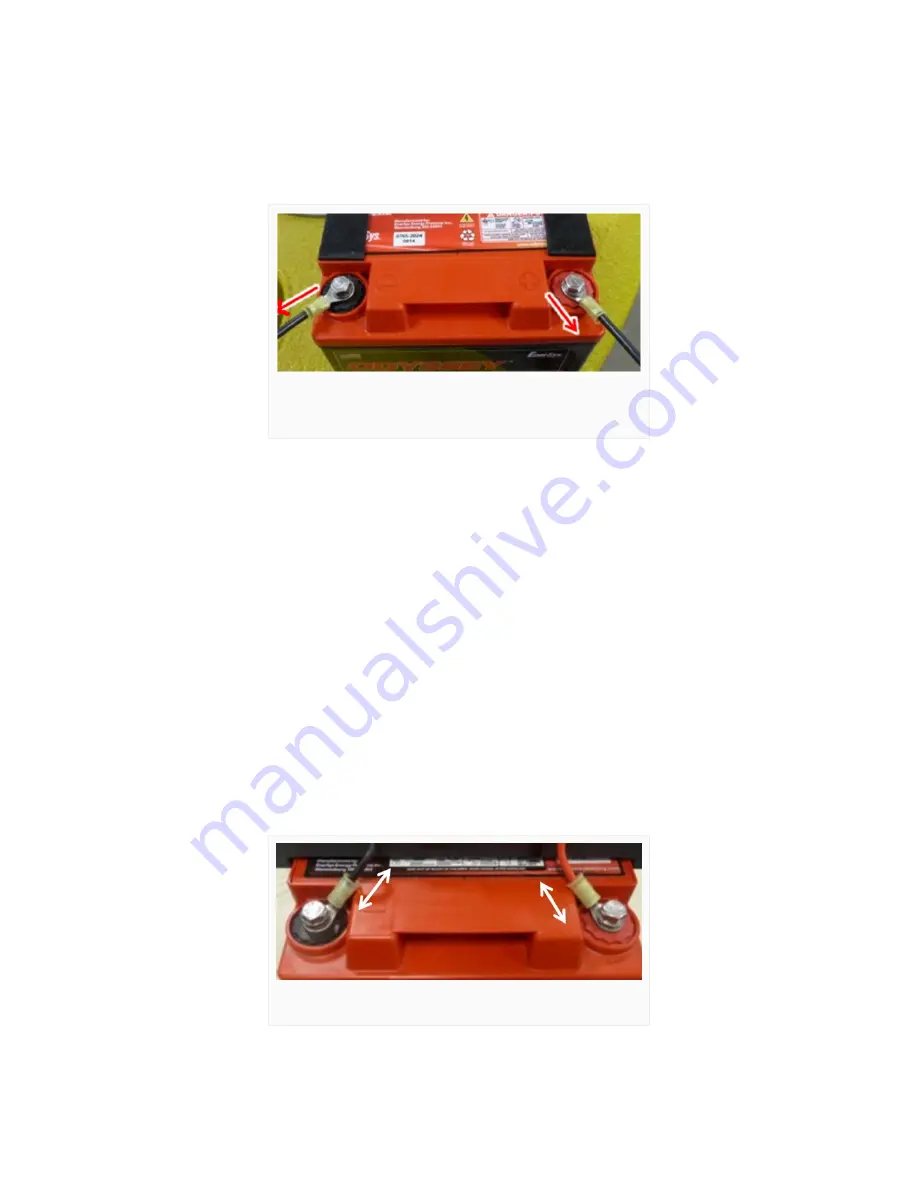
2. [Only for systems with 2 or more batteries]
a. Discard any pre-installed hardware on the new battery terminals. Using the original battery
terminal bolts and a 10mm socket wrench, tighten the ring terminal cables to the new battery.
b. Make sure that the cables point toward the corners of the battery. Always insulate the
detached cable leads to prevent short-circuiting the battery during installation.
c. Ensure that the opposite ends of the ring terminal cables are still insulated with electrical tape.
d. All batteries except the battery on top of the stack should have neoprene strips adhered in line
with the terminals to maintain spacing as shown in the picture above.
e. Lower the first battery into the bottom of the data well. Stack the second, then third and fourth
batteries (if applicable), attaching the previous battery’s ring terminal cable to the
corresponding battery terminal above it each time.
3. [For all Systems]
a. Once the final battery is installed in the data well, orient the solar regulator bracket so that the
ring terminal connections to the top-most battery are on the same side.
b. Slide the solar regulator bracket back on to the threaded rod and lower it until it is resting on
top of the new battery.
c. Tighten down each ring terminal from the solar regulator to its corresponding battery terminal
using a 10mm socket wrench. make sure the leads face inwards towards the center of the
battery as shown in the photo below.
d. Place the flat washer, followed by the lock washer and nut over the threaded rod and hand
tighten the regulator bracket to the top battery.
If more than one A05 is installed, align the ring
terminal cables as shown.
Inward facing leads.
37


