background image


14 


Password 

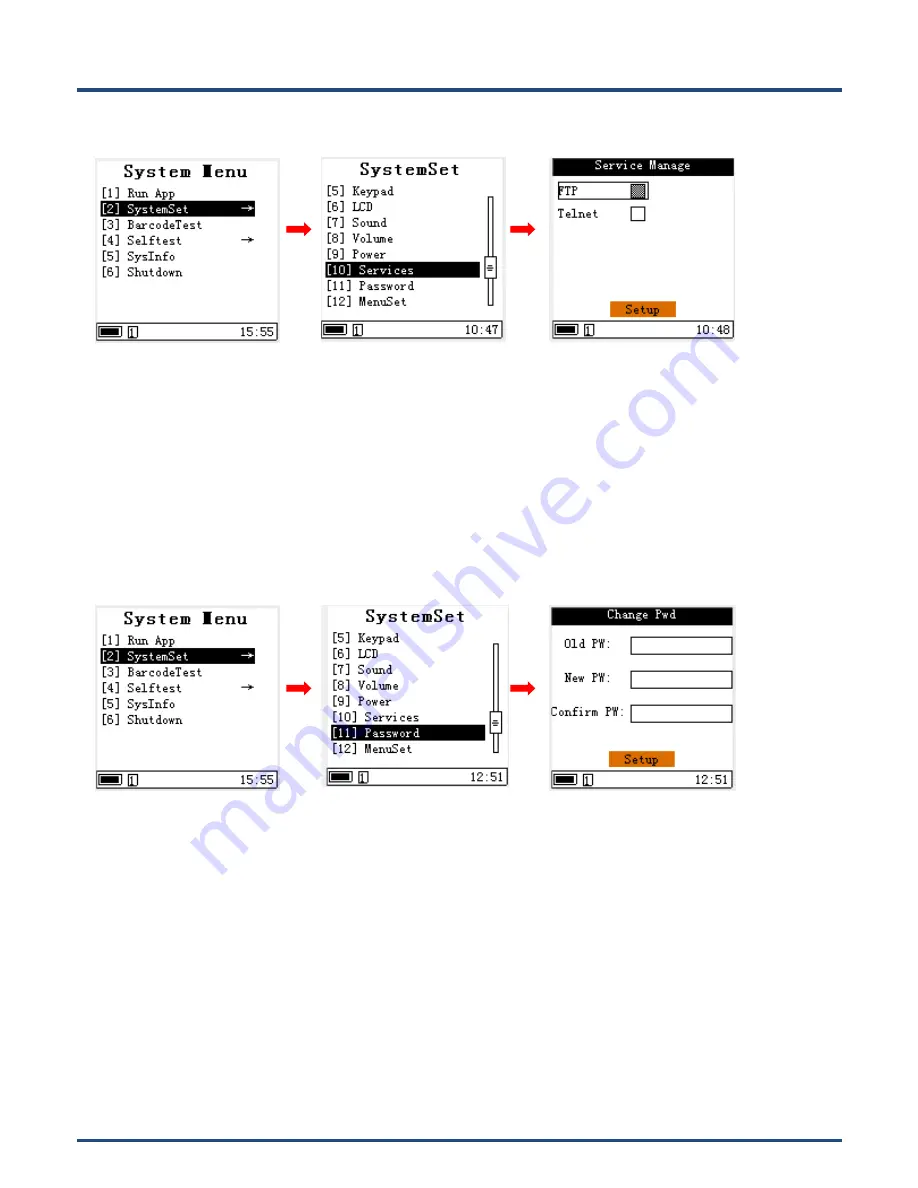
1. In the system Menu, enter “Systemset” – “password” and set the parameter per your needs. 

2. Input the old password and a new one. 

3. After completing the 

setting, move the cursor to the “Setup” button, press the “OK” button to confirm the setting and exit. 

Alternatively, press the “ESC” key to cancel the setting and exit. 

N

ote: the default password is “159951”. 


MenuSet     

1. In the system M

enu, enter “Systemset” – “Menuset” and set the language per your needs. 

2. After completing the setting, move the cursor to the “Setup” button, press the “OK” button to confirm the setting and exit. 

Alternatively, press the “ESC” key to cancel the setting and exit.     


Summary of Contents for DC850 Susu

Page 1: ...SCANNING MADE SIMPLE DC850 Susu mobile computer user guide ...

Page 2: ...his manual may include software copyrighted by Fujian Newland Auto ID Tech Co Ltd or third party The user corporation or individual shall not duplicate in whole or in part distribute modify decompile disassemble decode reverse engineer rent transfer or sublicense such software without prior written consent from the copyright holders This manual is copyrighted No part of this publication may be rep...

Page 3: ...Revision History Version Description Date V1 0 Initial release 2019 10 28 ...

Page 4: ...ion 2 Unpacking 2 Getting Started 2 Installing the Battery 2 Removing the Battery 3 Attach the Hand Strap 4 Switching On the DC850 4 Waking the Sleep Mode 4 Switching off the DC850 4 Charging the battery 4 LED Indicator and Keypad 5 Chapter 3 Basics 8 Introduction 8 System Menu 8 Run APP 8 SystemSet 9 Program 10 Date Time 10 Communication 10 Keypad 11 ...

Page 5: ...d test 17 LCD Backlight test 18 LCD test 18 Beep test 19 Battery test 19 USB test 20 Scan Engine test 20 SysInfo 21 Chapter 4 Data Transmission 22 Introduction 22 Connected with PC 22 Data Transmission 22 USB Mode 22 Ethernet Mode 22 HID Mode 25 Flash Disk Mode 26 USB VCOM Mode 27 Chapter 5 Maintenance Troubleshooting 31 Introduction 31 ...

Page 6: ...formation 31 Disassembly and Retrofit 31 External Power Supply 31 Abnormal Situation 31 Drop Damage 31 LCD Screen 31 Stacking Heavy Objects 31 Mounting Location 31 Use Maintenance 32 Battery Safety Guidelines 32 Troubleshooting 33 ...

Page 7: ...NLS DC850 Chapter Descriptions Chapter 1 About This Guide Provides a general description of this manual Chapter 2 Getting Started Provides information on getting the DC850 up and running for the first time Chapter 3 Basics Describes how to program the DC850 for the use of its basic features Chapter 4 Data Transmission Provides the instructions as to how to connect DC850 with PC and realize data tr...

Page 8: ...SB cable 1 x AC adapter for the DC850 1 x Li polymer battery 1 x Hand strap 1 x Quick Start manual Getting Started Use the DC850 for the first time Step1 Install the battery Step2 Press the power key to switch on the DC850 Step3 Program the DC850 Installing the Battery Install the battery per below steps Step 1 Unlock the battery cover latches Step 2 Remove the cover Step 3 Insert the battery as i...

Page 9: ... cover and lock the battery cover latches Removing the Battery Step 1 Long press the Power key to turn off the terminal Step 2 Unlock the battery cover latches Step 3 Remove the cover Step 2 Remove the battery 1 2 3 4 5 ...

Page 10: ...ong it takes for the DC850 to go into sleep mode Press the power key briefly will wake the sleep mode Switching off the DC850 Hold down the Power key for more than 3 seconds until the screen showing halting and then the device will be in power off mode When DC850 crashed hold down the power key for more than 10 seconds will shut down the device forcibly If the DC850 is connected with USB the syste...

Page 11: ...5 Note When the device is in sleep mode connect or remove the USB cable will wake up the terminal LED Indicator and Keypad USB Connection ...

Page 12: ...ce BASP key Press it to delete the last character Backlight key Press it to control the brightness of the screen 7 Power Key Press it to switch on switch off shut down the DC850 8 The keypad is color coded to indicate the alternate function keys blue is for the FUNC key and orange is for the ALPHA key 9 The keypad s default characters functions are numbers 0 9 for example press keypad in the edit ...

Page 13: ...e blue function keys valid for one time and not permanent For example to key F7F8 firstly press FUNC key prompt in the status bar secondly press 7 key to output F7 and then press FUNC key again finally press 8 key to output F8 then F7F8 can be available 13 Press the ALPHA key to toggle between Number English Characters and Chinese Characters Enter the edit box press ALPHA key once for English lowe...

Page 14: ...u 1 Run APP Run the app per current system settings 2 SystemSet Set system parameters like time power sound etc per your needs 3 BarcodeTest It is an app for barcode reading 4 Selftest Test each function of the device 5 SysInfo Displays system information 6 Shut down Switch off the DC850 device Run APP ...

Page 15: ... 6 LCD Enter to set LCD backlight configuration 7 Sound Enter to set tone configuration 8 Volume Enter to set the scan volume 9 Power Enter to set the sleep mode and shutdown mode configuration 10 Services Enter to set the network service configuration 11 Password Enter to change the system password 12 Menu Set Enter to set the language per needs 13 Barcode Enter to set the barcode parameter 14 Ud...

Page 16: ...utomatically run the current plugin for this device 4 Press the OK key to confirm the setting and exit Press the ESC key to cancel the setting and exit Date Time 1 In the system Menu enter Systemset Date Time then set the parameter per needs 2 Press the direction key to select the time you want to modify and press number key to do the modification 3 Press the OK key to confirm the setting and exit...

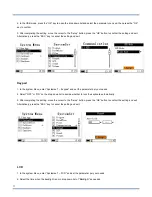
Page 17: ...1 In the system Menu enter Systemset keypad and set the parameter per your needs 2 Select OFF or ON on the drop down list to decide whether to lock the keyboard automatically 3 After completing the setting move the cursor to the Setup button press the OK button to confirm the setting and exit Alternatively press the ESC key to cancel the setting and exit LCD 1 In the system Menu enter Systemset LC...

Page 18: ... dropdown list of Keypad to turn on or turn off the keypad sound In the dropdown list of Barcode Engine select the reminder mode for reading barcode successfully If check All Mute close all the reminder voice for all event 3 After completing the setting move the cursor to the Setup button press the OK button to confirm the setting and exit Alternatively press the ESC key to cancel the setting and ...

Page 19: ...halt in the dropdown list of shutdown mode 3 After completing the setting move the cursor to the Setup button press the OK button to confirm the setting and exit Alternatively press the ESC key to cancel the setting and exit Services 1 In the system Menu enter Systemset Services and set the parameter per your needs 2 Use up and down key to select the internet service and then press OK 3 After comp...

Page 20: ... OK button to confirm the setting and exit Alternatively press the ESC key to cancel the setting and exit Note the default password is 159951 MenuSet 1 In the system Menu enter Systemset Menuset and set the language per your needs 2 After completing the setting move the cursor to the Setup button press the OK button to confirm the setting and exit Alternatively press the ESC key to cancel the sett...

Page 21: ...to check the current reading module type 4 Enter the Recovery to restore the factory default configuration U Disk 1 In the system Menu enter Systemset Udisk and set the parameter per your needs 2 Enter Udisk Chk to scan and fix the USB flash disk Enter Format UDisk to format all data on the flash disk 3 Press the OK key to confirm and exit after all operate successfully ...

Page 22: ...confirm the setting and exit Alternatively press the ESC key to cancel the setting and exit Note all custom settings will be lost after reset the default setting Barcode Test 1 In the system Menu enter BarcodeTest and press the SCAN Key to start the barcode reading test 2 Press the ESC key to cancel the setting and exit ...

Page 23: ... test 1 In the system Menu enter SelfTest and press Keypad 2 The screen displays the prompt of all keys When you press a key the corresponding prompt disappears if it does not disappear and then indicate a problem with the corresponding key 3 Exit the keyboard test by pressing the ESC key twice ...

Page 24: ... LCD backlight as displayed on the screen 3 Exit the LCD backlight test by pressing the ESC key LCD test 1 In the system Menu enter SelftTest and press LCD 2 The system will automatically conduct a screen display test which can check the bright or dark spots on the screen 3 Press the ENT key to exit the test ...

Page 25: ...to conduct the beep test as shown on the screen 3 Press the ESC key to exit the test Note for the beep test pleas disable the All Mute option in sound settings Battery test 1 In the system Menu enter SelftTest and press Battery 2 The screen will display the battery information 3 Press the ESC key to exit the test ...

Page 26: ...ill send characters to text document through the HID way Note USB test will automatically set USB working mode as HID and users can modify to other modes in the SystemSet setting Scan Engine test In the system Menu enter SelftTest and press ScanEngine or ContinueScan ScanEngine Press Scan key to start the barcode reading Continue Scan Press Scan key to start the barcode reading and can automatical...

Page 27: ...21 SysInfo In the system Menu enter SysInfo and it will display system information about DC850 such as firmware version manufacture date barcode engine etc ...

Page 28: ...USB Mode Press Systemset in the System Menu communication USB then it will display six USB modes COM Download Ethernet USB VCOM USB HID Flash Disk MTP please set the parameter per needs Ethernet Mode Step 1 Press Systemset in the System Menu services Select FTP then press setup to save the settings Step 2 Press Systemset in the System Menu communication USB select Ethernet in the USB mode then pre...

Page 29: ...tall usb2ethernet driver Step 1 Install the usb2ethernet driver DC850_usb2ethernet_driver_signed in the PC Step 2 Go to the device manager on your PC and then you will find the Linus USB ethernet RNDIS Gadget ...

Page 30: ...ols to log in to the IP address and manage files on DC850 devices copy paste delete etc The remote tool can be chosen as you like here we use the FileZilla as an example Open the remote tool and the following screen will display Fill host with 192 168 0 1 and user name with root leave the password blank and click quick connection After a successful connection the following interface appears ...

Page 31: ...wn below Users can upload download or delete the file in this directory HID Mode Step 1 Select the USB HID in the USB Mode then press the Setup to save the setting Step 2 Connect the DC850 with the computer via USB cable Step3 In this mode the barcode data scanned by DC850 device will be displayed in the TXT file opened on PC as shown below ...

Page 32: ... press the Setup to save the setting Step 2 Connect the DC850 with PC via USB cable Then you will find the U drive in PC In this mode the DC850 can be used as a flash drive Compared with the read only flash drive the file in the DC850 drive can be writable and readable ...

Page 33: ...ontains plugins programs for DC850 devices You can copy modify or delete programs that you need on DC850 under this folder USB VCOM Mode Step 1 Select the USB VCOM in the USB Mode then press the Setup to save the setting ...

Page 34: ... driver which is the same installation package as usb2ethernet driver if the computer has already install file then no need to install again Step 3 Connect the DC850 with PC via USB cable Then you will find below screen in the device manager of PC ...

Page 35: ...e take the hyper terminal tool Xshell personal as reference Step 2 press the key on the software Step 3 Select serial on the Protocol and click the SERIAL on the category directory and set other parameters per below screen then press the connect button ...

Page 36: ... your PC with Gadget Serial here is COM3 Step 4 Open the BarcodeTest in the system menu of DC850 then press the scan key and read the barcode The barcode data will be displayed on the hyper terminal of PC as shown below Note the USB mode should be under USB VCOM ...

Page 37: ...C adapter and contact your dealer or Newland customer service center Continued use in this case may result in fire or electric shock Drop Damage If the terminal is damaged due to a drop from a high place immediately cut off the power and contact your dealer or Newland customer service center LCD Screen Do not press against or strike the LCD screen Otherwise it may damage the screen When handling a...

Page 38: ...ervice life of the keypad and shell of the terminal Do not place the terminal facedown on any surface or there might be misoperations Sudden temperature drops may cause condensation on the shell which could cause malfunction Care should be taken to avoid condensation If condensation occurs dry the terminal before use Battery Safety Guidelines Do not dispose of batteries in a fire as they may explo...

Page 39: ... press the Power key to wake it up 3 Check the battery level If the battery is depleted recharge it 4 Ensure that the battery is properly installed 5 Replace the battery if it is faulty 6 If the problem remains please contact the after sales service center System Cannot switch on 1 Check the battery level If the battery is depleted recharge it 2 Switch the terminal on after using the included AC a...

Page 40: ...SCANNING MADE SIMPLE Newland EMEA HQ 31 0 345 87 00 33 info newland id com newland id com Need more info Contact us or one of our partners at newland id com partners ...

Reviews: