background image

New Air Refrigeration

CONTROL BOARD 

INSTRUCTIONS

CAREL

9

NGR Series: Control Board Instructions

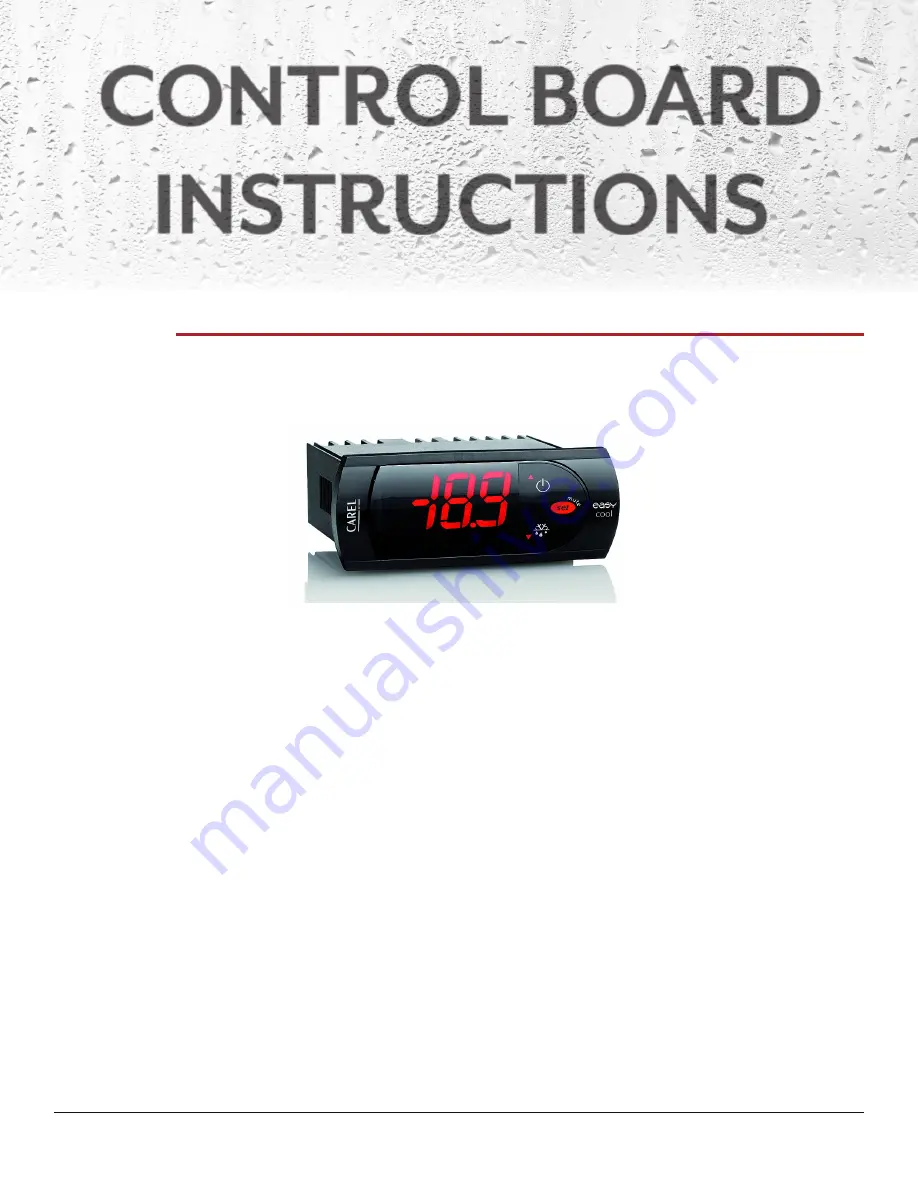
(1) To change temperature set point: Press & hold "SET" for 2 seconds until a flashing number appears in 

display, then release “SET”. 

(2) The flashing number is the present temperature set point. Press "UP" or "DOWN" arrows to the 

desired temperature set point.

For further assistance, please contact our Service Department at 1.800.567.3620 #116 or email us at 

[email protected]  

How to change the temperature settings

Summary of Contents for NGR-036-H

Page 1: ... Manual Manuel de produit Your Commercial Equipment Solution Votre solution d équipement commercial Models Modèles NGR 036 H NGR 40 S NGR 48 S NGR 068 H NGR 115 S NGR 182 H Glass Door Merchandisers Réfrigérateurs à portres vitrées ...

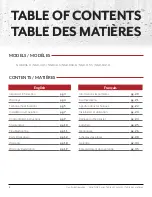
Page 2: ...mations importantes pg 20 Warnings pg 4 Avertissements pg 21 Technical Specifications pg 5 Spécifications techniques pg 22 Installation Operation pg 7 Installation et utilisation pg 23 Control Board Instructions pg 9 Réglage du thermostat pg 24 Maintenance pg 10 Entretien pg 25 Troubleshooting pg 11 Dépannage pg 26 Parts Breakdown pg 12 Schémas des pièces pg 28 Warranty pg 18 Garantie pg 34 Warran...

Page 3: ...talled The unit must be level after it is positioned in its permanent location This ensures proper door alignment on all cabinet adequate condensate water drainage and proper overall refrigeration system operation Electrical power to the unit is generated immediately after plugging the power cord into an adequate outlet Transportation Please strap or secure the unit and avoid significant vibration...

Page 4: ... refrigerant used Do not use mechanical devices to defrost refrigerator Do not puncture refrigerant tubing 9 DANGER Risk of fire or explosion Flammable refrigerant used To be repaired only by trained service personnel Do not puncture refrigerant tubing 10 CAUTION Risk of fire or explosion Flammable refrigerant used Consult repair manual owner s guide before attempting to service this product All s...

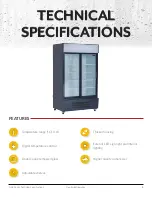
Page 5: ...CATIONS FEATURES 5 NGR Series Technical Specifications Thicker housing Exterior LED sign light and interior lighting Higher quality compressor Temperature range C 0 10 Digital temperature control Double pane tempered glass Adjustable shelves ...

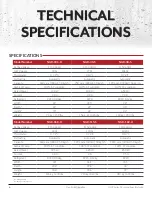
Page 6: ...Depth1 24 29 30 Height2 78 81 82 Weight 72 kg 159 lbs 156 6 kg 345 lbs 133 kg 293 lbs Model Number NGR 068 H NGR 115 S NGR 182 H Rating Voltage 115V 60Hz 115V 60Hz 110V 60Hz NET Volume 640L 1104L 1820L Thermostat 0 7 2ᵒC 0 7 2ᵒC 0 10ᵒC Defrosting Automatic Automatic Automatic Capacity 648 cans 330ml 50 kg sh 1296 cans 330ml 50 kg sh 1944 cans 330ml 50 kg sh Ambient Temp 100ᵒF ST condition 100ᵒF ST...

Page 7: ...space between the back side of the refrigerator and the wall and that nothing is placed on top of the refrigerator Allow a minimum gap of 100mm at the rear and 50mm at the sides of the cooler Connection to the main supply Connect the refrigerator to a 115 Volts 60Hz power supply on a min 15A fused grounded socket Do not use extension cables If the power cord is not long enough ask an authorized el...

Page 8: ...f the power wrap the electrical elements with plastic films and do not wash the internal cabinet directly with water 6 The operation and clean up of the refrigeration compressor unit should be observed regularly When there is too much dust in the condenser the ventilating and refrigerating effects will be influenced so it should be cleaned timely Users are recommended to clean the condenser once e...

Page 9: ...or 2 seconds until a flashing number appears in display then release SET 2 The flashing number is the present temperature set point Press UP or DOWN arrows to the desired temperature set point For further assistance please contact our Service Department at 1 800 567 3620 116 or email us at service distex ca How to change the temperature settings ...

Page 10: ...to bottom not side to side After cleaning straighten any bent condenser fins with a fin comb Cleaning the fan blades and motor If necessary clean the fan blades and motor with a soft cloth If it is necessary to wash the fan blades cover the fan motor to prevent moisture damage Cleaning the interior of unit When cleaning the cabinet interior use a solvent of warm water and mild soap Do not use stee...

Page 11: ...rrounding the unit Inside cabinet water leak Unit not properly leveled Verify and level unit left to right and front to back Drain not properly attached Verify and properly attach drain hose Drain frozen Unplug and empty unit Leave door open to allow drain hose to defrost Outside cabinet water leak Condensation due to humidity level to high Clean surface if possible find way to reduce humidity lev...

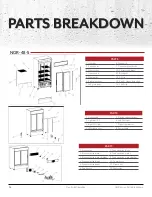
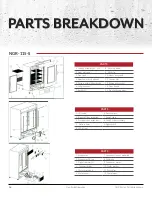
Page 12: ...er cover 11 Canopy LED light 38 Digital controller 12 LED power 39 Louver 13 Canopy left clip 40 Condenser 14 Canopy lower clip 41 Feet castor with brake 15 Canopy cover 42 Fan guard 16 Canopy upper clip 43 Chassis 17 Lamp switch 44 Fan blade 18 Corner code 45 Condenser fan 19 Canopy right clip 46 Compressor 20 Inner drain pan 47 Outer drain pan support plate 21 Evaporator 48 Outer drain pan 22 Ev...

Page 13: ...hinge 15 Castor with brake 8 Gasket PARTS 1 Canopy LED light 4 Wiring connecting box 2 Switch 5 LED light power driver 3 Cabinet LED light 6 Power wire PARTS 1 Evaporator 9 Compressor 2 Evaporator fan motor 10 Start kit for Compressor 3 Evaporator fan motor supporter 11 Water tray 4 Evaporator fan motor blade 12 Condenser fan motor supporter 5 Evaporator fan panel 13 Condenser fan motor 6 Thermost...

Page 14: ...13 Shelf Heavy duty shelf 7 Left glass door 14 Shelf clip PARTS 1 Light switch 5 Electric connector box 2 Light box LED 6 Left LED light 3 Right LED light 7 Digital thermostat 4 LED light driver 8 Power cable PARTS 1 Evaporator 7 Condenser fan blade 2 Evaporator fan motor 8 Condenser fan motor 3 Evaporator fan motor bracket 9 Condenser fan motor bracket 4 Evaporator fan blade 10 Compressor 5 Evapo...

Page 15: ... Casters with without brake 11 Door gasket 6 Back grill 12 Door handle PARTS 1 Canopy LED tube 5 LED driver 2 Right LED bar 6 Electrical box 3 Electrical connector box 7 Power cable 4 Defrost timer 8 Light switch PARTS 1 Evaporator assembly 7 Wire condenser condenser fan cover 2 Evaporator fan motor 8 Fan blade 3 Digital controller 9 Condensor motor 4 10 Motor bracket 5 11 Dryer filter 6 Motor cov...

Page 16: ...or cover 12 Compressor PARTS 1 LED tube 6 Electrical box 2 Right LED bar assembly 7 Power cable 3 Electrical connector box 8 Left LED bar assembly 4 Defrost timer 9 Light switch 5 LED driver PARTS 1 Canopy assembly 54 x 10 8 Price tag holder 2 Right glass door 9 Shelf clip 3 Front grill 10 Heavy duty shelf 4 Adjustable feet optional 11 Canopy film 5 Casters with without brake 12 Sliding door gaske...

Page 17: ...py film 7 Adjustable foot optional 15 Door gasket 8 Casters with without brake 16 Door handle PARTS 1 Canopy LED tube 6 LED driver 2 Right LED bar 7 Electrical box 3 Center pilar LED bar 8 Power cable 4 Electrical connector box 9 Left LED bar 5 Defrost timer 10 Light switch PARTS 1 Evaporator assembly 7 Wire condenser 2 Evaporator DC motor 8 Fan blade 3 Mechanical thermostat 9 Condenser motor 4 Th...

Page 18: ... NO CONSEQUENTIAL DAMAGES NEW AIR is not responsible for economic loss profit loss or special indirect or consequential damages including without limitation losses or damages arising from food or product spoilage claims whether or not account of refrigeration failure Warranty is not transferable This warranty is not assignable and applies only in favour of the original purchaser user to whom deliv...

Page 19: ...ter your unit with New Air Refrigeration simply proivde the following information by email to service distex ca or via the New Air website www newairrefrigeration ca WARRANTY REGISTRATION CARD OWNER NAME RESTAURANT NAME ADDRESS MODEL NUMBER SERIAL NUMBER EMAIL ADDRESS TELEPHONE NUMBER DATE OF PURCHASE ...

Page 20: ...avoir été positionnée dans son emplacement permanent Cela garantit un alignement correct des portes sur toutes les armoires une évacuation adéquate de l eau de condensation et un bon fonctionnement global du système de réfrigération L alimentation électrique de l unité est générée immédiatement après avoir branché le cordon d alimentation dans une prise adéquate Transport veuillez attacher ou sécu...

Page 21: ...écaniques pour dégivrer le réfrigérateur Ne percez pas la tubulure de réfrigérant 9 DANGER Risque d incendie ou d explosion Réfrigérant inflammable utilisé À réparer uniquement par un personnel de service qualifié Ne percez pas la tubulure de réfrigérant 10 CAUTION Risque d incendie ou d explosion Réfrigérant inflammable utilisé Consultez le manuel de réparation le guide du propriétaire avant de t...

Page 22: ...TÉRISTIQUES Isolation plus épaisse Éclairage intérieur au DEL et panneau extérieur illuminé Compresseur de haute qualité Température C 0 10 Contrôle de température digital Vitre à double épaisseur Tablettes ajutables Série NGR Spécifications techniques 22 ...

Page 23: ...g R290 R290 0 12kg Largeur 24 39 5 48 Profondeur3 24 29 30 Hauteur4 78 81 82 Poids 72 kg 159 lbs 156 6 kg 345 lbs 133 kg 293 lbs Modèle NGR 068 H NGR 115 S NGR 182 H Voltage 115V 60Hz 115V 60Hz 110V 60Hz Volume NET 640L 1104L 1820L Thermostat 0 7 2ᵒC 0 7 2ᵒC 0 10ᵒC Dégivrage Automatique Automatique Automatique Capacité 648 cannettes 330ml 1296 cannettes 330ml 1944 cannettes 330 ml Temp Ambiante 10...

Page 24: ...sur une surface à niveau Connexion électrique Si le cordon électrique n est pas assez long n utilisez pas de rallonge Faites installer une prise plus près du réfrigérateur par un électricien Assurez vous qu il y ait assez d espace entre les murs et l arrière et les côtés du réfrigérateur pour la circulation d air et ne rien placer sur le dessus de l unité Informations générales Le thermostat est s...

Page 25: ... un numéro clignotant apparaisse à l écran puis relâchez SET 2 Le chiffre clignotant est le point de consigne de température actuel Appuyez sur les flèches UP ou DOWN jusqu au point de consigne de température souhaité Pour toute assistance veuillez contacter notre département de service au 1 800 567 3620 116 ou par courriel au service distex ca Comment changer la température de l unité ...

Page 26: ... nettoyage du groupe compresseur frigorifique doivent être respectés régulièrement Lorsqu il y a trop de poussière dans le condenseur les effets de ventilation et de réfrigération seront influencés il doit donc être nettoyé régulièrement Il est recommandé aux utilisateurs de nettoyer le condenseur une fois tous les trois mois 6 Méthodes de lavage du condenseur 1 Coupez l alimentation et enveloppez...

Page 27: ...et débrancher l unité Laisser les portes ouvertes afin de permettre au serpentin de déglacer Trop de marchandises à l intérieur de l unité Retirer la marchandise afin d allouer une bonne circulation d air Mauvaise circulation d air environant l unité S assurer d une bonne circulation d air environant l unité Formation d eau à l intérieur de l unité L unité n est pas de niveau Mettre l unité de niv...

Page 28: ... de câblage 2 Interrupteur 5 Pilote de puissance pour lumière au DEL 3 Lumière DEL intérieure 6 Cordon d alimentation PIÈCES 1 Evaporateur 9 Compresseur 2 Ventilateur d évaporateur 10 Ens de démarrage pour compresseur 3 Support de ventilateur d évaporateur 11 Récipient à eau 4 Pale du moteur de ventilateur d évaporateur 12 Support de moteur de ventilateur de condenseur 5 Panneau de ventilateur d é...

Page 29: ...al 12 Alimentation pour DEL 39 Grille avant 13 Clip gauche pour panneau 40 Condenseur 14 Clip du bas pour panneau 41 Roue avec frein 15 Enseigne 42 Garde de ventilateur 16 Clip du haut pour panneau 43 Chassis 17 Interrupteur 44 Pale de ventilateur 18 Côté de panneau 45 Ventilateur de condenseur 19 Clip droite pour panneau 46 Compresseur 20 Bac de récupération intérieur 47 Plaque de support du bac ...

Page 30: ...5 Boîtier de connexion électrique 2 Panneau illuminé au DEL 6 Lumière au DEL gauche 3 Lumière au DEL droite 7 Thermostat digital 4 Pilote de puissance pour lumière au DEL 8 Cordon électrique PIÈCES 1 Evaporateur 7 Pale de moteur de ventilateur de condenseur 2 Ventilateur d évaporateur 8 Moteur de ventilateur de condenseur 3 Support de ventilateur d évaporateur 9 Support de moteur de ventilateur de...

Page 31: ...re 12 Poignée de porte PIÈCES 1 Tube pour DEL de panneau 5 Pilote de DEL 2 Lumière au DEL droite 6 Boîtier électrique 3 Boîtier de connexion électrique 7 Cordon électrique 4 Minuterie de dégivrage 8 Interrupteur PIÈCES 1 Ensemble d évaporateur 7 Condenseur à fil couvercle du ventilateur du condenseur 2 Moteur du ventilateur de l évaporateur 8 Pale de ventilateur d évaporateur 3 Contrôle digital 9 ...

Page 32: ...ière au DEL 6 Boîtier électrique 2 Lumière au DEL droite 7 Cordon électrique 3 Boîtier de connexion électrique 8 Lumière au DEL gauche 4 Minuterie de dégivrage 9 Interrupteur 5 Pilote de DEL PIÈCES 1 Panneau d affichage 54 x 10 8 Porte prix 2 Porte vitrée droite 9 Clip pour tablette 3 Grille avant 10 Tablette extra robuste 4 Pieds ajustables option 11 Enseigne 5 Roues avec sans frein 12 Joint d ét...

Page 33: ...6 Poignée de porte PIÈCES 1 Lumière au DEL pour panneau 6 Pilote de DEL 2 Lumière au DEL droite 7 Boîtier électrique 3 Barre LED du pilier central 8 Cordon électrique 4 Boîtier de connexion électrique 9 Lumière au DEL gauche 5 Minuterie de dégivrage 10 Interrupteur PIÈCES 1 Evaporateur 7 Condenseur à fil 2 Moteur d évaporateur 8 Pale de ventilateur 3 Thermostat mécanique 9 Moteur de condenseur 4 É...

Page 34: ...ciaux indirects ou corrélatifs y compris sans limitation les pertes ou dommages résultant de la détérioration des aliments ou des produits qu ils soient ou non dus à une panne de réfrigération La garantie n est pas transférable Cette garantie n est pas cessible et s applique uniquement en faveur de l acheteur utilisateur d origine à qui la livraison a été effectuée Une telle cession ou un tel tran...

Page 35: ...avec Réfrigération New Air veuillez fournir les informations suivantes soit par courriel au service distex ca ou via le site web de www newairrefrigeration ca CARTE D ENREGISTREMENT DE GARANTIE NOM DU PROPRIÉTAIRE NOM DU RESTAURANT ADRESSE NUMÉRO DE MODÈLE NUMÉRO DE SÉRIE ADRESSE COURRIEL NUMÉRO DE TÉLÉPHONE DATE D ACHAT ...

Page 36: ...Réfrigération New Air NOTES NEW AIR REFRIGERATION 585 AVE MELOCHE DORVAL QC H9P 2T1 WWW NEWAIRREFRIGERATION CA 1 800 567 3620 ...

Reviews: