background image


Warnings and Precautions  

CAUTION: TO PREVENT ELECTRIC SHOCK, MATCH WIDE BLADE OF PLUG TO WIDE 

SLOT, FULLY INSERT.

WARNING: To reduce the risk of fire or electric shock, do not expose this apparatus to rain or 

moisture.

CAUTION: Use of any controls or adjustments or performance of procedures other than those 

herein specified may result in hazardous radiation exposure.

WARNING: Changes or modifications to this unit not expressly approved by the party 

responsible for compliance could void the user’s authority to operate the equipment.

WARNING: Do not place this unit directly onto furniture surfaces with any type of soft, porous, 

or sensitive finish. As with any rubber compound made with oils, the feet could cause marks or 

staining where the feet reside. We recommend using a protective barrier such as a cloth or a 

piece of glass between the unit and the surface to reduce the risk of damage and/or staining.

WARNING: Use of this unit near fluorescent lighting may cause interference regarding use of 

the remote. If the unit is displaying erratic behavior move away from any fluorescent lighting, as 

it may be the cause.

CAUTION: Danger of explosion if battery is incorrectly replaced. Replace only with the same or 

equivalent type.

WARNING: The battery, batteries, and battery pack shall not be exposed to excessive heat 

such as sunshine, fire, or the like. 

WARNING: Lithium batteries, like all rechargeable batteries are recyclable and should be 

recycled or disposed of in normal household waste. Contact your local government for disposal 

or recycling practices in your area. They should never be incinerated since they might explode.

WARNING: Shock hazard - Do Not Open.

WARNING: Mains Plug or Direct plug-in adapter is used as disconnect device and it should 

remain readily operable during intended use. In order to disconnect the apparatus from the 

mains completely, the Mains Plug or Direct plug-in adapter should be disconnected from the 

mains socket outlet completely.

WARNING: TO REDUCE THE RISK OF 
ELECTRIC SHOCK, DO NOT REMOVE COVER 
(OR BACK). NO USER-SERVICEABLE PARTS 
INSIDE. REFER SERVICING TO QUALIFIED 
SERVICE PERSONNEL. 

The lightning flash with arrowhead symbol, within an equilateral triangle, is intended to alert the 
user to the presence of uninsulated "dangerous voltage" within the product's enclosure that may 
be of sufficient magnitude to constitute a risk of electric shock to persons. 

The exclamation point within an equilateral triangle is intended to alert the user to the presence 
of important operating and maintenance (servicing) instructions in the literature accompanying 
the appliance. 

13

Summary of Contents for NVR-831 TBTU

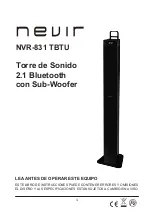
Page 1: ...TU Torre de Sonido 2 1 Bluetooth con Sub Woofer LEA ANTES DE OPERAR ESTE EQUIPO ESTE LIBRO DE INSTRUCCIONES PUEDE CONTENER ERRORES Y OMISIONES EL DISE O Y LAS ESPECIFICACIONES EST N SUJETOS A CAMBIO S...

Page 2: ...DVERTENCIA La bater a las bater as y el paquete de bater as no deben exponerse a calor excesivo como el sol directo el fuego o fuentes similares ADVERTENCIA Las bater as de litio como todas las bater...

Page 3: ...el punto en el que salen del producto 11 Use solamente aditamentos accesorios especificados por el fabricante En la caja debe haber Torre de sonido Bluetooth Adaptador de alimentaci n de enchufe redo...

Page 4: ...VOLUME Presione para reducir el volumen 7 Puerto USB 8 Antena de FM 9 Enchufe de entradas AUX L R IN 10 Enchufe de entrada LINE IN de 3 5 mm 11 Enchufe de entrada de corriente continua DC 12 Pantalla...

Page 5: ...resione de nuevo para restaurarlo 8 Bot n ALARM Presione para configurar la alarma 9 Bot n SLEEP Presione repetidamente para configurar el tiempo de sue o 10 Bot n TUN CLOCK Presione hacia atr s para...

Page 6: ...rucciones 1 Use solo el tama o y el tipo especificado de bater as 2 Aseg rese de respetar la polaridad correcta al instalar la bater a de la forma que se indica en el compartimento de las bater as Una...

Page 7: ...o en la unidad para entrar al modo USB el cual se indica por las palabras USb 2 Conecte una memoria flash USB u otro dispositivo de almacenamiento USB al enchufe de USB la m sica se cargar y se repro...

Page 8: ...raves seg n se desee 9 Presione los botones de modo de EQ para el ecualizador predefinido de MUSIC m sica MOVIE pel cula o VOICE voz para el efecto que se desee 10 Presione el bot n MUTE para silencia...

Page 9: ...la vez Apague el altavoz Bluetooth para emparejar el dispositivo con otro dispositivo Bluetooth 2 La m xima transmisi n entre el altavoz Bluetooth y los dispositivos es de 10 m o 32 pies 3 Puede ocur...

Page 10: ...iguraci n del temporizador SLEEP 1 Presione el bot n POWER para encender la unidad 2 Presione repetidamente el bot n SLEEP para seleccionar el temporizador predefinido Los tiempos predefinidos disponi...

Page 11: ...tavoz de torre No hay sonido en el modo Bluetooth Verifique que haya efectuado el emparejamiento Es necesario emparejar el reproductor de Bluetooth externo y el altavoz de torre con la contrase a 0000...

Page 12: ...duos existentes en su rea De igual manera debe extraer los residuos de pilas y o acumuladores antes de la entrega del RAEE a trav s de los canales de recogida separada habilitados al efecto distribuid...

Page 13: ...the same or equivalent type WARNING The battery batteries and battery pack shall not be exposed to excessive heat such as sunshine fire or the like WARNING Lithium batteries like all rechargeable bat...

Page 14: ...t where they exit from the apparatus 11 Only use attachments accessories specified by the manufacturer 12 This symbol indicates that this product incorporates double insulation between hazardous mains...

Page 15: ...volume 6 VOLUME Press to decrease the volume 7 USB port 8 FM antenna 9 AUX L R IN jacks 10 3 5mm LINE IN jack 11 DC jack in 12 LCD display 13 Remote Sensor 1 2 3 4 5 6 8 7 9 10 11 E EFFECTIVE DISTANCE...

Page 16: ...djust the treble up or down at MUSIC mode 6 SOURCE button Press to switch to Bluetooth FM AUX in LINE in or USB 7 MUTE button Press to mute the sound press again to resume 8 ALARM button Press to set...

Page 17: ...B BATTERY PRECAUTIONS Follow these instructions 1 Use only the size and type of battery specified 2 Be sure the follow the correct polarity when installing the battery as indicated in the battery com...

Page 18: ...y will show nIL USB Port MP3 Playback USB flash or USB storage device USB OPERATION 1 Press SOURCE button on the remote control or on the unit repeatedly to enter USB mode indicated by USb wording 2 C...

Page 19: ...wer speaker by the supplied Line In connection cable as the figure shown 2 Connect the tower speaker to the power as previous procedures The Standby indicator will turn on 3 Press the POWER button on...

Page 20: ...ime Turn off the Bluetooth speaker in order to pair the device with another Bluetooth device 2 The maximum transmission between the Bluetooth speaker and a deviceis 10 meters or 32 feet 3 Interferece...

Page 21: ...rm the setting and it will automatically go to minute setting 6 Press the TUN CLOCK or TUN CLOCK button on the remote control to adjust up or down the minute 7 Press MEM CLOCK button again on the remo...

Page 22: ...curing the front of the tower speaker No sound from in BT mode Check if you have pairing or not It needs to pair the external BT player and the tower speaker with password 0000 before 1st time listeni...

Page 23: ...ment The crossed out wheeled bin symbol on the product remind you of your obligations that when you dispose of the appliance it must be separately collected Besides that waste batteries and or accumul...

Page 24: ...ion s Directive s COMMISSION REGULATION EC No 1275 2008 LVD Reference No WTD 14S0413010S Test Standards EN 60065 2002 A1 2006 A11 2008 A2 2010 A12 2011 NB Expertise No 14 113413 Applied standards and...

Reviews: