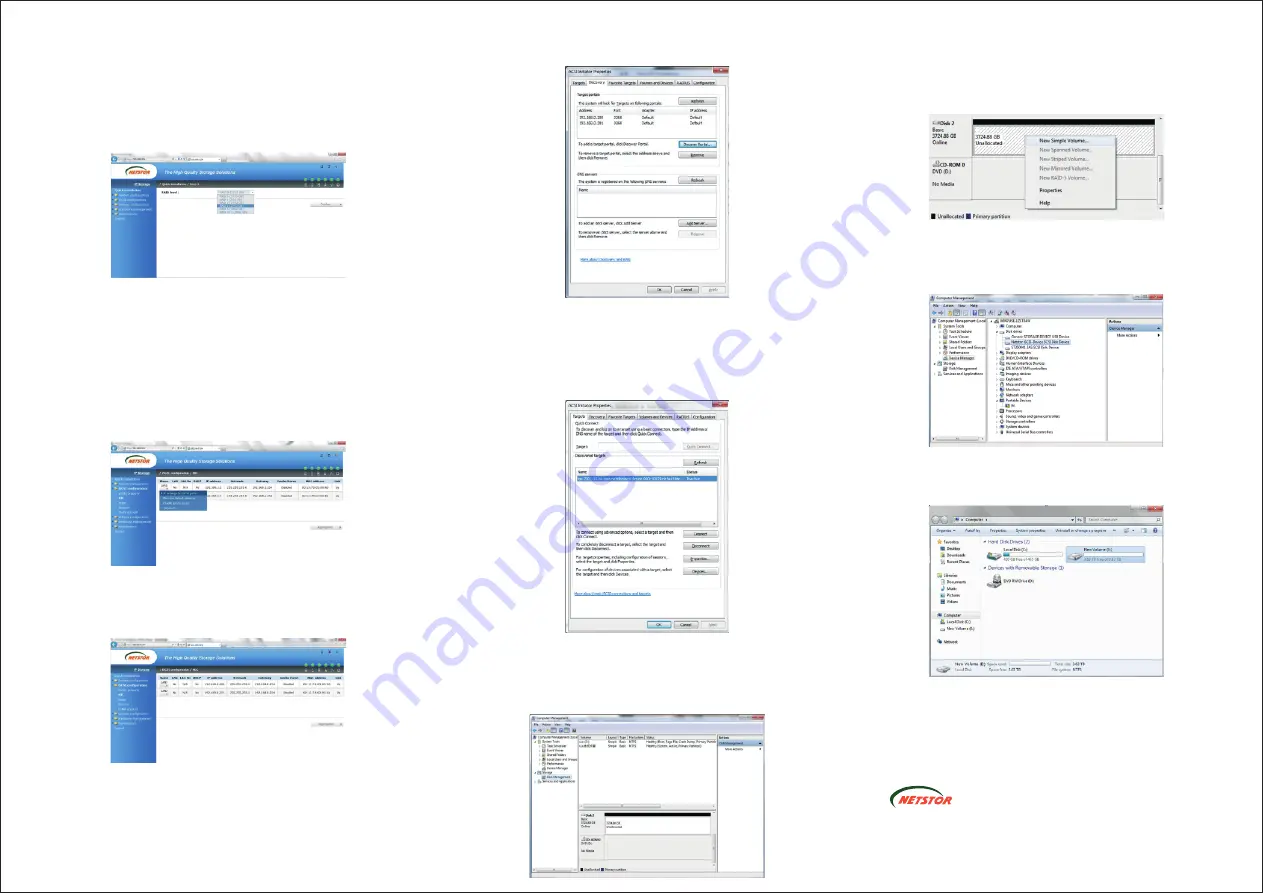
4. After you enter the web GUI, to perform a quick setup of RAID,
click
Quick installation
at the top on the left side of the screen.
Then you are able to select a RAID level (e.g. RAID 0, 1, 3, 5, 6,
0 + 1…etc.) for NR340A-IP2. After you have selected a RAID
level, press
Confirm
to proceed to the next step.
5. Information about the RAID level and the volume size that are
going to be created will be shown on the screen. Press
Confirm
to finish the setup. After you press Confirm, the RAID level and
the volume size will be created.
6. Click
iSCSI configuration
, and then click
NIC
. You will see LAN1
and LAN2 with its default IP address and Gateway address. To
change each LAN’s IP address and Gateway address for your
network environment, click
IP settings for iSCSI ports
, and key
in the IP address and Gateway address, and then click Confirm.
7. After the IP address and Gateway address have been changed,
remember those addresses for iSCSI Initiator’s
Target portals
in
the
Discovery
section in iSCSI Initiator.
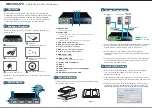
8. Open the iSCSI Initiator. Select
Discovery
, and then click
Discover Portal
. Key in the IP addresses shown from
iSCSI
configuration > NIC
for LAN1 and LAN2.
9. Select
Targets
in iSCSI Initiator. Click the item “iqn.2001-10.tw.
com.netstor:iscsi-device-000c10021:default-target” shown in the
Discovered targets, and then press
Connect
. The window of
“Connect To Target” will pop up. Select “Add this connection to
the list…” and “Enable multi-path”, and click
OK
. After you press
OK, the status of the item will become “Connected”.
GbE iSCSI to SATA II/III Chassis
NR340A-IP2
6F, No. 1, Alley 16, Lane 235, Baoqiao Rd., Xindian District,
New Taipei City 231-45, Taiwan, R.O.C.
Tel: +886-2-2917-1500 Fax: +886-2-2918-1260
E-mail: [email protected]
Netstor Technology Co., Ltd.
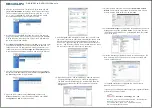
11. Right-click the RAID volume, and select
New Simple Volume
Wizard
. Complete the steps shown in the New Simple Volume
Wizard, and the RAID volume will be formatted.
12. Click
Device Manager
on the left side of the window of Computer
Management, and then click
Disk drives
. You will see “Netstor
iSCSI-Device SCSI Disk Device” (indicating NR340A-IP2) shown
under “Disk drives”.
13. After the formatting of the RAID volume, left-click Computer. The
New Volume will be shown, and you are able to use the RAID
volume on NR340A-IP2.
10. Right-click Computer, and select Manage. After the window of
Computer Management shows up. Click Disk Management.
The RAID volume (Unallocated) you created on NR340A-IP2
will be shown at the bottom part in the window of Computer
Management.
For detailed configuration of NR340A-IP2, please refer to
NR340A-IP2’s user’s manual.
If you have any questions, please contact your regional distributor,
or Netstor Technology, Taiwan.


