WARNING: Do not force the levers to close while you insert
drive modules into the NR170S enclosure. If a lever does not
close smoothly, draw out and inlay the drive module again,
and then press the lever to close.
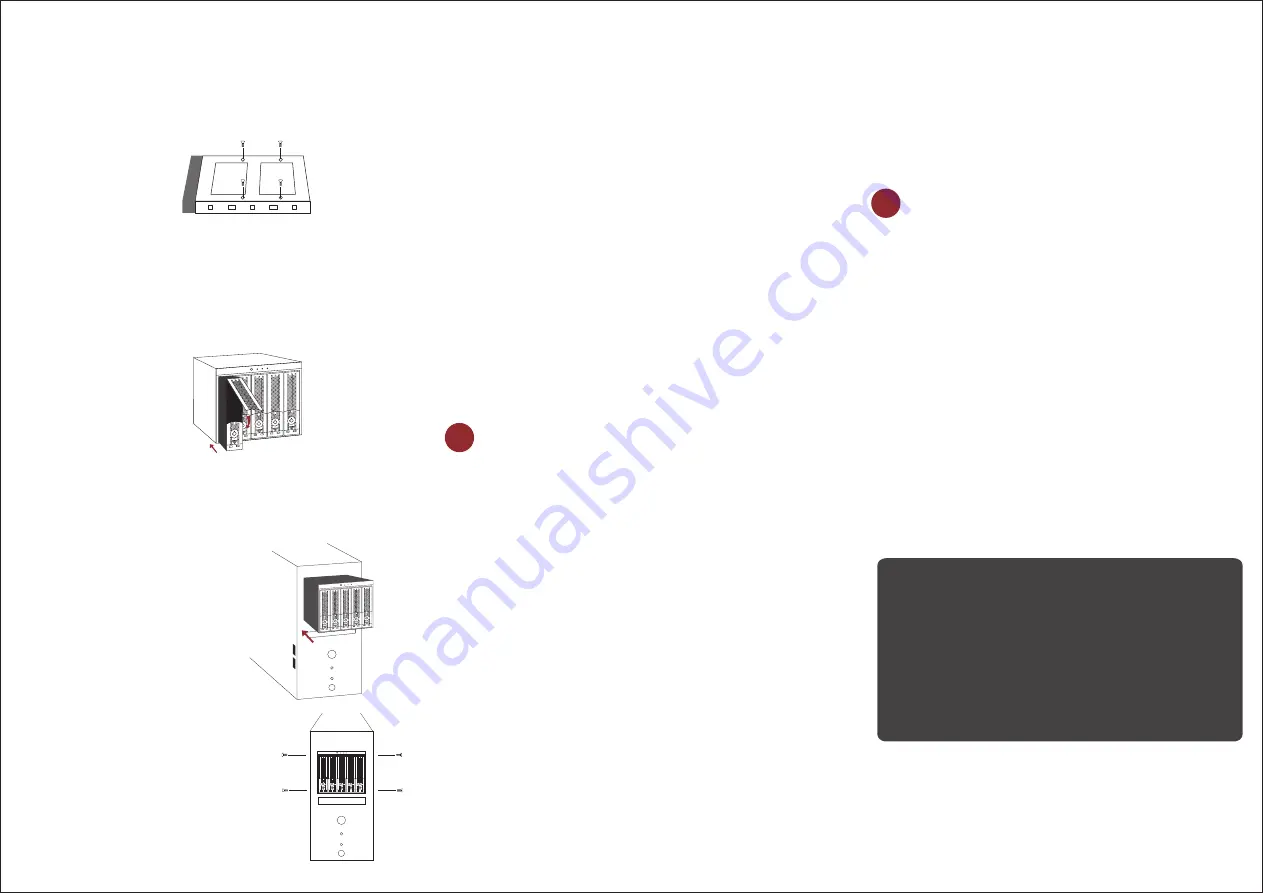
5. Insert the drive module into the NR170S enclosure correctly
until its lever appears to shut, and then press the lever to close
until it clicks to ensure that the drive module is within the
enclosure.
6. Go over steps 2 to 6 again for further drives.
7. Open the case from a PC, a server, or a workstation. Take
off three 5.25” bay lids on the front panel of the PC, server,
or workstation to provide an outlet for the module.
8. Insert the NR170S into the outlet
created by step 7.
9. Once the module is inserted and the
front panel of the module is level with
the front panel of PC, server, and
workstation, tighten four screws on
each side of the module inside the
PC, server, or workstation.
The following is an example for Windows operating system.
1. Copy the folder
RAID_AP_v1.8
from the CD to your computer.
2. Open the folder
RAID_AP_v1.8
from your computer, and then
open the sub-folder
Netstor_RAID_Server
. Execute program
ManagementServerSetup
.
3. Go to folder
Netstor_RAID_AP
under
RAID_AP_v1.8
, and
execute
RAID_AP_v1.8
, and then an interface shows up.
4. After the interface appears, you are required to input data for
three entries: the IP address, the user name, and the
password, and then input
localhost
for the IP address,
admin
for the user name, and
111111
for the password. After you
input the data, click
Connect
.
5. After the partition and the format, go to My Computer and you
will see the newly created volume.
6. Select the disk drives you want to use for RAID, and then
select a RAID level from RAID 0 to RAID 10. After you select
a RAID level, click
Apply
.
1. Right click
My Computer
, and then select
Manage
.
2. Click
Disk Management
from the left column of the
window. If a dialog that reads
Initialize and Convert
Disk Wizard
shows, click
Cancel
to close it. All the
hard disk drives will be identified and listed by the
system. Right click the device from Netstor, and then
choose
Initialize Disk
.
3. Right click the bar that indicates the disk for the RAID
system, and then choose
New Partition
.
4. Follow the procedures from the New Partition Wizard
to complete the partition.
5. After the partition and the format, go to My Computer
and you will see the newly created volume.
● For detailed information on RAID configuration,
please see System Configuration Guide.
Note:
1. Operating systems that allow disk volume larger than 2
Terabytes (2048 Gigabytes) include:
Windows Vista, Windows 7, and Windows Server 2008.
2. If you want to use multiple RAID volumes, your system
should meet either of the following requirements.
A. The motherboard’s SATA port should support port
multiplier function.
B. The system should have an internal SATA card with port
multiplier function.
10. Connect one end of SATA cable to the SATA port on the
NR170S. Make sure the connector is fastened to the enclosure.
11. Connect the other end of SATA cable to the SATA port that
features port multiplier on motherboard or SATA add-on card
inside PC, server, or workstation. Verify the connector is firmly
conjoined.
12. Connect two Molex connectors to the NR170S module from the
power supply inside PC, server, or workstation. Verify the power
cables are firmly connected.
13. Close the case from PC, server, or workstation, and then switch
on your PC, server, or workstation.
7. A confirmation of RAID configuration shows up, and
click
Yes
to continue, and then the RAID will be
created.
●
If the chassis of PC, server, or workstation has plastic lock for
5.25” drive bay from one side, push the plastic lock forward
until it clicks to secure the NR170S module inside the PC,
server, or workstation.
5.
Quick RAID Configuration
6.
Disk Partition and Format
4. Adopt four of the screws provided, and fasten the tray on
the hard disk drive. Tighten each screw to fasten the
drive tray snugly to the hard disk drive. Do not tighten the
screws overly.
NR170S
Internal 5-Bay SATA Disk Array Storage System
•
For Windows operating system


