Technical Information
Getting Started – New NetPilot Range
20
Configuring the NetPilot unit
NetPilot Connection Configuration
After connecting NetPilot to your network, and completing all other
installation instructions in the previous chapter, you may switch on your
NetPilot. When NetPilot issues its final ready beep (this could take up to
three minutes) it is ready for you to configure. This can be done using the
Internet browser of any PC on the same network as NetPilot.
Initially
the NetPilot’s LAN1 and LAN2 interfaces are set to ‘Quick configuration’
profile, allowing the unit to pick up you network configuration. Please
always make sure that during the installation you change this to a profile
suitable for your LAN interfaces.
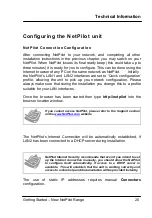
Once the browser has been started then type
into the
browser location window.
If you cannot access NetPilot, please refer to the Support section
on the
website
The NetPilot’s Internet Connection will be automatically established, if
LAN2 has been connected to a DHCP server during installation.
NetPilot Internet Security recommends that even if you intend to set
up the Internet connection manually, you should allow the NetPilot
to configure itself automatically, if access to a DHCP server is
available. This will establish that the unit is working correctly and
access to online help and documentation will be provided instantly.
The use of static IP addresses requires manual
Connectors
configuration.


