Netis WF2222 Quick Installation Manual Download Page 8

4. Networ k Configuration

The netis Access Point supports multiple modes including AP, Multi-SSID (VLAN), 
Repeater, WDS and Client. In default, netis Access Point works in AP mode, it can be 
used to create one or more wireless networks from an Ethernet connection. It is 
suitable for the room where there's already a wired router but you need additional 
wireless hotspots. 

Here we provide the step-by step configuration process of AP mode. 

Step 1

: Power on all the devices.

Step 2

: Search and connect to the netis Access Point's network “

netis_XXXXXX

” on 

your wireless computers or mobile devices. The 

XXXXXX

 is the last 6 digits of the 

Access Point's MAC address. The default wireless password is “

password

”.

If your main router is already connected to the Internet, you'll be online through 
your wireless computers or mobile devices now!

If you want to change the default wireless network name and password for netis 
Access Point or set up more wireless networks (

Multi-SSID

 mode), please go on with 

the steps.

Step 3

: Open your browser on your wireless computer and type “

http://netisap.cc

” in 

the address field to visit netis Access Point's web management page.
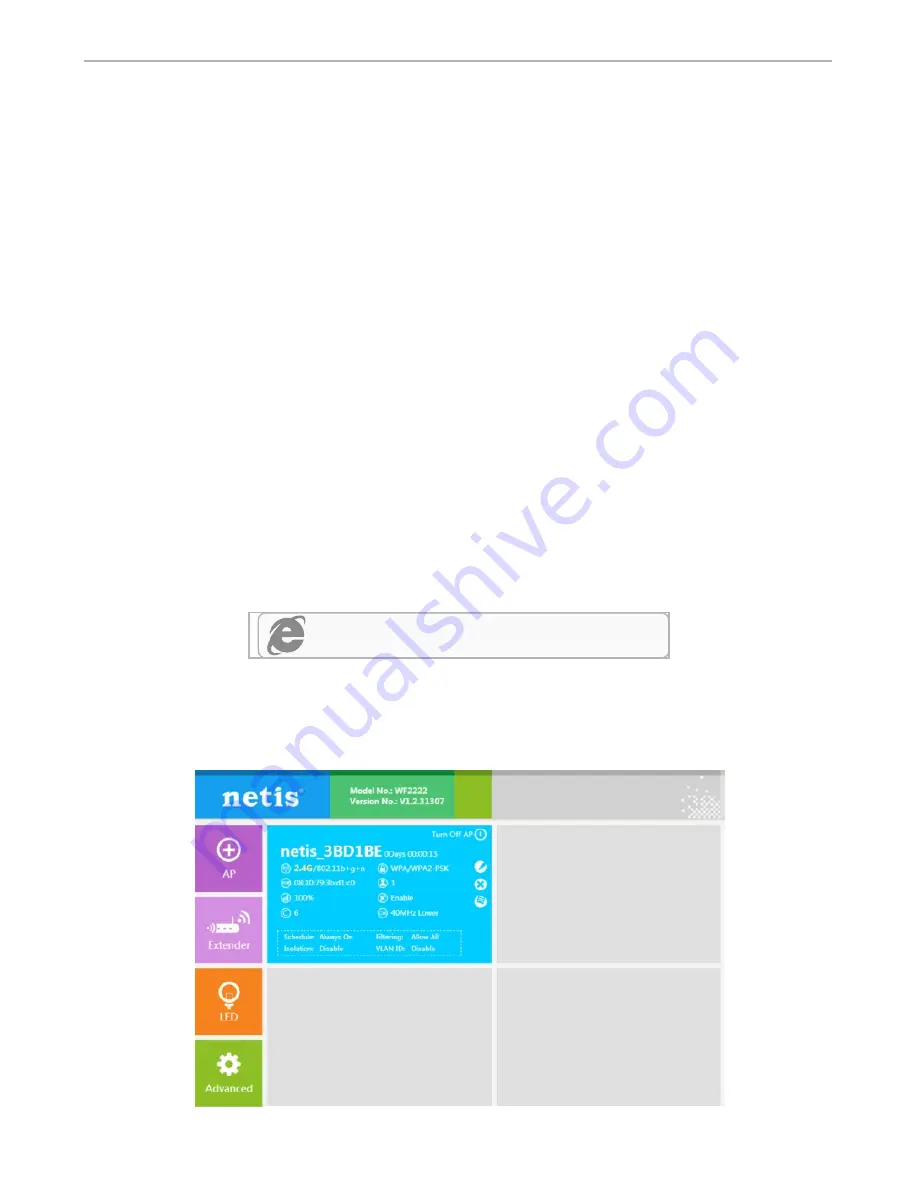
Step 4

: In this 

Quick Setup

 page, you will see the blue section for the default wireless 

network “

netis_XXXXXX

”. 

http://netisap.cc

netis Wireless N Ceiling-Mounted Access Point


Quick Installation Guide

6

Summary of Contents for WF2222

Page 1: ...netis Wireless N Ceiling Mounted Access Point Quick Installation Guide R Model No WF2222...

Page 2: ...onnection A Via PSE Device B Via PoE Power Injector C Via Power Adapter 4 Network Configuration 5 Hardware Installation A Ceiling Mounting B Wall Mounting Troubleshooting Appendix A LED Locator Append...

Page 3: ...a Mounting Bracket Wing Nuts Washers Plastic Wall Anchors Self tapping Screw and Pan head Screws Wing Nuts 4 Washers 4 Plastic Wall Anchors 4 Self tapping Screw 4 Pan head Screws 4 2 1 Front Panel R L...

Page 4: ...h Ethernet cable PWR The LAN2 port is used to a router to transmit data or to the provided PoE Power Injector for both data transmission and Power over Ethernet through Ethernet cable The Default butt...

Page 5: ...etis Access Point to your PSE device PoE Switch with an Ethernet cable 2 Then go to 4 Network Configuration to configure WF2222 Router Internet netis Wireless N Ceiling Mounted Access Point Quick Inst...

Page 6: ...ector with an Ethernet Cable 2 Connect the LAN2 port of netis Access Point to the PoE port on the PoE Power Injector with an Ethernet Cable 3 Plug the Provided Power Adapter into the DC IN jack on the...

Page 7: ...in router to the LAN1 port or LAN2 port of netis Access Point 2 Plug the Provided Power Adapter into the PWR port of netis Access Point and the other end to a stand electrical wall socket 3 Then go to...

Page 8: ...mobile devices The XXXXXX is the last 6 digits of the Access Point s MAC address The default wireless password is password If your main router is already connected to the Internet you ll be online thr...

Page 9: ...connected to the netis Access Point s network with default wireless name and password Once the new settings take effect you d better search for the new one and connect to it with the new password Sit...

Page 10: ...ess Point supports up to 3 different AP networks in one time You may click the icon for each network to change the settings for the corresponding section When using Multi SSID you can assign different...

Page 11: ...5 Hardware Installation The netis Access Point can be ceiling mounted or wall mounted according to your setup we particularly recommend the ceiling mounted Note Make sure the thickness of the ceiling...

Page 12: ...ch is 5cm in front of the U shaped notch for the Ethernet cable to feed through Mark the positions of the four mounting slots and an Ethernet cable hole Step 2 According to the positions that marked d...

Page 13: ...thernet cable to the Ethernet port of netis Access Point Step 5 Set the ceiling tile back into place then fix netis Access Point to the mounting bracket by aligning arrows as shown below R R netis Wir...

Page 14: ...r holes on the wall Please note that the U shaped notch must be consistent with the actual direction of the network Mark the positions of the four mounting slots Step 2 Attach the mounting bracket to...

Page 15: ...lastic Wall Anchor Self tapping Screw Step 4 Fix netis Access Point to the mounting bracket by aligning arrows as shown below netis Wireless N Ceiling Mounted Access Point Quick Installation Guide R 1...

Page 16: ...factory default Q What can I do if I cannot access my Access Point s web management page 1 Check the hardware connection according to your Hardware Connection and make sure that your computer is conne...

Page 17: ...ter and type http netisap cc in the address field to visit netis Access Point s web management page 2 In quick setup page click on the LED tab on the left 3 Set the LED Locator Timing and click on the...

Page 18: ...Protocol Version 4 TCP IPv4 5 Select Use the following IP address and enter the address manually in corresponding field then click OK For Window XP 2000 1 Go to Start Control Panel 2 Left click on Ne...

Page 19: ...na Increase the separation between the equipment and receiver Connect the equipment into an outlet on a circuit different from that to which the receiver is connected Consult the dealer or an experien...

Reviews: