


7. HARDWARE SETUP
USB cameras
Computer
SceneScan
Ethernet
Synchronization cable
USB cables
Power supply
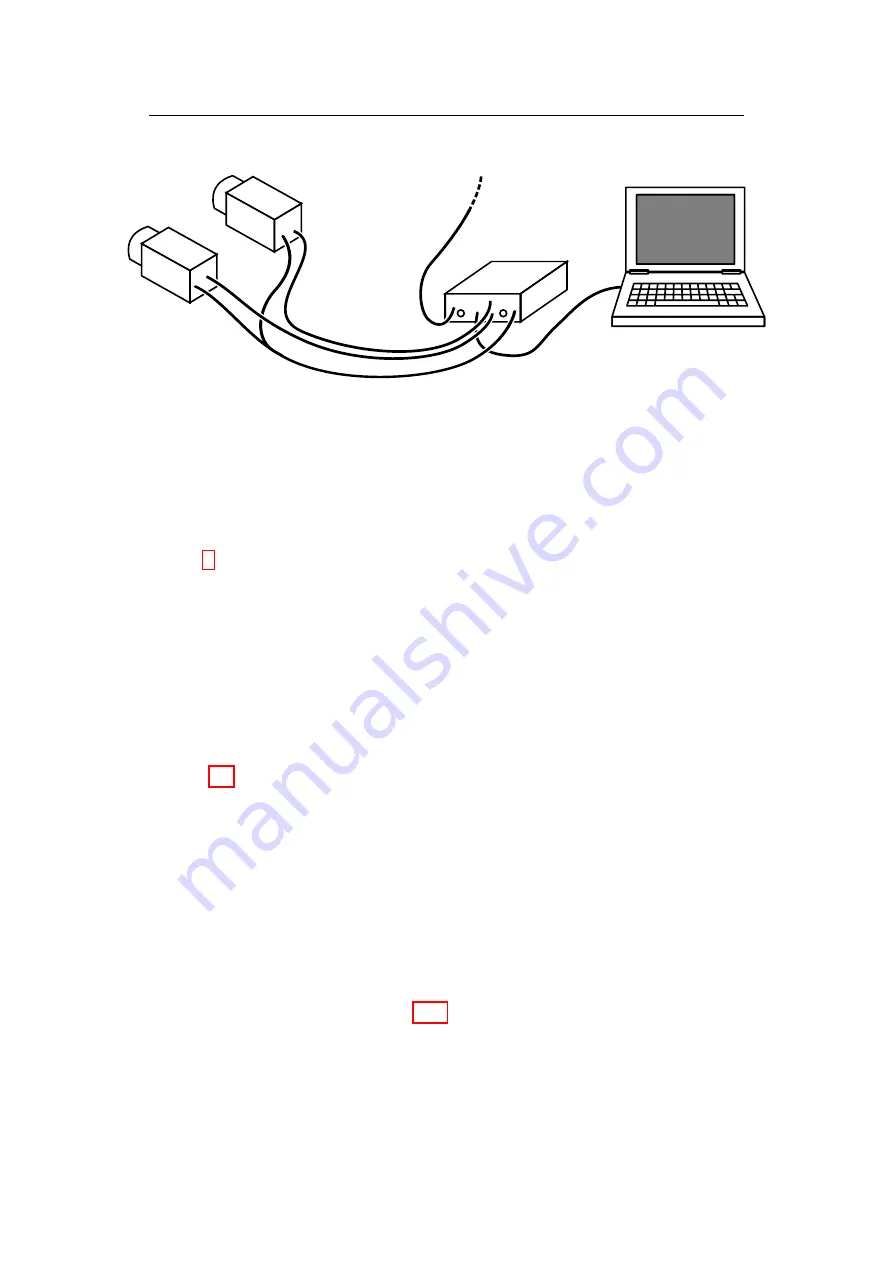
Figure 6: Example setup for cameras, SceneScan and client computer.
7 Hardware Setup
7.1 Basic Setup
Figure 6 shows a basic system setup for stereo vision. A client computer that
receives the computed depth data is connected to SceneScan's ethernet port.
Two cameras are connected to the two available USB ports. As an alternative,
it is possible to connect Nerian's dedicated Karmin2 stereo camera to one USB
port.
The image acquisition of both cameras must be synchronized. SceneScan
will only process frames with a matching time stamp. Operating the cam-
eras in free-run mode will thus result in dropped frames and er-
roneous results for non-static scenes. In a typical conguration, syn-
chronization requires connecting the cameras to SceneScan's trigger port (see
Section 7.7), but it is also possible to use other external trigger sources.
7.2 Networking Conguration
It is highly recommended to connect SceneScan directly to the host computer's
ethernet port, without any switches or hubs in between. This is because Scene-
Scan produces very high-throughput network data, which might lead to packet
loss when using network switches that cannot meet the required performance.
It must also be ensured that the host computer's network interface can handle
an incoming data rate of up to 500 MBit/s.
For maximum performance, SceneScan should be congured to
use Jumbo Frames (see Section 9.12). By default, Jumbo Frame support is
disabled, as this requires an appropriate conguration of the host computer's
network interface. In order to activate Jumbo Frame support in Windows,
please follow the following steps:
1. Open `Network and Sharing Center'
10