


AI Wireless Module (AWM) - Setup Guide
Page 8
Moonlights:
In this example, we create a profile called ‘moonlight’ with a 1% intensity on the Deep Blue channel and 6% on
the UV channel, turning our Hydra into a moonlight:
1.
Create a profile, name it ‘moonlight’.
2.
Set all the color channels to 0 except Deep Blue at 1% and UV at 6% You could also use Royal Blue if
you like that color better – both of these blue channels have 4 LED’s on the Hydra (see the chart above
for the Vega). If that’s still too bright for your taste then try using the Violet channel instead – it has
only 2 LED’s
3.
Set the begin and end intensities to 1 and the ramp time to 0.
Fallback OFF
If Time 08:00 to 10:00 Then RampUp
If Time 10:00 to 16:00 Then Day
If Time 16:00 to 18:00 Then RampDn
If Time 18:00 to 08:00 Then moonlight
*If you wanted a smoother progression you could modify RampDn to go down to 10%, then modify the
moonlight profile to begin at 10%, end at 1% and have a ramp time of 60 (minutes). Ending the ramp before
the ‘If time’ expires is valid – the fixture will just remain at whatever the ending ramp intensity is until another
program statement modifies it.
Weather:
There’s another type of profile that you can use with AI Hydra and Vega fixtures – the ‘Weather’ type profile.
This profile lets you define cloudy periods as well as periods with lightning. Then using additional ‘If Time’
statements you can mix these weather events into your daily light strategy. Here’s how:
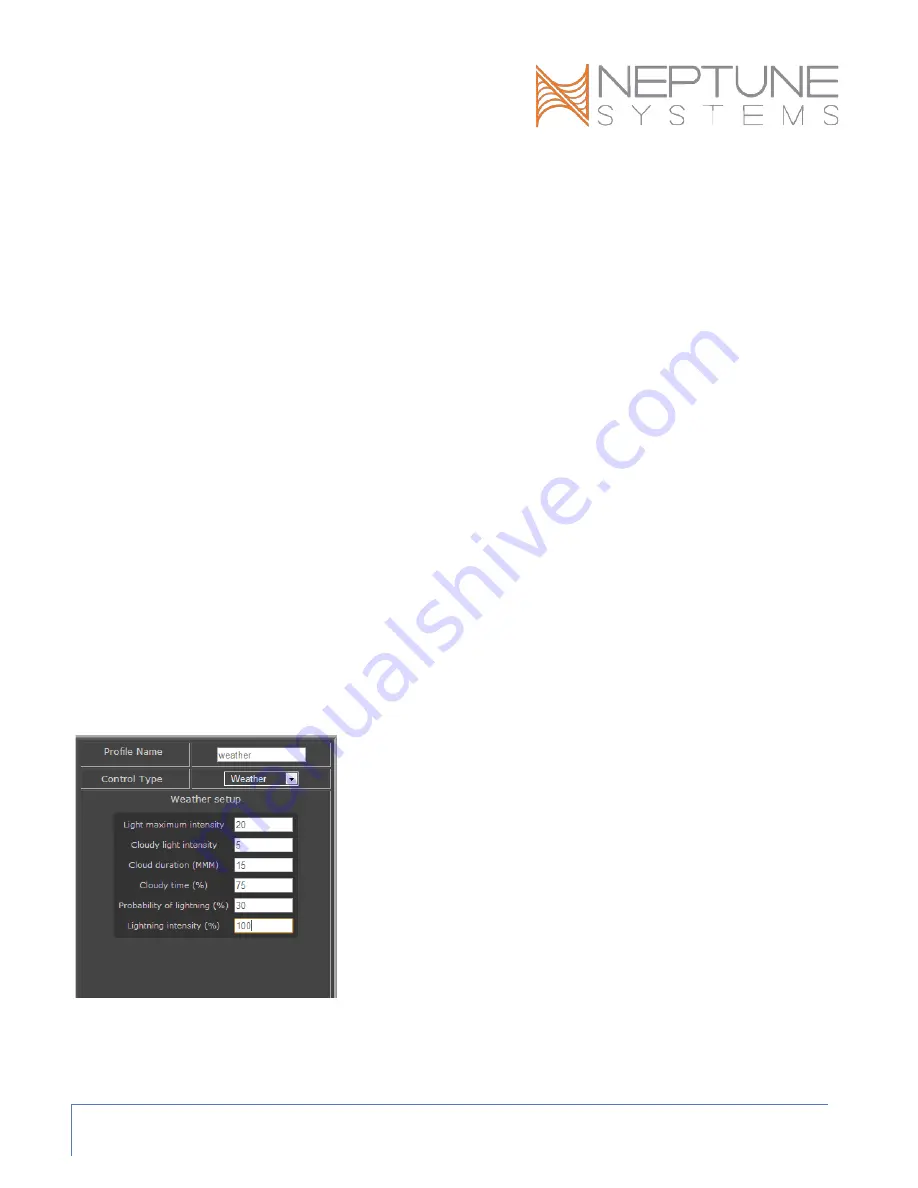
Begin by creating a new profile using the ‘weather’ control type. Name
this profile as you wish. The following fields are used:
Light Maximum Intensity (%): the lighting intensity during periods
other than cloudy – this could be sunny or simply overcast.
Cloudy light Intensity (%): the intensity of the lights during a cloudy
period – this could be stormy if you use the light intensity to represent
overcast.
Cloud Duration (MMM): the number of minutes for each cloudy
period.
Cloudy Time (%): the percent of time that it will be cloudy. This is
applied against the length of time you chose to run this profile. If you run this profile for 60 minutes with 75%
cloudy time then cloudy time will be 45 minutes. With a 15 minute cloud duration in the example that would
mean 3 cloudy periods over the 60 minutes.


