page 26
6.
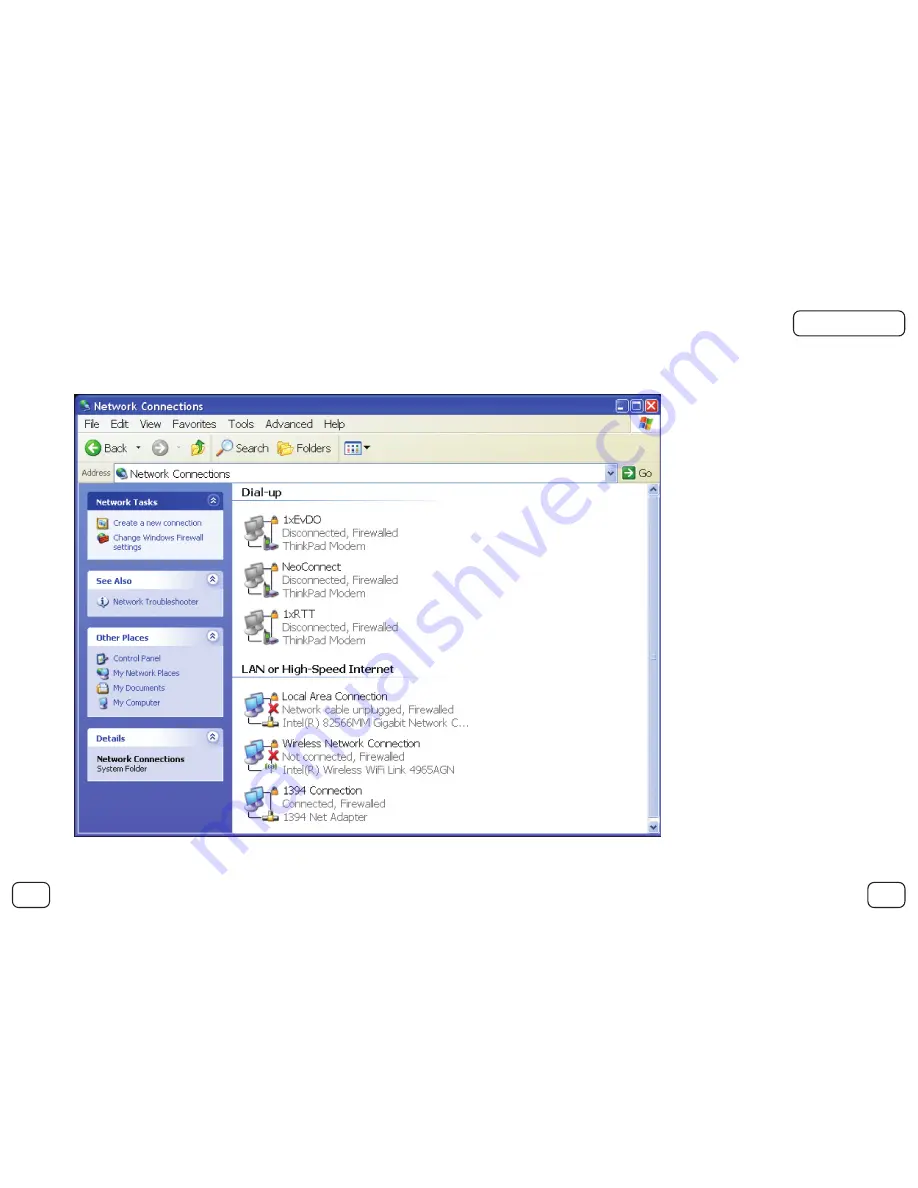
You will be presented with a screen similar to the one below.
Connecting via Windows XP
Back
Back to contents page
Next
Page 1: ...www neotel co za Call 0800 333 636 NeoFlex Data Wi Fi guide...
Page 2: ...contents 1 Security Warning and Disclaimer 2 Connecting the NeoFlex device to your computer 3 Switching the wireless LAN on 4 Enabling your security settings 5 Connecting via Windows XP 6 Connecting v...
Page 3: ...reby placing the personal information of the user at risk In order to avoid or prevent the risk stated above the user is required to follow the instructions in the NeoFlex Data Wi Fi Guide to successf...
Page 4: ...the other end of the Ethernet cable into your computer Switch the Device on 5 Your computer will now be assigned an address from the device and you will be able to connect to the Internet 3 Connect t...
Page 5: ...xplorer 2 Enter the address 192 168 0 1 into the address bar the same place you would normally enter any website address e g www neotel co za Connecting the NeoFlex device to your computer Switching t...
Page 6: ...page 6 3 The following dialog box will now appear Connecting the NeoFlex device to your computer Back Back to contents page Next...
Page 7: ...page 7 4 Enter the User name as admin 5 Enter the Password as admin 6 Click on the OK Button Connecting the NeoFlex device to your computer Back Back to contents page Next...
Page 8: ...page 8 7 The following page will now be displayed in your web browser Connecting the NeoFlex device to your computer Please turn over the page Back Back to contents page Next...
Page 9: ...8 On the left hand side of the screen you will see the following menu 9 Under the Advanced heading click on wireless settings Connecting the NeoFlex device to your computer Back Back to contents page...
Page 10: ...page 10 10 You will now be presented with the following screen Connecting the NeoFlex device to your computer Please turn over the page Back Back to contents page Next...
Page 11: ...In the middle pane you will see the following check boxes 12 Check the box next to the text Wireless On 13 Click on the APPLY Button Connecting the NeoFlex device to your computer Back Back to content...
Page 12: ...page 12 14 The following dialog box will pop up 15 Click on the OK Button Connecting the NeoFlex device to your computer Back Back to contents page Next...
Page 13: ...16 On the left hand side of the screen you will see the following menu 17 Click on System Settings under the Maintenance heading Connecting the NeoFlex device to your computer Back Back to contents pa...
Page 14: ...page 14 18 You will be presented with the following screen Connecting the NeoFlex device to your computer Please turn over the page Back Back to contents page Next...
Page 15: ...15 19 Under the reboot settings heading towards the bottom of the middle pane you will see the RESTART button Click RESTART Connecting the NeoFlex device to your computer Back Back to contents page N...
Page 16: ...2 Once the device has restarted your Wireless LAN will be on 23 You can confirm this by looking at the LED next to the label Wi Fi on the top of your device IMPORTANT PLEASE ENSURE THAT YOU ENABLE SEC...
Page 17: ...page 17 1 If you have continued on from the previous steps you will be presented with the screen below Enabling your security settings Please turn over the page Back Back to contents page Next...
Page 18: ...page 18 2 In the left hand pane under the Setup heading select the wireless settings sub heading it is the second sub heading Enabling your security settings Back Back to contents page Next...
Page 19: ...ou will be presented with the following screen 4 In the middle of the screen you will see the following options under the heading Security Options Enabling your security settings Back Back to contents...
Page 20: ...rks by essentially creating a password or WEP key based on the phrase that is used All computers wishing to connect to the network will require this WEP key To enhance the security of WEP the key can...
Page 21: ...that the Keys listed Key 1 Key 2 etc now have a value next to them 9 Keep a copy of these keys somewhere as they will be needed to set up other computers so that they can connect to the NeoFlex devic...
Page 22: ...page 22 13 On the left hand side of the screen you will see the following menu 14 Click on System Settings under the Maintenance Heading Enabling your security settings Back Back to contents page Next...
Page 23: ...presented with the following screen 16 Under the reboot settings heading towards the bottom of the middle pane you will see the RESTART button Click RESTART Enabling your security settings Back Back...
Page 24: ...ollowing dialog box will pop up 18 Allow the system to Restart this may take a few moments 19 Once the device has restarted your WEP Security will be on Enabling your security settings Back Back to co...
Page 25: ...your computer 2 Switch your computer s Wireless LAN on 3 Click Start My Network Places 4 You will be presented with the My Network Places window On the left hand side of this window you will see the...
Page 26: ...page 26 6 You will be presented with a screen similar to the one below Connecting via Windows XP Back Back to contents page Next...
Page 27: ...page 27 7 Click the Wireless Network Connection link once highlighted below Connecting via Windows XP Back Back to contents page Next...
Page 28: ...e menu on the left hand side of the screen expands and now shows the View available wireless networks link as shown below 9 Click on the View available wireless networks link Connecting via Windows XP...
Page 29: ...indow similar to the one below will pop up 11 On the left hand side you will see the Network Tasks box click on the Refresh network list link as shown below Connecting via Windows XP Back Back to cont...
Page 30: ...oFlex device is listed in this example it is called AxessMV400 If you changed the SSID name of the device yourself the name you chose will be presented here 13 Click once on the Link AxessMV400 or the...
Page 31: ...nnect is visible Click on the Connect button 15 A window will pop up asking you to enter the WEP key you created earlier enter your WEP key and confirm the WEP key on the second row 16 Now click on th...
Page 32: ...your computer attempts to connect to the NeoFlex Device 18 Once your computer has connected the above window will disappear and you will see a screen similar to the one on the following page Connecti...
Page 33: ...age 33 19 You will see that your device is now listed as Connected Congratulations your computer is now connected and you can surf the Internet Connecting via Windows XP Back Back to contents page Nex...
Page 34: ...via Windows Vista 1 Remove the Ethernet cable from the device and from your computer 2 Switch your computer s Wireless LAN on 3 Click Start Connect To 4 The following window will pop up Back Back to...
Page 35: ...page 35 5 At the top of this window you will see the drop down box stating All 6 Click on the down arrow and select Wireless Connecting via Windows Vista Back Back to contents page Next...
Page 36: ...only the Wireless LANs available 8 You will see the Wireless LAN AxessMV400 or whatever you may have changed the name of your device to You may have to scroll to see this connection Connecting via Wi...
Page 37: ...page 37 9 Click once on the AxessMV400 link 10 You will see that the Connect Button now becomes highlighted Click on the Connect Button Connecting via Windows Vista Back Back to contents page Next...
Page 38: ...page 38 11 The following screen will now appear Connecting via Windows Vista Back Back to contents page Next...
Page 39: ...page 39 Connecting via Windows Vista 12 In the box beneath the heading security key or passphrase enter the WEP key you recorded earlier 13 Click on the Connect button Back Back to contents page Next...
Page 40: ...ill see the screen below when your device has connected 15 You can choose to save this network and or to start this connection automatically 16 Click Close Connecting via Windows Vista Back Back to co...
Page 41: ...ask whether you would like to assign the device to a Home or Office Network The choice is yours 18 After making the above decision you are able to connect wirelessly to your NeoFlex device Connecting...