
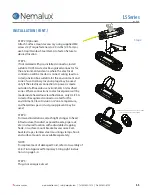
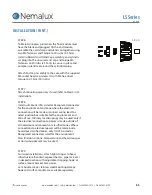

STEP 2 (Optional):
Attach Surface mount accessory using supplied M4
screws (2). Torque fasteners to 20 in-lbs (2.3 N-m) or
use Strap/Stainless Steel Clamp to fasten fixture to
desired location.
STEP 3:
If not ordered with pre-installed connector, install
suitable UL/CSA Listed or Recognized connector for
the environment and zone where the electrical
connection will be made or connect wiring lead to a
Listed junction box suitable for the environment and
zone of use. Ordinary location plugs may be used
only if the electrical connection to power is made
outside of all hazardous environments or classified
zones. Where connections to electrical power will be
made inside hazardous classified zones, only UL/CSA
Listed or Recognized connectors rated for the
environment, Class/Division or Zone, temperature,
and hazardous gas or dust group present may be
used.
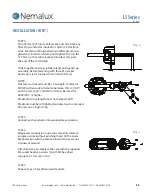
STEP 4:
For raised installations, attach light stringer to fixed
infrastructure (handrail, exposed beams, pipe rack,
etc.) in desired location with adjustable strapping,
hook, or surface mount bracket accessories. Cam
buckle straps, stainless steel mounting clamps, hook
and surface mounts are available separately.
NOTE:
For replacement of damaged Cord, refer to Assembly of
LS-KIT into Approved Temporary String Light instruc
-
tions on page 3-4.
STEP 5:
Plug-in or energize circuit.
INSTALLATION (CONT.)
2
1
STAINLESS STEEL STRAP ACCESSORIES
ARE AVAILABLE IF REQUIRED
TM
Nemalux
I N D U S T R I A L
LS Series
rev. A-20
3-6
www.nemalux.com | [email protected] | Tel 403•242•7475 | Fax 403•243•6190
MADE IN CANADA
Step 2