background image

www.nektartech.com                                              Nektar Panorama P4: Quick Start Guide    

11


QUICK TIPS: GLOBAL SETTINGS 

About Quick Tips 

In this section we aim to provide you with a set of quick tips for the most common operations of a MIDI 
controller. If you have experience with MIDI and controller keyboards, chances are that this is all you 
need to know to get going.  


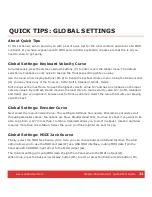
Global Settings: Keyboard Velocity Curve 

Simultaneously press the Octave up/down buttons (C) to enter or exit the Global menu. The default 
selection is Transpose so it’s quick to change the Transpose setting while you play.  

Use the menu arrow display buttons (M1-2) to locate the Keyboard Curve menu. Using the Data encoder 
(O) you can choose any of the 5 curves: Soft2, Soft1, Standard, Hard1, Hard2.  

Soft2 requires the most force to reach the highest velocity value 127 and has an emphasis on the lower 
velocity values. By contrast, Hard2 requires the least force to reach velocity value 127. Soft1, Standard 
and Hard1 give you options in between each of these extremes. Select the curve that suits your playing 
style the best.  


Global Settings: Encoder Curve 

Next select the menu Encoder Curve. This setting determines how quickly Panorama’s encoders scroll 
through parameter values; the options are Slow, Standard and Fast. You may like Fast if you want to be 
able to go from 0-127 in less than 1 rotation. Standard allows you to do it in about 1 rotation and Slow 
requires more than one rotation. Select the curve you think might work best for you.  


Global Settings: MIDI Jack Source


Finally, select the MIDI Jack Source (Src). Here you can choose between USB and Internal. The USB 
option allows you to use the MIDI Out jack(W) as a USB MIDI interface, routing MIDI data from the 
Panorama P4 USB MIDI input driver to the MIDI output jack.  

The Internal setting will route MIDI data straight from Panorama to the MIDI out jack(W).  

When done, press the back arrow display button (M5) to exit or press the Internal mode button (K4). 


Summary of Contents for Panorama P4

Page 1: ...www nektartech com Nektar Panorama P4 Quick Start Guide Quick Start Guide ...

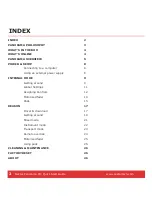
Page 2: ... 8 Connecting to a computer 8 Using an external power supply 8 INTERNAL MODE 9 Getting around 9 Global Settings 11 Assigning Controls 12 Motorized fader 14 Pads 15 REASON 17 Driver download 17 Getting around 19 Mixer mode 21 Instrument mode 22 Transport mode 23 Remote override 24 Motorized fader 25 Using pads 25 CLEANING MAINTENANCE 26 FACTORY RESET 26 ABOUT 26 ...

Page 3: ...I messages or use our dedicated communication protocols to control supported software such as Reason by Propellerhead Software And while controller hardware can never be as flexible as the software it controls we provide a well thought out set of controls and buttons in a logical layout that makes it easy to find exactly what you need Our ultimate goal with Panorama is to make your experience in t...

Page 4: ...as not included please let us know via email stuffmissing nektartech com WHAT S ONLINE Additional documentation drivers and support software are available online which is also where you will find any future firmware updates If you plan to operate Panorama with a computer make sure to register Panorama to get access to the extra material If you plan to use Panorama without a computer we still recom...

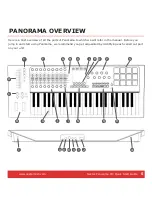
Page 5: ...IEW Here is a brief overview of all the parts of Panorama to which we will refer in the manual Before you jump in and start using Panorama we recommend you get acquainted by identifying each called out part on your unit A B C D E F G H K L M O P S T U V W X Y Z I J N Q R Æ ...

Page 6: ...ght LED buttons when used with dedicated communication protocols Four Mode buttons Used to switch between Mixer Instrument Transport and Internal modes but also double as each mode s home or back button When used without our dedicated communication protocols only Internal mode is selectable High resolution TFT display Five menu buttons Their functions always correspond to the menu label at the bot...

Page 7: ...he port powers the entire unit except the motorized fader which needs a second power source via the USB Micro B connector as mentioned above MIDI Out jack for connecting any external MIDI equipment MIDI data can be routed directly from Panorama or via the Panorama s USB MIDI driver This allows it to be used as a MIDI interface by your DAW Foot switch jack MIDI assignable but by default controls su...

Page 8: ... with Panorama With your computer switched on Panorama will now go through its startup routine which includes calibrating the motorized fader Your computer s operating system will install the USB class driver which will show up as three sets of MIDI ports inside most MIDI applications If you plan to use Panorama as a regular USB MIDI controller you will need to select the inputs and outputs labele...

Page 9: ...heir values will update in the display as they move Where controls are assigned to send a standard MIDI Controller message pressing the TOGGLE VIEW button G will display the Controller number assignments Pressing the TOGGLE MUTE button J will mute the MIDI output of the faders so you can position them where you want them Press again to unmute The buttons under the display M are used to navigate an...

Page 10: ...obal menu This means you always have quick access to the most important setup functions at any time in any mode While the Global menu is open parameter values can be changed using the Octave up down buttons as well as the Data encoder O Pressing the PB1 and PB2 buttons simultaneously activates the PB Assign menu You can read more about that in the Panorama User Guide Regarding Maps Panorama s pres...

Page 11: ...equires the least force to reach velocity value 127 Soft1 Standard and Hard1 give you options in between each of these extremes Select the curve that suits your playing style the best Global Settings Encoder Curve Next select the menu Encoder Curve This setting determines how quickly Panorama s encoders scroll through parameter values the options are Slow Standard and Fast You may like Fast if you...

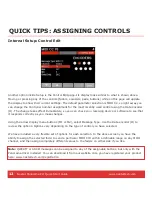
Page 12: ...eceiving device or software to see that it responds correctly as you make changes Using the arrow display menu buttons M1 or M2 select Message Type Use the Data encoder O to review the options Options vary depending on the type of control you have selected We have included a very flexible set of options for each selection In the above screen you have the ability to assign the selected fader to sen...

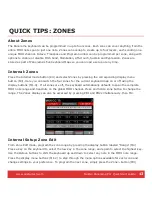
Page 13: ...Here you can switch the four zones for the current keyboard map on or off using the display buttons M1 4 If all zones are off the keyboard automatically defaults to span the complete MIDI note range and transmits on the global MIDI channel Press and hold a zone button to change the range The Zones display can also be accessed by pressing PB1 and PB2 simultaneously then M4 Internal Setup Zone Edit ...

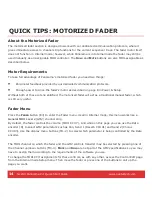
Page 14: ...atisfied the motorized fader will act as a traditional manual fader which is still very useful Fader Menu Press the FADER button E3 to enter the Fader menu Used in Internal mode this menu works like a General MIDI Level 2 GM2 channel strip By default the fader controls the volume MIDI CC 7 And while on this page you can use the Data encoder O to select GM2 parameters such as Pan Send 1 Reverb CC 9...

Page 15: ... select Pad Map with the associated display menu button M1 Next select Note learn M1 and tap on the pad for which you want to assign a note The display highlights the selected pad in red Now just play the key on the keyboard that you want to assign to the pad Select a new pad followed by a note on the keyboard and keep going until you are done assigning Then simply switch the Note learn function o...

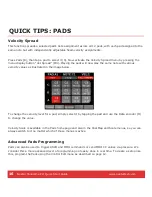
Page 16: ...ith various velocity values as illustrated in the image below To change the velocity level for a pad simply select it by tapping the pad and use the Data encoder O to change the value Velocity Scale is available in the Pads home page and also in the Pad Map and Scale menus so you can always switch to it no matter which of those menus is active Advanced Pads Programming Pads can also be used to tri...

Page 17: ...f the full version by visiting Propellerhead Software s website http www propellerheads se download Once installed you can run the program in demo mode and see for yourself how well Reason and Panorama interact Note Panorama s dedicated communication protocol is compatible with Record 1 5 Reason 5 Reason 6 and up Older versions are not supported Downloading the Reason Driver The Reason driver for ...

Page 18: ...ntrol surfaces are found Reason and Panorama are now connected You will see the following message on Panorama s display To use Mixer Mode please lock Panorama Mixer Control Surface to a Mixer device Locking to the Master Section is most useful You can also lock to any Mixer device in the rack and the ReGroove Mixer Alternatively select Instrument Transport or Internal mode To lock to the Reason 6 ...

Page 19: ...ssigns all controls to the Reason mixer Instrument Assigns controls to the device on your sequencer track In most cases this will be an instrument but it s also how you control any of Reason s effects Transport Controls functions in Reason s transport menu including current song position and locator points Internal Uses Panorama s internal MIDI controller functions so you can jump out of our dedic...

Page 20: ... Current Menu Changing Track Patch and Mixer Bank The navigation buttons allow you to make the following navigational changes Track Changes the current sequencer track Patch Changes the patch or preset of the instrument device assigned to the current sequencer track View Changes the display view on your computer to show Mixer in Mixer mode Rack in Instrument mode and Sequencer in Transport mode Ba...

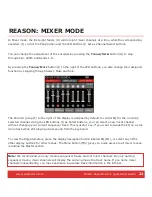
Page 21: ...d by default to control EQ for the currently selected channel Using the LED buttons I as Select buttons you can select a new mixer channel without changing your current sequencer track This is useful say if you want to tweak the EQ on a kick drum track while still playing a bass sound from the keyboard To view the EQ parameters press the display navigation button labeled EQ M1 or select any of the...

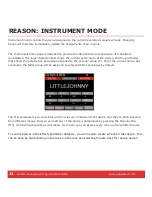
Page 22: ...rameters and values assigned to the encoder group P And if the current device has envelopes the fader group will be assigned to Amp and Filter envelopes by default The first parameters you encounter are the ones we considered most useful and they ve been selected from different menus But you can edit any of the device s parameters by pressing the Menu button M5 which will activate the scroll menu ...

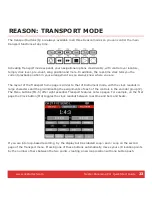
Page 23: ... The layout of the Transport home page is similar to that of Instrument mode with the clock readout in large characters and the grid indicating the assignments of each of the controls in the encoder group P The Menu buttons M1 5 offer eight essential Transport features on two pages For example on the first page the Clock button M4 toggles the clock readout between real time and bars and beats If y...

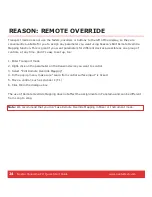
Page 24: ...accessible as one group of controls at any time And it s easy to set up too 1 Enter Transport mode 2 Right click on the parameter on the Reason device you want to control 3 Select Edit Remote Override Mapping 4 In the popup menu make sure Learn from control surface input is ticked 5 Move a control such as encoder 1 F1 6 Click OK in the dialogue box The use of Remote Override Mapping does not affec...

Page 25: ...tton will allow you to select and control parameters within the Master or Control Room sections Note In Reason it is possible to have tracks in the sequencer that do not have corresponding mixer channels for example when you create a track for an effect When such a track is selected the motorized fader does not change its target channel The pads are a great way not only to play drum and percussion...

Page 26: ...Performing a complete factory reset will erase all presets and maps and return the unit to its default factory state Make sure to back up your presets and maps first For details on backup make sure to register your product to gain access to our online documentation Here is how you perform a factory reset Make sure Panorama s power switch Z is set to the Off position Press and hold the Patch and Pa...

Page 27: ...tion which can be determined by turning the equipment off and on the user is encouraged to try to correct the interference by one or more of the following measures Reorient or relocate the receiving antenna Increase the separation between the equipment and receiver Connect the equipment into an outlet on a circuit different from that to which the receiver is connected Consult the dealer or an expe...

Page 28: ...28 Nektar Panorama P4 Quick Start Guide www nektartech com www nektartech com ...

Reviews: