Nektar Pandorma P6 Quick Start Manual Download Page 18

18

    Nektar Panorama P4: Quick Start Guide                                              www.nektartech.com 


REASON: SETUP 

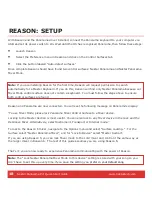
With Reason and the Panorama driver installed, connect the Panorama keyboard to your computer via 
USB and set its power switch to On. Wait until the OS has recognized Panorama, then follow these steps: 

 

Launch Reason 

 

Select the Preference menu in Reason and click on the Control Surfaces tab 

 

Click the button labeled “Auto-detect surfaces”


Once complete Reason should have found two control surfaces: Nektar Panorama and Nektar Panorama 
Mixer Mode.  


Note: 

If you are installing Reason for the first time, Reason will request permission to search 

automatically for a Master Keyboard. If you do this, Reason will find only Nektar Panorama because our 
Mixer Mode control surface does not contain a keyboard.  You must follow the steps above to ensure 
both control surfaces are found. 


Reason and Panorama are now connected. You will see the following message on Panorama’s display: 


“To use Mixer Mode, please lock Panorama Mixer Control Surface to a Mixer device.  

Locking to the Master Section is most useful. You can also lock to any Mixer device in the rack and the 
ReGroove Mixer. Alternatively, select Instrument, Transport or Internal mode.” 


To lock to the Reason 6 mixer, navigate to the Options menu and select “Surface Locking…”. For the 
Surface select “Nektar Panorama Mixer”, and for “Lock to Device” select “Master Section”. 


If you are using Reason 5, you can lock Mixer mode to the 14:2 mixer and control it the same way as 
the larger mixer in Reason 6.  The rest of this guide assumes you are using Reason 6. 


That’s it; you are now ready to experience Panorama communicating with the power of Reason. 


Note: 

The “Lock Nektar Panorama Mixer Mode to this device” setting is stored with your song so you 

don’t have to set this up every time if you save the setting you 

prefer in your default song. 


Summary of Contents for Pandorma P6

Page 1: ...www nektartech com Nektar Panorama P4 Quick Start Guide Quick Start Guide...

Page 2: ...8 Connecting to a computer 8 Using an external power supply 8 INTERNAL MODE 9 Getting around 9 Global Settings 11 Assigning Controls 12 Motorized fader 14 Pads 15 REASON 17 Driver download 17 Getting...

Page 3: ...messages or use our dedicated communication protocols to control supported software such as Reason by Propellerhead Software And while controller hardware can never be as flexible as the software it...

Page 4: ...s not included please let us know via email stuffmissing nektartech com WHAT S ONLINE Additional documentation drivers and support software are available online which is also where you will find any f...

Page 5: ...IEW Here is a brief overview of all the parts of Panorama to which we will refer in the manual Before you jump in and start using Panorama we recommend you get acquainted by identifying each called ou...

Page 6: ...ht LED buttons when used with dedicated communication protocols Four Mode buttons Used to switch between Mixer Instrument Transport and Internal modes but also double as each mode s home or back butto...

Page 7: ...he port powers the entire unit except the motorized fader which needs a second power source via the USB Micro B connector as mentioned above MIDI Out jack for connecting any external MIDI equipment MI...

Page 8: ...with Panorama With your computer switched on Panorama will now go through its startup routine which includes calibrating the motorized fader Your computer s operating system will install the USB class...

Page 9: ...eir values will update in the display as they move Where controls are assigned to send a standard MIDI Controller message pressing the TOGGLE VIEW button G will display the Controller number assignmen...

Page 10: ...bal menu This means you always have quick access to the most important setup functions at any time in any mode While the Global menu is open parameter values can be changed using the Octave up down bu...

Page 11: ...quires the least force to reach velocity value 127 Soft1 Standard and Hard1 give you options in between each of these extremes Select the curve that suits your playing style the best Global Settings E...

Page 12: ...ceiving device or software to see that it responds correctly as you make changes Using the arrow display menu buttons M1 or M2 select Message Type Use the Data encoder O to review the options Options...

Page 13: ...ere you can switch the four zones for the current keyboard map on or off using the display buttons M1 4 If all zones are off the keyboard automatically defaults to span the complete MIDI note range an...

Page 14: ...tisfied the motorized fader will act as a traditional manual fader which is still very useful Fader Menu Press the FADER button E3 to enter the Fader menu Used in Internal mode this menu works like a...

Page 15: ...select Pad Map with the associated display menu button M1 Next select Note learn M1 and tap on the pad for which you want to assign a note The display highlights the selected pad in red Now just play...

Page 16: ...th various velocity values as illustrated in the image below To change the velocity level for a pad simply select it by tapping the pad and use the Data encoder O to change the value Velocity Scale is...

Page 17: ...the full version by visiting Propellerhead Software s website http www propellerheads se download Once installed you can run the program in demo mode and see for yourself how well Reason and Panorama...

Page 18: ...trol surfaces are found Reason and Panorama are now connected You will see the following message on Panorama s display To use Mixer Mode please lock Panorama Mixer Control Surface to a Mixer device Lo...

Page 19: ...signs all controls to the Reason mixer Instrument Assigns controls to the device on your sequencer track In most cases this will be an instrument but it s also how you control any of Reason s effects...

Page 20: ...Current Menu Changing Track Patch and Mixer Bank The navigation buttons allow you to make the following navigational changes Track Changes the current sequencer track Patch Changes the patch or preset...

Page 21: ...by default to control EQ for the currently selected channel Using the LED buttons I as Select buttons you can select a new mixer channel without changing your current sequencer track This is useful s...

Page 22: ...ameters and values assigned to the encoder group P And if the current device has envelopes the fader group will be assigned to Amp and Filter envelopes by default The first parameters you encounter ar...

Page 23: ...The layout of the Transport home page is similar to that of Instrument mode with the clock readout in large characters and the grid indicating the assignments of each of the controls in the encoder gr...

Page 24: ...ccessible as one group of controls at any time And it s easy to set up too 1 Enter Transport mode 2 Right click on the parameter on the Reason device you want to control 3 Select Edit Remote Override...

Page 25: ...ton will allow you to select and control parameters within the Master or Control Room sections Note In Reason it is possible to have tracks in the sequencer that do not have corresponding mixer channe...

Page 26: ...erforming a complete factory reset will erase all presets and maps and return the unit to its default factory state Make sure to back up your presets and maps first For details on backup make sure to...

Page 27: ...ion which can be determined by turning the equipment off and on the user is encouraged to try to correct the interference by one or more of the following measures Reorient or relocate the receiving an...

Page 28: ...28 Nektar Panorama P4 Quick Start Guide www nektartech com www nektartech com...

Reviews: