Installation and connection
en
37
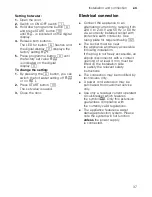
Setting hot water:
1.
Open the door.
2.
Switch on ON/OFF switch
(
.
3.
Hold down programme button
#
and press START button
)"
until
•
:
‹
... is indicated on the digital
display.
4.
Release both buttons.
The LED for button
#
flashes and
the digital display
8
displays the
factory setting
•
:
‹…
.
5.
Press programme button
#
until
the factory set value
‘
:
‹‹
is indicated on the digital
display
8
.
To change the setting:
1.
By pressing the
3
button, you can
switch the hot water setting off
‘
:
‹‹
or on
‘
:
‹‚
.
2.
Press START button
)"
.
The set value is saved.
3.
Close the door.
Electrical connection
ヽ
Connect the appliance to an
alternating current only, ranging from
220 V to 240 V and 50 Hz or 60 Hz
via a correctly installed socket with
protective earth conductor. See
rating plate for required fusing
92
.
ヽ
The socket must be near
the appliance and freely accessible
following installation.
If the plug is not freely accessible, an
allpole disconnector with a contact
opening of at least 3 mm must be
fitted on the installation side
to satisfy the relevant safety
instructions.
ヽ
The connection may be modified by
technicians only.
ヽ
A power cord extension may be
purchased from customer service
only.
ヽ
Use only a residual current operated
circuit-breaker which features
the symbol
‚
. Only this extension
guarantees compliance with
the currently valid regulations.
ヽ
The appliance features a water
damage protection system. Please
note the system will not function
unless
the power supply
is connected.
Summary of Contents for S51T69X3GB
Page 1: ...HQ 23 5 7 1 16758 7 216 Q 6 6 5...
Page 2: ...K 6WDUW K K PLQ 5HVHW VHF...


