background image

Installation and connection  

en

21

5

 Installation and 

connection

Installat

ion and c

onnection

Contents of package

After unpacking all parts, check for any 

damage in transit.
If you have any complaints, contact the 

dealer from whom you purchased the 

appliance or our after-sales service. 

~

 "Customer service" on page 31

The delivery consists of the following 

parts:

Built-in appliance

Interior fittings (depending on model)

Bag containing installation materials

User manual

Installation instructions

Customer service booklet

Warranty enclosure

Information on the energy 

consumption and noises

Technical specifications

Refrigerant, cubic capacity and further 

technical specifications can be found on 

the rating plate. 

~

 "Getting to know your appliance" 

on page 24

Installing the appliance

Installation location

The more refrigerant an appliance 

contains, the larger the room must be 

in which the appliance is situated. 

Leaking refrigerant can form 

a flammable gas-air mixture in rooms 

which are too small. 

The room must be at least 1 m³ per 8 g 

of refrigerant. The amount of refrigerant 

in your appliance is indicated 

on the rating plate inside the appliance. 

~

 "Getting to know your appliance" 

on page 24

The weight of the appliance may be up 

to 60 kg depending on the model.

Permitted room temperature

The permitted room temperature 

depends on the climatic class of the 

appliance.
Information on the climatic class can be 

found on the rating plate.  

~

 "Getting to know your appliance" 

on page 24

The appliance is fully functional within 

the permitted room temperature.
If an appliance of climatic class SN is 

operated at colder room temperatures, 

the appliance will not be damaged up to 

a room temperature of +5 °C.

Cavity depth

A cavity depth of 56 cm 

is recommended for the appliance. 

If the cavity depth is smaller – at least 

55 cm – the energy consumption 

increases slightly.

Climatic 

category

Permitted room temperature

SN

+10 °C ... 32 °C

N

+16 °C ... 32 °C

ST

+16 °C ... 38 °C

T

+16 °C ... 43 °C

Summary of Contents for KI141

Page 1: ...Gebrauchsanleitung 2 en User manual 17 fr Notice d utilisation 32 it Istruzioni per l uso 50 nl Gebruiksaanwijzing 67 K hlger t Refrigerator R frig rateur Frigorifero Koelapparaat KI121 KI131 KI141 KI...

Page 2: ...aren 7 Vor dem ersten Gebrauch 8 Elektrischer Anschluss 8 Ger t kennenlernen 8 Ger t 8 Bedienelemente 9 Ausstattung 9 1 Ger t bedienen 10 Ger t einschalten 10 Ger t ausschalten und stilllegen 10 Tempe...

Page 3: ...Explosionsgefahr Nie elektrische Ger te innerhalb des Ger ts verwenden z B Heizger te oder elektrische Eisbereiter Keine Produkte mit brennbaren Treibgasen z B Spraydosen und keine explosiven Stoffe i...

Page 4: ...endienst rufen Vermeidung von Risiken f r Kinder und gef hrdete Personen Gef hrdet sind Kinder Personen die k rperlich psychisch oder in ihrer Wahrnehmung eingeschr nkt sind Personen die nicht gen gen...

Page 5: ...und wieder verwertbar Entsorgen Sie die Verpackung umweltgerecht Informieren Sie sich ber Entsorgungswege bei Ihrem Fachh ndler oder bei der ffentlichen Verwaltung Altger t Durch umweltgerechte Entso...

Page 6: ...ht In zu kleinen R umen kann bei einem Leck ein brennbares Gas Luft Gemisch entstehen Pro 8 g K ltemittel muss der Raum mindestens 1 m gro sein Die Menge des K ltemittels Ihres Ger ts steht auf dem Ty...

Page 7: ...Die Luft an der R ckwand des Ger ts erw rmt sich nicht so stark Das Ger t verbraucht weniger Strom wenn die warme Luft abziehen kann Nicht L ftungs ffnungen abdecken oder zustellen Raum t glich l fte...

Page 8: ...um Sch den am Verdichter zu vermeiden 2 Ger t ber eine vorschriftsm ig installierte Steckdose anschlie en Die Steckdose muss folgende Daten erf llen Au erhalb Europas Pr fen ob die angegebene Stromart...

Page 9: ...herausziehen absenken und seitlich herausschwenken Beh lter Bild Sie k nnen den Beh lter herausnehmen Beh lter bis zum Anschlag herausziehen vorne anheben und herausnehmen Butterfach und K sefach Bil...

Page 10: ...lweise leicht beheizt Dies verhindert Schwitzwasserbildung im Bereich der T rdichtung Ger t ausschalten und stilllegen Ger t ausschalten Taste dr cken Das Ger t k hlt nicht mehr Ger t stilllegen Wenn...

Page 11: ...Eiern fertigen Speisen und Backwaren Die Temperatur ist von 2 C 8 C einstellbar Durch die K hllagerung k nnen Sie auch hoch verderbliche Lebensmittel kurz bis mittelfristig lagern Je tiefer die gew h...

Page 12: ...feuchtigkeit im Gem sebeh lter anpassen Damit k nnen Sie frisches Obst und Gem se bis zu zweimal l nger einlagern als bei konventioneller Lagerung Die Luftfeuchtigkeit im Gem sebeh lter k nnen Sie nac...

Page 13: ...d L sungsmittel verwenden Keine scheuernden oder kratzenden Schw mme verwenden Auf den metallischen Oberfl chen kann Korrosion entstehen Nie Ablagen und Beh lter im Geschirrsp ler reinigen Die Teile k...

Page 14: ...ern 6 Ger t wieder einschalten 7 Lebensmittel einordnen 8 Nach 24 Stunden pr fen ob es erneut zu Geruchsbildung gekommen ist 9 Beleuchtung Beleuchtung Ihr Ger t ist mit einer wartungsfreien LED Beleuc...

Page 15: ...et Der Netzstecker sitzt nicht fest Netzstecker anschlie en Die Sicherung wurde ausgel st Sicherungen pr fen Der Strom ist ausgefallen Pr fen ob Strom vorhanden ist Anzeige zeigt E an Die Elektronik h...

Page 16: ...bsttest Ihr Ger t verf gt ber ein Selbsttestprogramm das Fehler anzeigt die Ihr Kundendienst beheben kann 1 Ger t ausschalten und 5 Minuten warten 2 Ger t einschalten 3 Innerhalb der ersten 10 Sekunde...

Page 17: ...the first time 23 Electrical connection 23 Getting to know your appliance 24 Appliance 24 Controls 24 Interior fittings 24 1 Operating the appliance 25 Switching on the appliance 25 Switching off and...

Page 18: ...t use or for the next owner Risk of explosion Never use electric devices inside the appliance e g heaters or electric ice makers Do not store products which contain flammable propellants e g spray can...

Page 19: ...ains plug Call the after sales service Avoiding placing children and vulnerable people at risk At risk are Children People who have limited physical mental or sensory abilities People who have inadequ...

Page 20: ...n an environmentally friendly manner Please ask your dealer or inquire at your local authority about current means of disposal Old appliances Valuable raw materials can be reclaimed by recycling old a...

Page 21: ...which the appliance is situated Leaking refrigerant can form a flammable gas air mixture in rooms which are too small The room must be at least 1 m per 8 g of refrigerant The amount of refrigerant in...

Page 22: ...on the rear panel of the appliance does not warm up so intensely The appliance consumes less power if the warm air can escape Do not cover or block the ventilation openings Ventilate the room daily Us...

Page 23: ...Isolated applications e g on ships or in mountain lodges which are not connected directly to the national grid 1 After installing the appliance wait at least 1 hour before connecting it to prevent dam...

Page 24: ...pletely remove the shelf 1 Press and hold down both buttons under the shelf 2 Pull out the shelf lower and swing out to the side Container Fig You can remove the container Pull out the container all t...

Page 25: ...ance Switching on the appliance 1 Press the button The appliance begins to cool 2 Set the required temperature Setting the temperature on page 26 Operating tips After the appliance has been switched o...

Page 26: ...ing noises may occur After 15 hours the appliance switches to normal operation Switching Super cooling on off Press the Super button The button is lit when Super cooling is switched on M Alarm Alarm D...

Page 27: ...n continue to release its flavour and the butter will still be easy to spread Vegetable container with humidity control Fig The vegetable container is the best storage location for fresh fruit and veg...

Page 28: ...e appliance and the fittings Do not use abrasive chloride or acidic cleaning agents or solvents Do not use scouring or abrasive sponges The metallic surfaces may corrode Never clean the shelves or con...

Page 29: ...itch the appliance on again 7 Store food in the appliance 8 Check whether the formation of odours is still occurring after 24 hours 9 Lighting Lighting Your appliance features a maintenance free LED l...

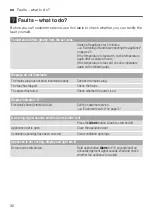
Page 30: ...ate The mains plug has not been inserted properly Connect the mains plug The fuse has tripped Check the fuses The power has failed Check whether the power is on Display indicates E Electronics have de...

Page 31: ...t which your customer service can rectify 1 Switch off the appliance and wait 5 minutes 2 Switch on the appliance 3 Within the first 10 seconds after switching on press the Super refrigerator compartm...

Page 32: ...emi re utilisation 40 Raccordement lectrique 40 Pr sentation de l appareil 41 Appareil 41 El ments de commande 41 quipement 41 1 Utilisation de l appareil 42 Mettre l appareil sous tension 42 Arr t et...

Page 33: ...z pas d appareils lectriques l int rieur de l appareil par ex appareils de chauffage machine gla ons Ne stockez dans l appareil aucun produit contenant des gaz propulseurs combustibles bombes a rosols...

Page 34: ...A rez la pi ce teignez l appareil puis d branchez le Appeler le service apr s vente vitez des risques pour les enfants et les personnes en danger Personnes risques les enfants les personnes pr sentan...

Page 35: ...hygi ne alimentaire Conform ment la r glementation fran aise visant emp cher la pr sence de listeria dans le compartiment r frig rateur nous vous remercions de respecter les consignes suivantes Nettoy...

Page 36: ...d coupe couteau de cuisine etc 8 Conformit d utilisation Conformit d utilisation Utilisez cet appareil uniquement pour la r frig ration des produits alimentaires Uniquement dans un foyer et dans l en...

Page 37: ...triques et lectroniques usag s waste electrical and electronic equipment WEEE La directive d finit le cadre pour une reprise et une r cup ration des appareils usag s applicables dans les pays de la CE...

Page 38: ...ante admissible La temp rature ambiante admissible d pend de la cat gorie climatique de l appareil Des indications sur la classe climatique se trouvent sur la plaque signal tique Pr sentation de l app...

Page 39: ...o r gne une temp rature ambiante d environ 20 C Utilisez une cavit de 56 cm de profondeur Attention Risque de br lures Certaines pi ces de l appareil deviennent tr s chaudes en service Le fait de tou...

Page 40: ...ccordez l appareil via une prise femelle r glementairement install e La prise doit r pondre aux sp cifications suivantes Hors d Europe V rifiez si le param trage du courant indiqu pour l appareil corr...

Page 41: ...a clayette vous Vous pouvez sortir enti rement la clayette 1 Appuyez longuement sur les deux boutons sous la clayette 2 Tirez la clayette vous abaissez la et faites la basculer lat ralement pour l ext...

Page 42: ...n 1 Appuyez sur la touche L appareil commence r frig rer 2 R glez la temp rature souhait e R gler la temp rature la page 43 Remarques concernant le fonctionnement de l appareil Apr s sa mise en servic...

Page 43: ...a super r frig ration le compartiment r frig rateur refroidit au maximum Enclenchez la super r frig ration par ex dans les cas suivants avant de ranger de grandes quantit s d aliments pour refroidir r...

Page 44: ...rvation minimum ou la date de consommation indiqu e par le fabricant Pour pr server l ar me la teinte et la fra cheur rangez les produits alimentaires bien emball s ou couverts Vous vitez ainsi les co...

Page 45: ...es poivrons tomates et pommes de terre qui craignent le froid hors du r frig rateur des temp ratures entre 8 C 12 C pour en pr server optimalment la qualit et l ar me Suivant la quantit et la nature d...

Page 46: ...4 Si pr sente Attendez que la couche de givre ait fondu 5 Ne nettoyez l appareil qu avec un chiffon doux de l eau ti de et du produit vaisselle pr sentant un pH neutre Attention Veillez ce que l eau d...

Page 47: ...Seul le service apr s vente ou des sp cialistes agr s sont autoris s r parer l clairage Bruits Bruits Bruits normaux Bourdonnement Un moteur tourne par exemple le groupe frigorifique un ventilateur G...

Page 48: ...ant Raccordez la fiche m le Fusible grill disjoncteur disjonct V rifiez les fusibles disjoncteurs Une coupure de courant s est produite V rifiez la pr sence de courant Affichage indique E L lectroniqu...

Page 49: ...nd un programme d autodiagnostic affichant les d fauts que votre service apr s vente peut supprimer 1 teignez l appareil et attendez 5 minutes 2 Mettez l appareil sous tension 3 Au cours des premi res...

Page 50: ...elettrico 57 Conoscere l apparecchio 58 Apparecchio 58 Elementi di comando 58 Caratteristiche 58 1 Utilizzare l apparecchio 59 Accensione dell apparecchio 59 Spegnere e mettere fuori servizio l appar...

Page 51: ...hi elettrici all interno di questo elettrodomestico es apparecchi di riscaldamento produttori di ghiaccio elettrici Non conservare nell apparecchio prodotti contenenti gas propellenti combustibili ad...

Page 52: ...ambiente Spegnere l apparecchio ed estrarre la spina d alimentazione Rivolgersi al servizio di assistenza Evitare pericoli a bambini e persone a rischio Sussiste pericolo per bambini persone con limi...

Page 53: ...Peso Nell installazione e nel trasporto di questo apparecchio considerare che molto pesante Luogo d installazione a pagina 55 8 Uso corretto Usocorretto Utilizzare questo apparecchio solo per raffredd...

Page 54: ...eria di apparecchi elettrici ed elettronici waste electrical and electronic equipment WEEE Questa direttiva definisce le norme per la raccolta e il riciclaggio degli apparecchi dismessi valide su tutt...

Page 55: ...chio Conoscere l apparecchio a pagina 58 A seconda del modello l apparecchio pu pesare fino a 60 kg Temperatura ambiente ammessa La temperatura ambiente ammessa dipende dalla classe climatica dell app...

Page 56: ...iscaldano durante il funzionamento Un contatto con queste parti pu causare ustioni L aria circolante lungo la parete posteriore dell apparecchio non si riscalda eccessivamente L apparecchio consuma me...

Page 57: ...l installazione dell apparecchio attendere almeno 1 ora prima di collegarlo 2 Collegare l apparecchio tramite una presa elettrica installata a norma La presa elettrica deve soddisfare i dati seguenti...

Page 58: ...contenitori alti ad es bricchi o bottiglie Estrarre la parte anteriore del ripiano e spingerla sotto la parte posteriore H Elementi di comando P Ventola X Illuminazione Ripiano estraibile h Cassetto p...

Page 59: ...mosso Sollevare ed estrarre il balconcino Balconcino Vario Figura Nel balconcino inferiore possono essere conservate bottiglie grandi Spostare il balconcino verso destra o sinistra Fermabottiglie Figu...

Page 60: ...indica OK ridurre progressivamente la temperatura Dopo la messa in funzione dell apparecchio possono passare fino a 12 ore prima che sia raggiunta la temperatura regolata Corretta regolazione Super r...

Page 61: ...ti e alimenti confezionati non superare la data minima di conservazione o la data di consumo indicata dal produttore Sistemare gli alimenti ben confezionati o coperti per conservare aroma colore e fre...

Page 62: ...ne papaie ed agrumi e ortaggi ad es melanzane cetrioli zucchine peperoni pomodori e patate che temono il freddo conservarli fuori del frigorifero a temperature di circa 8 C 12 C A seconda della quanti...

Page 63: ...sciolto 5 Pulire l apparecchio con un panno morbido e acqua tiepida leggermente saponata Attenzione L acqua di lavaggio non deve penetrare nell illuminazione o attraverso il foro di scarico nella zona...

Page 64: ...Solo il servizio assistenza clienti o tecnici specializzati sono autorizzati a riparare l illuminazione Rumori Rumori Rumori normali Ronzio un motore in funzione ad es gruppo frigorifero ventola Ribo...

Page 65: ...alimentazione intervenuto il dispositivo di sicurezza Controllare il dispositivo elettrico di sicurezza Manca l energia elettrica Controllare se vi energia elettrica Il display indica E Il sistema el...

Page 66: ...autotest che indica i guasti che il servizio assistenza clienti pu riparare 1 Spegnere l apparecchio ed attendere 5 minuti 2 Accendere l apparecchio 3 Entro 10 secondi dall accensione tenere premuto i...

Page 67: ...ie besparen 73 Voor het eerste gebruik 74 Elektrische aansluiting 74 Het apparaat leren kennen 75 Apparaat 75 Bedieningselementen 75 Uitrusting 75 1 Apparaat bedienen 76 Apparaat inschakelen 76 Appara...

Page 68: ...xplosie Gebruik nooit elektrische apparaten in het apparaat bijv verwarmingsapparaten of elektrische ijsbereiders Geen producten met brandbare drijfgassen bijv spuitbussen en geen explosieve stoffen i...

Page 69: ...e ruimte ventileren Het apparaat uitschakelen en de stekker uit het stopcontact trekken Contact opnemen met de servicedienst Vermijden van risico s voor kinderen en kwetsbare personen Er bestaat gevaa...

Page 70: ...ning mee dat het apparaat erg zwaar kan zijn De juiste opstelplaats op pagina 72 8 Correct gebruik van het apparaat Bestemmingvanhetapparaat Gebruik dit apparaat alleen voor het koelen van levensmidde...

Page 71: ...ende afgedankte elektrische en elektronische apparatuur waste electrical and electronic equipment WEEE De richtlijn geeft het kader aan voor de in de EU geldige terugneming en verwerking van oude appa...

Page 72: ...ot 60 kg bedragen Toegestane omgevingstemperatuur De toegestane binnentemperatuur is afhankelijk van de klimaatklasse van het apparaat Informatie over de klimaatklasse vindt u op het typeplaatje Het a...

Page 73: ...de achterwand van het apparaat wordt niet zo warm Het apparaat verbruikt minder stroom wanneer de warme lucht kan wegtrekken Ventilatieopeningen niet afdekken of versperren De ruimte dagelijks luchten...

Page 74: ...n bijv op schepen of in berghutten hebben geen rechtstreekse aansluiting op het openbare elektriciteitsnet 1 Na plaatsing van het apparaat minstens 1 uur wachten met aansluiten om beschadiging van de...

Page 75: ...ste deel schuiven Uittrekbaar legplateau Afb U kunt zorgen voor een beter overzicht Legplateau eruit trekken U kunt het legplateau geheel verwijderen 1 Beide knoppen onder het legplateau indrukken en...

Page 76: ...pparaat inschakelen 1 Toets indrukken Het apparaat begint te koelen 2 De gewenste temperatuur instellen Temperatuur instellen op pagina 77 Opmerkingen bij voor het gebruik Na het inschakelen kan het e...

Page 77: ...paraat iets luider Na 15 uur schakelt het apparaat over op het normale werking Superkoelen in uitschakelen Toets Super indrukken De toets brandt als het superkoelsysteem is ingeschakeld M Alarm Alarm...

Page 78: ...fb Aanwijzing Bewaar in de koudste zone gevoelige levensmiddelen bijv vis worst en vlees De warmste zone De warmste zone bevindt zich helemaal bovenaan in de deur Aanwijzing Bewaar in de warmste zone...

Page 79: ...ng De dooiwatergoot en het afvoergat schoonhouden zodat het dooiwater kan weglopen en geurvorming wordt voorkomen D Schoonmaken Schoonmaken Attentie Beschadiging van het apparaat en de uitrustingsonde...

Page 80: ...inschakelen 7 Levensmiddelen inruimen 8 Na 24 uur controleren of er opnieuw luchtjes zijn ontstaan 9 Verlichting Verlichting Het apparaat is voorzien van een onderhoudsvrije LED verlichting Alleen de...

Page 81: ...opcontact Stekker in het stopcontact steken De zekering is geactiveerd Zekeringen controleren De stroom is uitgevallen Controleren of er stroom is De indicatie geeft E aan De elektronica heeft een fou...

Page 82: ...eschikt over een zelftestprogramma dat fouten aangeeft die uw klantenservice kan verhelpen 1 Apparaat uitschakelen en 5 minuten wachten 2 Apparaat inschakelen 3 Binnen de eerste 10 seconden na het ins...

Page 83: ...K H H V H K H H V H ODUP 6XSHU K C 3 6XSHU ODUP...

Page 84: ......

Page 85: ...1 2 3 4 5 6...

Page 86: ......

Page 87: ...9001042220 9001042220 9506 de en fr it nl...

Reviews: