background image

Using the Operating System and Utilities   4-13


Partition Only — Lets you preserve your existing hard disk drive partition
structure and format only the primary partition without affecting the extended
partition(s). Partition Only formats drive C: (of a multiple partitioned drive) and
restores drive C: to its initial installation state. Additional partitions, e.g., drives
D:, E:, etc., remain intact. For important information about partitioning your
hard disk drive, see the section, “Partition Magic,” earlier in this chapter.

Note   

Use the Partition Only restore option if your hard disk is partitioned into two or

more partitions (drives).

!


Exit — Exits the NEC Product Recovery Utility.

Full Disk Drive Restore

If your preinstalled software becomes unusable and you cannot boot from the hard disk,
use the Product Recovery Utility to restore your system to its initial shipping
configuration. The Full Disk Drive restore option erases the hard disk completely
before reinstalling the files.

The Full Disk Drive restore option deletes all files on the hard

drive and replaces them with the original factory installed files.

Only use the Full Disk Drive restore option if the preinstalled software is unusable.

Use the Product Recovery Utility to perform a Full Disk Drive restore as follows:

1. 

Check the Product Recovery CD title and make sure that it is the correct CD for
your NEC Versa computer and operating system.

2. 

Put the CD into the CD-ROM drive tray, close the drive door, and power on your
system.

3. 

Read the License Agreement screen that appears. Use the VersaGlide touchpad to
position the cursor on the Accept button. Left click to accept the agreement.

You have the option of accepting or declining the agreement. If you decline the
agreement, the recovery utility exits.

4. 

In the NEC Product Recovery Utility screen, use the VersaGlide touchpad to
choose Full Disk Drive to restore your hard disk drive to its original factory
installed state.

Summary of Contents for VERSA LXI - VERSION 10-2000

Page 1: ......

Page 2: ...configuration customer data and operator control Since implementation by customers of each product may vary the suitability of specific product configurations and applications must be determined by th...

Page 3: ...he Bottom of the System 1 15 2 Getting Started NEC VersaGlide 2 2 Making VersaGlide Adjustments 2 3 VersaGlide Tips 2 3 Power Sources for Your NEC Versa 2 3 AC Adapter 2 4 Connecting the AC Adapter 2...

Page 4: ...sing Hard Disk Drive Password Protection 3 11 Moving the Hard Disk Drive 3 12 Power Management Setup 3 12 Boot Device Setup 3 15 Peripheral Setup 3 17 Other BIOS Setup Options 3 18 Managing System Pow...

Page 5: ...Utility 4 7 HDPREPEZ Utility 4 7 Using HDPREPEZ with Windows 98 4 8 Using HDPREPEZ with Windows NT 4 8 SpeedStep Applet 4 8 Application and Driver CD 4 8 Launching the CD with Windows 98 4 9 Launching...

Page 6: ...Communication Cards 6 2 Storage Cards 6 3 Other Cards 6 3 PC Card Slots 6 3 Using the PC Card Slots 6 4 Inserting a PC Card 6 4 Removing a Card 6 5 PC Card Modems 6 6 Mini PCI Modem 6 6 Mini PCI LAN...

Page 7: ...a Dock 8 10 NEC Versa PortBar 8 11 PortBar Ports 8 11 9 Using Multimedia Audio 9 2 Recording 9 2 Playing Back 9 3 Optimizing the Sound Quality 9 3 Line In 9 4 CD ROM Input 9 4 Microphone 9 4 Mixing 9...

Page 8: ...You A 2 Arrange Your Equipment A 3 Adjust Your Chair A 3 Adjust Your Input Devices A 3 Adjust Your Screen or Monitor A 4 Vary Your Workday A 5 Pre Existing Conditions and Psychosocial Factors A 5 B S...

Page 9: ...ding the hard disk drive and installing memory modules Chapter 6 Communicating with Your NEC Versa for essential information about using PC cards optional mini PCI modems or LANs and other communicati...

Page 10: ...wing format Warnings alert you to situations that could result in serious personal injury or loss of life Cautions indicate situations that can damage the system hardware or software Note Notes give p...

Page 11: ...C Versa LXi Quick Reference card provides an easy to carry reference to LED meanings controls function key combinations and NECC help numbers The quick reference card does not ship with some systems p...

Page 12: ...Versa Before You Begin About Your NEC Versa LXi Notebook Around the Front of the System Around the Back of the System Around the Left Side of the System Around the Right Side of the System Around the...

Page 13: ...ready to go To get started do the following Read Appendix A Setting Up a Healthy Work Environment for guidelines that help you use your computer productively and safely Information includes how to se...

Page 14: ...14 1 inch or 15 0 inch TFT XGA LCD panel provides high resolution display for sharp effective visuals In addition your system provides a high performance hard disk drive a diskette drive or SuperDisk...

Page 15: ...LCD panel that you can adjust for a comfortable viewing position To adjust the viewing angle gently tilt the LCD panel into position Depending on the model your system is equipped with a 14 1 inch co...

Page 16: ...pports 3D sound which simulates the latest surround sound technology Keyboard 85 keys with the standard QWERTY key layout Models purchased outside of the U S and Canada ship with country specific keyb...

Page 17: ...phone C Caps Lock G Power Button D Scroll Lock IDE VBIII devices lights when the NEC Versa writes data to or retrieves data from the internal hard disk drive a SuperDisk drive in the file bay or a dev...

Page 18: ...rn to where you left off Suspend mode in Windows NT and Standby mode in Windows 2000 98 shuts down all devices in the system while retaining data and system status In Windows NT press the Power button...

Page 19: ...e of which are printed in blue on the key Function keys are application driven See the specific application s user guide for information about how each function key works within the application you ar...

Page 20: ...connections Numeric keypad Pressing NumLock on the keyboard activates the numeric keypad numbers and functions printed in blue on the keys The keypad lets you type numbers and mathematical operands a...

Page 21: ...Charging LED B Power Status LED D LCD Lid Latch NEC VersaBay III A 24X CD ROM drive a CD Read Write drive a SuperDisk drive or an 8X DVD ROM drive comes installed in the NEC VersaBay III on the front...

Page 22: ...inter a docking station or an external monitor on the back of your NEC Versa These ports are described after the figure Ports on the back of the system A PortBar Notches E External Monitor Port B PS 2...

Page 23: ...attach the NEC Versa to a DC power source such as the AC adapter or the optional DC auto adapter Around the Left Side of the System The left side of your NEC Versa offers the following features which...

Page 24: ...PCI LAN or mini PCI LAN modem combo installed USB Ports Each Universal Serial Bus USB port allows you to connect up to 127 USB equipped peripheral devices printers monitors scanners etc to your NEC Ve...

Page 25: ...lification through the unit Plugging in an external microphone disables the built in microphone IR Port Use this infrared IR port to transfer files between your NEC Versa and an IR equipped desktop or...

Page 26: ...Battery Bay D NEC VersaBay III Release Lock H Vents Height Adjustment Feet Modifies the angle of the NEC Versa for easier viewing and typing Memory Module Bay Stores the system s memory modules Batter...

Page 27: ...drive See the section Other NEC VersaBay III Devices in Chapter 5 for details about NEC VersaBay III options NEC VersaBay III Release Latch Releases a device from the NEC VersaBay III Battery Bay Cont...

Page 28: ...2 Getting Started NEC VersaGlide Power Sources for Your NEC Versa AC Adapter Main Battery Pack System Batteries System Care...

Page 29: ...ap to the touchpad equivalent to a double click of the primary mouse button Click and hold then drag your finger across the VersaGlide touchpad equivalent to a click and drag of the primary mouse butt...

Page 30: ...de at a comfortable height Keep your forearms parallel to the floor Your wrists should be relaxed and straight While using the keyboard and VersaGlide keep your shoulders and arms as relaxed as possib...

Page 31: ...AC adapter The AC adapter has no user replaceable or serviceable parts inside Dangerous voltage in the AC adapter can cause serious personal injury or death The AC adapter is intended for use with a...

Page 32: ...that comes with your NEC Versa LXi Although other adapters look similar using them can damage your system Powering On Your System Power on the system as follows 1 Locate the latch on the front of the...

Page 33: ...C power source Use the system s power meter to determine battery status Access the system s power meter in the following ways Move the cursor over the power icon on the taskbar to display the remainin...

Page 34: ...eck battery status press the LED status button to illuminate the LEDs The battery gauge LEDs indicate the following Battery Gauge LEDs Note If the battery gauge LEDs display a combination other than t...

Page 35: ...nding Battery Life While on the road it is important to be aware of the simple things you can do to extend the life of the system s main battery One way is to keep the brightness setting low Use the F...

Page 36: ...e following in mind when removing or replacing a battery Use only the battery designed for your system in the NEC Versa Mixing other manufacturers batteries or using a combination of very old and new...

Page 37: ...ing a combination of very old and new batteries can deteriorate battery and equipment performance 1 Save your files exit Windows and put your system into Suspend mode Windows NT Standby mode Windows 2...

Page 38: ...the system Removing the battery 5 Insert the new battery as follows Locate the alignment groove on the edge of the battery Locate the alignment groove inside the battery bay Align the grooves on the b...

Page 39: ...2 12 Getting Started Inserting the battery pack 6 Turn over the system...

Page 40: ...verheats or emits a foul odor Keep the battery dry and away from water Keep metal objects away from battery terminals Metal objects in contact with the terminals can cause a short circuit and damage I...

Page 41: ...uration for example date time drives and memory The CMOS battery charges when your NEC Versa is connected to AC power The CMOS battery may discharge completely if the NEC Versa notebook remains unused...

Page 42: ...0 volts AC Never use the AC adapter if the voltage falls outside of this range Watch for this when traveling to other countries Turn computer power off before attaching or removing non plug and play d...

Page 43: ...storage area free from vibration and magnetic fields Keep the system and its components away from organic solvents or corrosive gases Avoid leaving the system and its components in direct sunlight or...

Page 44: ...3 Using the BIOS Setup Utility Introducing BIOS Setup Entering BIOS Setup Checking Setting System Parameters Managing System Power Updating the BIOS...

Page 45: ...tem interrupts the Power On Self Test POST and displays the current CMOS RAM settings If the system detects an error during POST it prompts you with a double beep and a message Press F1 to resume If y...

Page 46: ...ess F2 the system displays the BIOS Setup Main Menu screen similar to the following BIOS Setup Main Menu Use the up and down arrow keys located on the lower right corner of the keyboard to toggle thro...

Page 47: ...area lists parameters and their current settings Available Options and Help The right side of the screen This area lists alternate settings and Help text for each parameter Key Legend The bottom right...

Page 48: ...Main Menu screen displays the prompt Quit without saving F3 F4 Changes the screen color F10 Saves and exits the BIOS Setup utility Checking Setting System Parameters The BIOS Setup Utility consists of...

Page 49: ...Diskette Drive B 1 Not installed 1 2 MB 5 25 1 44 MB 3 5 Internal Auto User Defined CD DVD SuperDsk Not installed 32 Bit Mode On Off VersaBay Auto CDROM User Defined CD DVD SuperDsk Not installed 32...

Page 50: ...Station Drives Enables or disables the drives installed in a docking station These options are only available when the NEC Versa is docked Advanced CMOS Setup Use the Advanced CMOS Setup to set the f...

Page 51: ...Yes Resume Password Required No Yes Assign Supervisor SmartCard Press Enter Assign User SmartCard Press Enter Clear Supervisor SmartCard Press Enter Clear User SmartCard Press Enter Assign Supervisor...

Page 52: ...Clear User SmartCard Accessible when the optional SmartCard accessory is installed For details refer to the documentation that ships with the accessory Assign Supervisor FingerPrint Accessible when th...

Page 53: ...rive Passwords Your NEC Versa allows you to establish password protection for the internal hard disk drive and for an optional hard disk drive installed in the NEC VersaBay III Hard disk drive HDD pas...

Page 54: ...ter password you are prompted to enter a new master password If you enter the current user password you are prompted to enter the new user password If you do not wish to establish a new master or user...

Page 55: ...section Establishing Hard Disk Drive Passwords before installing the HDD in a different system Install the HDD in the desired system then follow steps 7 and 8 as desired to establish HDD protection To...

Page 56: ...Audio Device Timeout 1 On Off Standby Timeout 1 4 minutes Off 1 2 6 8 10 15 min Auto Suspend Timeout 1 10 minutes Off 5 15 20 25 30 min LCD Suspend Disabled Enabled Suspend Option Suspend STF Auto Sav...

Page 57: ...ts you define power management levels and specific device timeouts according to your own needs and present environment Custom lets you set the following timeouts Custom Timeout Options Option Definiti...

Page 58: ...On Allows the serial port modem or LAN board to wake the system on a ring signal Wake Up from Suspend Alarm Resume Alarm Time Allows the alarm to resume the system from suspend Designates the time par...

Page 59: ...vice when set to IDE hard drive Only one IDE device is bootable Quick Boot Specifies whether or not the system performs all tests during system boot Silent Boot Specifies whether or not to display the...

Page 60: ...sabled Auto COM2 IRQ3 COM3 IRQ4 COM4 IRQ3 Note If you disable a device in Peripheral Setup you cannot enable or assign it using the Windows device manager The device will not be listed in the Windows...

Page 61: ...xits BIOS Setup Exit Without Saving Reverts to previously selected settings and exits Setup Managing System Power In the Windows 2000 98 environment your NEC Versa manages its power resources using th...

Page 62: ...system and to set timeouts for standby LCD panel and hard disk Define parameters for your system when running under AC plugged in or DC running on batteries power Power Schemes Parameter Default Sett...

Page 63: ...he system standby timeout period for your system when running under AC or DC power Windows 2000 Alarms Use the Alarms screen to define the point at which the battery alarm activates Define the alarm t...

Page 64: ...losed and the Power button Advanced Parameter Default Setting Alternate Setting s Always show icon on taskbar unchecked checked Prompt for password when computer goes off standby checked unchecked Whe...

Page 65: ...ply click OK and close the Control Panel Note When powering on your NEC Versa running the Windows 2000 operating system you may encounter a warning message suggesting that a problem exists with the hi...

Page 66: ...es 1 2 3 4 5 hours Never Turn off monitor Plugged In After 15 Minutes 1 2 3 5 10 15 20 25 30 45 minutes 1 2 3 4 5 hours Never Turn off monitor Running on batteries After 2 Minutes 1 2 3 5 10 15 20 25...

Page 67: ...wn Critical battery alarm 3 0 100 Alarm Action Notification Display message Sound alarm Alarm Action Power level Standby Hibernate Shutdown none Low battery alarm Defines a low battery alarm percentag...

Page 68: ...ed Always show icon on the taskbar determines whether or not the Power Meter icon displays on the taskbar Prompt for password when computer goes off standby Determines whether or not the system prompt...

Page 69: ...tteries Battery Optimized Perfomance Recommended N A When computer is plugged in Maximum Performance Recommended Battery Optimized Performance Automatically change performance when the power source ch...

Page 70: ...mance changes Controls whether you will hear a system beep when the performance changes Windows 2000 98 Power Management States ACPI uses different levels or states of power management The power manag...

Page 71: ...environment saved to hard disk Resume Press any key Press Power button Press Power button Progress bar appears during process 1 Only when BIOS Suspend Option set to STF and BIOS Auto Save to File set...

Page 72: ...ter Suspend 1 3 Manually Invoke Fn F4 Press Power button for less than 4 seconds 2 or Click Start Suspend Fn Power System Behavior LCD panel is blank Status LED lights green LCD panel is blank Status...

Page 73: ...e Enable the BIOS Flash Switch Setting Perform the BIOS Update Disable the BIOS Flash Setting Obtaining the BIOS Update If you are informed that the default BIOS needs an update contact Support Servic...

Page 74: ...ings A six position dip switch is located underneath the keyboard The following list identifies each switch setting and its function Switch 1 Password Override Switch The default setting is OFF If you...

Page 75: ...h 5 to ON before performing the BIOS update Follow these steps to enable the BIOS flash switch 1 Make sure the system is powered off and that no peripheral devices are attached 2 Open the LCD panel 3...

Page 76: ...d toward the LCD screen to release the tabs that secure it Lifting the keyboard Be careful not to disconnect the keyboard or keyboard cable entirely from the system 5 Gently rest the keyboard on top o...

Page 77: ...e dip switch block Using a fine tipped object change switch 5 to ON to enable the BIOS flash Never use a pencil to change switch settings Residue from the pencil can damage the system BIOS flash switc...

Page 78: ...ing the system 8 Follow the instructions later in this chapter Performing the BIOS Update Performing the BIOS Update Follow these steps to perform the BIOS update Before you begin be sure to Connect t...

Page 79: ...and the version of the new replacement BIOS Press any key to return to the Main menu 5 Highlight the Install New BIOS option and press Enter 6 Press Y and then press Enter After a brief pause a messag...

Page 80: ...4 Using the Operating System and Utilities Windows Introduction NEC Utilities SpeedStep Applet Application and Driver CD NEC Info Center Partition Magic Product Recovery CD...

Page 81: ...ers the control panel network features and scheduled tasks Recycle Bin Gives you a trash container in which to put and discard unwanted files or allows you to restore those same files back to their or...

Page 82: ...rnet or view local HTML files Also access Internet Explorer under Start Programs Internet Explorer Outlook Express Provides your default email program with secure and personalized features for email a...

Page 83: ...phone line to your system or install a LAN card for network access Online Services Includes setup icons for a variety of online services Your NEC Versa comes with all the software you need to get star...

Page 84: ...to run regularly Also access Task Scheduler under Start Programs Accessories System Tools Scheduled Tasks Power Management Properties Displays your current power source and total remaining battery po...

Page 85: ...e internet or view local HTML files Also access Internet Explorer under Start Programs Internet Explorer NEC Customize Gives you the option to launch the Application and Driver CD or install the NEC s...

Page 86: ...stomize Utility Using the NEC Customize Utility Follow these steps to use the NEC Customize Utility 1 Double click the NEC Customize icon 2 From the display window select the desired option 3 Click La...

Page 87: ...r you install a generic Windows NT operating system on your NEC Versa LXi use the Application and Driver A D CD to load the HDPREPEZ utility to increase the size of or to create the STF file Follow th...

Page 88: ...o launch the Application and Driver CD using NEC Customize with Windows 2000 NT 1 Insert the Application and Driver CD into the CD ROM drive 2 Double click the NEC Customize icon 3 Select Launch Appli...

Page 89: ...of the system s features and power management tips Installing the NEC Info Center To install the NEC Info Center simply follow the instructions presented earlier in this chapter for launching the A D...

Page 90: ...titions For systems running Windows NT use the Disk Administrator utility in the Administrative Tools menu to repartition your hard drive For systems running Windows 2000 use the Disk Management utili...

Page 91: ...ds USB devices printers and monitors Product Recovery CD Options The Product Recovery CD and Utility provides you with a number of choices Move the cursor over each selection on the NEC Product Recove...

Page 92: ...ration The Full Disk Drive restore option erases the hard disk completely before reinstalling the files The Full Disk Drive restore option deletes all files on the hard drive and replaces them with th...

Page 93: ...as an exit option If you select Continue a screen with progress bars displays and lets you know the progress of the recovery Do not turn off or disturb the system during the recovery process 7 When th...

Page 94: ...drive see the section Partition Magic earlier in this chapter Use the Product Recovery Utility to perform a Partition Only restore as follows 1 Check the Product Recovery CD title and make sure that i...

Page 95: ...ry utility returns to the prior screen which has an exit option If you select Continue a screen with progress bars displays and lets you know the progress of the recovery Do not turn off or disturb th...

Page 96: ...Using the System Drives and Bays NEC Versa File Bay SuperDisk Drive NEC VersaBay III NEC VersaBay III Swap Utility 24X CD ROM Drive CD Read Write Drive 8X DVD ROM Drive Hard Disk Drive Memory Modules...

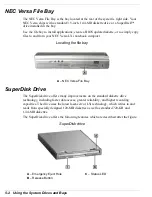
Page 97: ...Xi notebook computer Locating the file bay A NEC Versa File Bay SuperDisk Drive The SuperDisk drive offers many improvements on the standard diskette drive technology including faster data access grea...

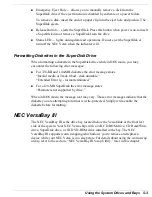
Page 98: ...For 720 KB and 1 44 MB diskettes the error message states Invalid media or Track 0 bad disk unusable Extended Error 1g format terminated For a 120 MB SuperDisk the error message states Parameters not...

Page 99: ...lug and Play technology to your NEC VersaBay III devices by allowing you to swap a CD ROM drive CD Read Write drive SuperDisk drive DVD ROM drive or NEC VersaBay III Battery Pack in the NEC VersaBay I...

Page 100: ...8 Power Management must be enabled to use the swap utility Warm swapping is not supported under Windows 2000 or Windows NT Warm swapping is not supported on the NEC Versa Dock The swap utility only su...

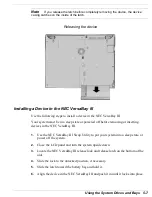
Page 101: ...Your system must be in a sleep state or powered off before removing or inserting devices in the NEC VersaBay III 1 Use the NEC VersaBay III Swap Utility to put your system into a sleep state or power...

Page 102: ...ep state or powered off before removing or inserting devices in the NEC VersaBay III 1 Use the NEC VersaBay III Swap Utility to put your system into a sleep state or power off the system 2 Close the L...

Page 103: ...move the standard device and install an optional hard disk drive Your system must be powered off before removing or inserting a hard disk drive in the NEC VersaBay III Add another hard disk drive as f...

Page 104: ...o get your data faster and to see smoother animation and video The CD ROM drive offers the following features which are described after the figure 24X CD ROM drive A Emergency Eject Hole C Status LED...

Page 105: ...he disc Do not write on or apply labels to either side of the disc Keep the disc away from direct sunlight or high temperatures Clean fingerprints or dust from the disc by wiping it with a soft cloth...

Page 106: ...ngs in the Settings tab and exit the Properties window 9 To activate the new setting reboot the system when prompted CD Read Write Drive Your NEC Versa may ship with a CD Read Write drive with Easy CD...

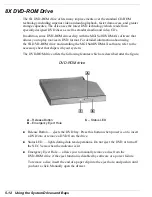
Page 107: ...MGI SoftDVDMAX software refer to the accessory sheet that ships with your system The DVD ROM drive offers the following features which are described after the figure DVD ROM drive A Release Button C...

Page 108: ...is located under the battery bay in your NEC Versa notebook computer You must remove the system s main battery before replacing the hard disk drive Replace the hard disk drive as follows 1 Save your...

Page 109: ...disk drive Place your finger in the center notch of the hard drive lever and pull up the lever Be sure that both sides of the lever are raised If you encounter any resistance when lifting the lever c...

Page 110: ...side of the center notch Pull the drive toward the open side of the battery bay Do not apply pressure to the drive surface as you pull Disconnecting the drive Once the drive is disconnected use the l...

Page 111: ...ed lower the new drive into the drive bay Lowering the drive into the bay Align the drive connector with the connector in the drive bay Pressing against the outer edge of the lever slide the drive tow...

Page 112: ...the drive A Screw C Hard Disk Drive B Hard Disk Drive Lever 7 Replace the battery pack as follows Locate the alignment groove on the edge of the battery Locate the alignment groove inside of the batte...

Page 113: ...B memory module 128 MB memory module 256 MB memory module Only install NECC supplied approved memory module options to ensure proper functionality of your NEC Versa notebook computer Contact your NECC...

Page 114: ...stem Drives and Bays 5 19 2 Turn over the system and locate the memory module bay Locating the memory module bay A Screw B Memory Module Bay Cover 3 Remove the screw and bay cover Removing the screw a...

Page 115: ...Locate the SO DIMM expansion port and proceed as follows Hold the SO DIMM at a 45 degree angle and align the SO DIMM contacts with the socket in the system Push the connector into the socket Press dow...

Page 116: ...ss the locking tabs away from the sides of the SO DIMM and hold while gently lifting on the edge of the SO DIMM When the edge of the SO DIMM pops up and is at approximately a 60 degree angle pull the...

Page 117: ...6 Communicating with Your NEC Versa PC Cards Mini PCI Modem Mini PCI LAN Mini PCI LAN Modem Internet Connections IR Port...

Page 118: ...nded card has an additional physical component that protrudes beyond the traditional card size The extension can be as large as 40 mm deep by 9 65 mm high This extension provides room for additional e...

Page 119: ...ebook computer it appears as a unique drive as long as the system has an available interrupt for the card Other Cards Many other kinds of PC cards are available for notebook computers They include the...

Page 120: ...elect the Hardware tab then the Device Manager In Windows 98 select the Device Manager tab To disable a device in Windows 95 NT reboot your system enter the BIOS setup and access the Peripheral Setup...

Page 121: ...s PC card activity Access CardWizard via the taskbar icon or via the Programs menu Removing a Card Follow these steps to remove a PC card in Windows 2000 or Windows 98 1 Double click the PC card icon...

Page 122: ...C card slots 4 Refer to the user guide that ships with your PC card modem for detailed instructions about how to use the PC card modem Note When using a modem outside the U S and Canada you might need...

Page 123: ...nly available if your system is equipped with these optional components Connecting the mini PCI LAN Mini PCI LAN Modem Your NEC Versa LXi may ship with an internal mini PCI Modem LAN that combines the...

Page 124: ...erience Use the Internet Connection Wizard or the operating system s network configuration options to configure your system for email and internet access Sign up for a new account or configure your sy...

Page 125: ...re connected to a LAN your live connection is already established Simply launch your internet browser or email application Connecting to the Internet in Windows NT In Windows NT use the operating syst...

Page 126: ...tem The instructions for enabling the IR port in Windows 2000 and Windows 98 vary Be sure to follow the instructions specific to your operating system provided in the following sections Enabling the I...

Page 127: ...hen select and click Infrared Recipient 4 During the file transfer a Wireless Link window may appear on the receiving IR device Click Yes to accept the file transfer Enabling the IR Port with Windows...

Page 128: ...s Explorer to display the files that you want to transfer 3 Right click the file s for transfer then select and click Infrared Recipient 4 During the file transfer an Infrared Monitor window may appea...

Page 129: ...7 Traveling Tips Preparing for Travel Packing for Travel Using Power Sources Getting Through Customs Using Your Modem...

Page 130: ...of the system Back up your NEC Versa s hard disk Insert a fully charged battery to make sure your system is ready to quickly boot up at the airport security check Fully charge all your batteries Tape...

Page 131: ...f customs regulations Plan wisely to get your NEC Versa notebook computer through customs by carrying the appropriate documentation to assure the customs agent that your system is not a recent purchas...

Page 132: ...our system for phone line access in another country Line access outside of a hotel may require the addition of a 9 preceding the phone number string Be sure to modify your dial up connection as requir...

Page 133: ...8 Using Peripheral Devices External Monitor Printer External Keyboard Mouse External Television Connections External Audio Options USB Devices NEC Versa Dock NEC Versa PortBar...

Page 134: ...onitor is DDC compliant Follow these steps to connect an external monitor to your NEC Versa 1 Check that the NEC Versa is powered off and the monitor power switch is turned off 2 Open the left most po...

Page 135: ...a printer be sure to install the appropriate printer driver through the Windows Control Panel Connect a parallel device to your NEC Versa as follows 1 Check that power to both the NEC Versa and the de...

Page 136: ...s Control Panel Follow these steps to connect a serial device to your NEC Versa 1 Check that power to both the NEC Versa and the device is off 2 Open the left most port cover on the back of the system...

Page 137: ...e VersaGlide while an external mouse is connected see Chapter 3 Using the BIOS Setup Utility The Internal Mouse parameter in the Advanced CMOS Setup section of the BIOS Setup parameters allows you to...

Page 138: ...a standard RCA input jack The S video TV out port requires an S video cable and a television equipped with an S video input jack S video transmission provides sharper picture images and superior color...

Page 139: ...C Versa and the other end of the cable into the S video input jack on your television 2 Go to Settings Control Panel Display Settings and click the Advanced button Windows 2000 98 or Settings Control...

Page 140: ...ord and play sound Connect audio jacks like a microphone headphones or external speakers to the audio ports as follows The headphone external speaker port supports SP DIF 1 Locate the audio port that...

Page 141: ...als Only one device needs to be plugged into your NEC Versa Additional peripherals can be connected in a daisy chain configuration where one device is connected to another in a series Up to 127 device...

Page 142: ...an NEC Versa Dock prior to October 29 1999 the monitor stand that shipped with the docking station cannot accommodate the NEC Versa LXi with 14 5 inch and 15 inch LCD panels You need to order a new m...

Page 143: ...ernal CRT VGA Port Connects an external VGA SVGA monitor to your notebook computer External Keyboard Port Connects to a 6 pin standard PS 2 style keyboard External Mouse Port Connects to a 6 pin stand...

Page 144: ...9 Using Multimedia Audio Video Multimedia Applications...

Page 145: ...lt in microphone make sure the speaker volume is turned down before using the microphone or feedback may occur The following procedure describes how to use the Microsoft Sound Recorder to record sound...

Page 146: ...for details on its use 1 Go to Start Program Accessories Entertainment Windows 2000 98 and select the Windows Media Player option 2 Click File and specify the file name of your audio source 3 Once yo...

Page 147: ...cord your own sounds Line In accepts analog signals from external devices such as a tape deck a stereo CD player a docking station or a stereo tuner The Line In port has a mini pin connector You may n...

Page 148: ...d impact you can plug a pair of stereo speakers into the headphone jack located on the right side of the system Adjust the volume with the volume control knob on the right side of the system through t...

Page 149: ...ics Port AGP adds new features for graphics accelerators such as dedicated access to main memory and faster transfer rates AGP further expands current 3D capabilities to new levels of visual realism p...

Page 150: ...re packages include graphics packages animation software and presentation authoring systems as follows Animation software allows you to create 3 D effects and 3 D titles and add interest to an otherwi...

Page 151: ...10 Solving System Problems Problem Checklist Start Up Problems If You Need Assistance...

Page 152: ...y pack is correctly inserted Attach the AC adapter to recharge the battery If you have the AC adapter attached check that you are using a working electrical outlet LCD screen is dark and blank Power s...

Page 153: ...Chapter 5 for details Upon resuming from a manual STF the system displays the message Following system component s changed since last Suspend Windows NT or Standby Windows 2000 98 System Memory Do you...

Page 154: ...dress line is short Error in the address decoding circuitry on the system board Contact your service representative for service C Drive Error Hard disk drive C does not respond Confirm that C hard dis...

Page 155: ...ice representative FDD Controller Failure The BIOS cannot communicate with the floppy disk controller Contact your service representative to check all appropriate connections HDD Controller Failure Th...

Page 156: ...beeps All beep code errors except beep code 8 are fatal errors and do not allow the system to continue to boot If beep codes occur during POST check the items in the Problem Checklist at the start of...

Page 157: ...ror The ROM checksum value does not match the value encoded in the BIOS 10 CMOS Shutdown Register Read Write Error The shutdown register for CMOS RAM failed 11 Cache Error External Cache Bad The exter...

Page 158: ...11 Getting Service and Support Service and Support Contact Information NECC Web Site NECC FTP Site NECC Support Services Email Fax to Support Services...

Page 159: ...email address tech support nec computers com Note If you purchased your computer outside of the U S or Canada please contact the local NECC office or their dealers for support and service If you have...

Page 160: ...for your technical support questions a Reseller s area password accessible To access NECC s Home Page enter the following Internet Uniform Resource Locator URL in your browser http www nec computers c...

Page 161: ...d service available in your country Email Fax to Support Services The NECC Support Services offers technical support by email over the Internet network if you have a modem The Internet address is tech...

Page 162: ...thy Work Environment Making Your Computer Work for You Arrange Your Equipment Adjust Your Chair Adjust Your Input Devices Adjust Your Screen or Monitor Vary Your Workday Pre Existing Conditions and Ps...

Page 163: ...sorders it is still unclear whether working at a computer causes such disorders Some doctors believe that using the keyboard and mouse may aggravate existing musculoskeletal disorders Note Contact a d...

Page 164: ...pth should allow your lower back to comfortably contact the backrest Make sure that the backs of your lower legs do not press against the front of the chair Extend your lower legs slightly so that the...

Page 165: ...them Keep your shoulders arms hands and fingers relaxed Adjust Your Screen or Monitor Correct placement and adjustment of the screen or external monitor can reduce eye shoulder and neck fatigue Check...

Page 166: ...osture periodically and keep your hands and wrists warm Note For more information on workstation setup see the American National Standard for Human Factors Engineering of Visual Display Terminal Works...

Page 167: ...amping stiffness throbbing weakness soreness tingling and or numbness in the hands wrists arms shoulders neck back and or legs This appendix was prepared in consultation with Dr David Rempel of the Un...

Page 168: ...B Specifications System Components Memory Map Interrupt Controllers...

Page 169: ...Standard Main Memory 64 MB SDRAM 3 3V SO DIMM 64 bit data path 100 MHz CBR refresh 128 MB SDRAM 3 3V SO DIMM 64 bit data path 100 MHz CBR refresh Optional Expansion 1 slot Expandable in 64 MB 128 MB...

Page 170: ...NEC Versa Dock and optional NEC Versa PortBar Microphone 1 port Mini Jack Stereo Headphones 1 port Mini Jack 5 watts per channel Stereo Line In 1 port Mini Jack TV Out 1 port RCA Jack 1 port 7 pin S V...

Page 171: ...matrix Thin Film Transistor TFT Extended Graphics Array XGA color display Resolution 1024 x 768 Colors 16 Million maximum Keyboard Membrane 85 keys both U S and International with standard QWERTY key...

Page 172: ...rate 120 MB 20ms typ 1 44 MB 720 KB 25ms typ Hard Disk Drive Specifications vary depending upon model Ultra DMA 33 support Capacity Internal 10 x or 20 x GB Drive height 12 7 mm Read write track to t...

Page 173: ...OM XA mode 2 form 1 form 2 CD I mode 2 form 1 form2 CD I Ready CD I Bridge Photo CD single and multiple sessions CD WO fixed and multiple packets Video CD Enhanced Music CD CD Plus CD RW 8X DVD ROM Dr...

Page 174: ...not Ultra DMA Write Transfer Rate 150 KB s normal speed 300 KB s 2X speed 600 KB s 4X speed Audio Out 0 8 0 25 Vrms Operating Conditions Shock 1G 11ms read 0 5G 11ms write Vibration 0 2G read 0 1G wri...

Page 175: ...nel Width 12 4 in 317 mm Depth 10 1 in 259 mm Height 1 9 in 49 mm System with 15 0 inch LCD panel Width 12 8 in 327 mm Depth 10 5 in 268 5 mm Height 1 96 in 50 mm Base of system with 15 0 inch LCD pan...

Page 176: ...ations Memory used by the OS device drivers TSRs and all DOS applications 0A0000 0AFFFFh 64 KB Video Buffer EGA and VGA 0B0000 0B7FFFh 32 KB Video Buffer monochrome CGA color VGA monochrome 0B8000 0BF...

Page 177: ...ystem Interrupt Controllers Controller Master Slave Priority Name Device Master 0 IRQ00 SystemTimer 1 Master 1 IRQ01 Keyboard Master 2 IRQ02 Programmable Controller Slave 3 IRQ08 Real time Clock Slave...

Page 178: ...C Frequently Asked Questions External Mouse Display PC Cards Diskette Drive Booting Power Management Miscellaneous...

Page 179: ...ports Contact your NECC dealer for ordering information Why won t a serial mouse work when connected to the PS 2 port with the appropriate adapter The NEC Versa LXi computer is designed to find a mou...

Page 180: ...CD into the appropriate drive Click on Have Disk and follow the on screen instructions to install the video driver PC Cards In which slots do my PC cards go Your PC cards can go into either slot if th...

Page 181: ...impact battery life When not using any PC card close all applications using the card and pop it part of the way out of the slot to save power If my NEC Versa LXi system is docked in the NEC Versa Dock...

Page 182: ...re that you have a diskette in the diskette drive containing operating system files Be sure to check the Boot Device Setup parameters in the BIOS Setup Utility to determine the designated sequence of...

Page 183: ...iskette do I use in my diskette drive Some systems ship with a 1 44 megabyte MB diskette drive that uses 3 5 inch high density HD diskettes These diskettes are also called double sided high density DS...

Page 184: ...ower off using the system unit Power button wait at least five seconds and then turn the power on Power Management Does my system come with power management features enabled Your system s default sett...

Page 185: ...y in Windows 2000 98 You can initiate full Suspend to RAM in Windows 2000 98 by accessing Start Shut Down Standby This places the system in a deeper state of sleep and requires that you press the Powe...

Page 186: ...ork Resuming from STF mode requires less time than performing a cold boot Your system must be configured for STF Hibernation In Windows Power Management Properties check the box labeled enable hiberna...

Page 187: ...Windows 2000 98 click on Start Settings Control Panel In Control Panel double click on the Power icon In the Power Properties screen uncheck Allow Windows to manage power use on this computer Miscella...

Page 188: ...I get a message Insufficient memory when I run some games I have 64 MB of memory The Insufficient memory refers to the 640 kilobytes of DOS base memory Since there are drivers being loaded at power o...

Page 189: ...do Verify that the IR port is enabled Enter the BIOS Setup Utility access the Peripheral Setup menu and be sure that the IR serial port setting contains an available COM port and IRQ setting Check tha...

Page 190: ...33 MBps and 1 07 GBps animation The art of making things appear to move in two dimensional 2 D or three dimensional 3 D space and making events happen over time applications programs Software designed...

Page 191: ...bit bus and bus mastering operation for improved adapter performance and can operate at speeds up to 32 MHz CD Compact disc A polished metal platter capable of storing digital information The most pr...

Page 192: ...ursor A movable image on the display screen that indicates where the next entered data appears D default A value option or setting that the computer automatically selects until you direct it otherwise...

Page 193: ...echnology that sends data at 4 0 Mbit second 4 million bits per second FM synthesis A technique for synthesizing sound that uses a combination of modulated sine waves to produce different waveforms fu...

Page 194: ...ersa is Infrared Data Association IrDA compatible interface A connection that enables two devices to communicate interrupt A special control signal from an I O device that diverts the attention of the...

Page 195: ...data at 1 152 Mbit second 1 152 000 bits per second MMX A set of 57 multimedia instructions built into Intel s Pentium microprocessors MMX enabled microprocessors handle many common multimedia operat...

Page 196: ...via modem to a paging device from a computer with paging communications software or telephone parallel interface Interface that communicates multiple data bits at a time parallel printer A printer wi...

Page 197: ...o attach the device to the computer processor In a computer a functional unit that interprets and executes instructions prompt A special symbol indicating the beginning of an input line Also a message...

Page 198: ...interface that communicates information one bit at a time serial printer A printer with a serial interface SIR Serial Infrared an infrared technology that sends data at 2 4 Mbit second 2 400 000 bits...

Page 199: ...phics technology that supports up to 256 or more colors and a graphics resolution of 800 by 600 pixels system board The main printed circuit board inside the system unit into which other boards and ma...

Page 200: ...ot Process of resetting the computer without turning off the power through keyboard input pressing Ctrl Alt and Del keys simultaneously The system returns to an initial or arbitrarily selected conditi...

Page 201: ...hin the computer that provides the high quality path required for smooth video playback or TV tuner transmission Zoomed video technology allows data transfer directly between a PC card and VGA control...

Page 202: ...harging LED 1 11 CMOS 2 14 gauge LEDs 2 7 handling 2 9 inserting 2 11 main 2 14 optional 2 14 precautions 2 13 recharging precautions 2 13 refresh 3 18 release latch 1 15 system 2 14 when to change 2...

Page 203: ...television connections 8 6 F Fan 1 13 FAQs booting C 7 diskette drive C 5 display panel C 2 external mouse C 2 miscellaneous C 10 PC cards C 3 power management C 7 File bay 1 14 1 15 5 2 FTP site 11 3...

Page 204: ...map B 9 module bay 1 15 modules 5 18 MGI SoftDVDMAX 5 12 Microphone 1 6 1 14 9 4 MIDI files 9 6 Mini PCI LAN 6 7 LAN Modem 6 7 modem 6 6 Mixing 9 5 Monitor port 1 12 turning off 3 20 3 23 Mouse port...

Page 205: ...terconnect PCI 1 3 Playing back 9 3 PortBar notches 1 11 POST error messages 10 4 Power button 1 5 1 7 3 13 button pressing 3 21 connections 7 3 meter 3 21 3 24 options Windows 2000 3 19 pressing butt...

Page 206: ...rs 1 5 Storage requirements 2 16 SuperDisk drive 1 14 5 2 formatting diskettes 5 3 Supervisor password 3 9 Support services 11 3 Suspend mode 3 14 3 28 warning tone 3 15 Switch settings 3 31 System ba...

Page 207: ...Video 9 6 Video out type 3 7 Volume control 1 13 W Wake up from Suspend 3 15 Warm swap 5 4 Web site 11 3 Windows 2000 4 2 2000 power options 3 19 2000 taskbar icons 4 3 98 4 3 98 desktop icons 4 3 98...

Page 208: ...interference to radio communications However there is no guarantee that interference will not occur in a particular installation If this equipment does cause harmful interference to radio or televisi...

Page 209: ...equivalent type recommended by the manufacturer Discard used batteries according to the manufacturer s instructions Il y a danger d explosion s il y a replacement incorrect de la batterie Remplacer un...

Page 210: ...DECLARATION OF CONFORMITY We the Responsible Party NEC Computers Inc 15 Business Park Way Sacramento CA 95828 declare that the product NEC Versa LXi is in compliance with FCC CFR47 part 15 for Class...

Reviews: