background image

28

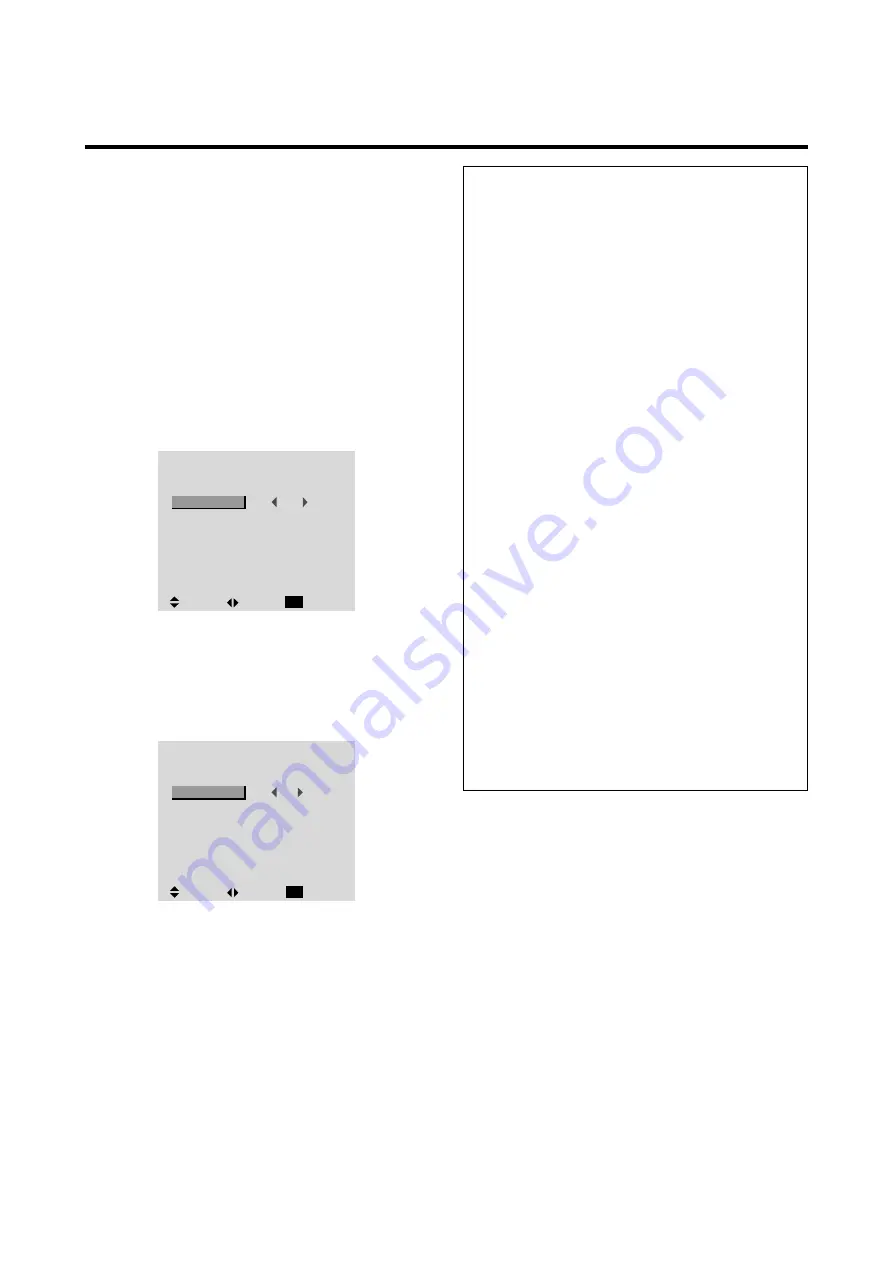
Setting the power management for computer images

This energy-saving (power management) function
automatically reduces the monitor’s power consumption
if no operation is performed for a certain amount of time.

Example: Turning the power management function on

Press the PROCEED button on the remote control to
display the MAIN MENU on the screen, then...

1. Use the 

 and 

 buttons to select “FUNCTION”, then

press the PROCEED button.
The “FUNCTION” screen appears.

2. Use the 

 and 

 buttons to select “POWER MGT”.

F U N C T I O N

OSM
OSM ADJ.
POWER MGT
GRAY LEVEL
CINEMA MODE

ON
1

OFF

3
ON

:
:
:
:
:

SEL.

ADJ.

RETURN

EXIT

1

:

LONG LIFE

RGB3 ADJ.

RESET

3.

To turn the power management function on ...

Use the 

 and 

 buttons to select “ON”.

The mode switches as follows each time the 

 or 

button is pressed:

ON 

 OFF

F U N C T I O N

OSM
OSM ADJ.
POWER MGT
GRAY LEVEL
CINEMA MODE

ON
1

ON

3
ON

:
:
:
:
:

SEL.

ADJ.

RETURN

EXIT

1

:

LONG LIFE

RGB3 ADJ.

RESET

4.

Once the setting is completed ...

Press the EXIT button to return to the main menu.
To delete the main menu, press the EXIT button once
more.

Information

 Power management function

* The power management function automatically reduces

the monitor’s power consumption if the computer’s
keyboard or mouse is not operated for a certain amount
of time. This function can be used when using the
monitor with a computer conforming to the VESA
DPMS format.

* If the computer’s power is not turned on or if the

computer and selector tuner are not properly connected,
the system is set to the off state.

* For instructions on using the computer’s power

management function, refer to the computer’s operating
instructions.

 Power management settings

ON ...................

In this mode the power management
function is turned on.

OFF .................

In this mode the power management
function is turned off.

 Power management function and POWER/

STANDBY indicator

The POWER/STANDBY indicator indicates the status
of the power management function. See page 29 for
indicator status and description.

 Restoring the factory default settings

Select  “RESET” under the function menu. Note that
this also restores other settings to the factory defaults.

Summary of Contents for PlasmaSync 61XM1A

Page 1: ...PlasmaSync Plasma Monitor User s Manual NEC Technologies...

Page 2: ...tured to provide long trouble free service No maintenance other than cleaning is required Use a soft dry cloth to clean the panel Never use solvents such as alcohol or thinner to clean the panel surfa...

Page 3: ...f a Plasma Display Panel Recommendations to avoid or minimize phosphor burn in Like all phosphor based display devices and all other gas plasma displays plasma monitors can be susceptible to phosphor...

Page 4: ...n que NEC produise des panneaux affichage plasma avec plus de 99 99 de cellules actives il peut y avoir des cellules qui ne produisent pas de lumi re ou qui restent allum es Pour des raisons de s curi...

Page 5: ...vie du Panneau d Affichage Plasma Pour viter le risque de combustion au phosphore les mesures suivantes sont recommand es Comme tous les appareils d affichage base de phosphore et tous les autres affi...

Page 6: ...cluding adjustment of user controls These costs are the responsibility of the NECTECH dealer from whom the product was purchased 3 Shipping charges HOW YOU CAN GET WARRANTY SERVICE 1 To obtain service...

Page 7: ...E SIZE is set to OFF 15 MULTI SCREEN Operations 16 Showing a couple of pictures on the screen at the same time 16 Selecting the input signals to be displayed 16 Adjusting the OSM controls 16 OSM Contr...

Page 8: ...and mounting it is strongly recommended to use a trained authorized NEC dealer Failure to follow correct mounting procedures could result in damage to the equipment or injury to the installer Product...

Page 9: ...720P and HDTV signal compatibility PCs VCRs Laser Disc and DVD player source compatibility AccuBlend scan conversion automatically converts VGA SVGA XGA SXGA and UXGA signals to the panel s native re...

Page 10: ...POWER STANDBY PROCEED INPUTSELECT DOWN UP LEFT RIGHT EXIT VOLUME qPROCEED Sets the On Screen Menu OSM mode and displays the main menu w VOLUME DOWN and UP Adjusts the volume Functions as the CURSOR b...

Page 11: ...Laser Discs etc here I RGB1 Inputs the analog RGB signal of personal computer etc J RGB2 DVD2 HD2 RGB2 Inputs the analog RGB signal DVD2 HD2 Connect DVD s High Definition or Laser Discs etc here K RG...

Page 12: ...utton to select VIDEO as the source VIDEO1 VIDEO2 VIDEO3 VIDEO can also be selected using the INPUT SELECT button on the monitor The input switches as follows each time the button is pressed VIDEO1 VI...

Page 13: ...o switch the screen size to ZOOM mode automatically with the superimposed caption displayed fully only when the picture contains dark areas above and below the picture 8 Remote control signal transmit...

Page 14: ...o not drop or mishandle the remote control Do not get the remote control wet If the remote control gets wet wipe it dry immediately Avoid heat and humidity When not using the remote control for a long...

Page 15: ...Disc Player Document Camera DVD Player IBM VGA or Compatibles Personal computer with a digital RGB output Signal cable supplied To Mini D Sub 15 pin connector on the plasma monitor To video inputs on...

Page 16: ...n unit Note that the RGB3 IN DVI terminal does not support analog RGB input source Note 1 Input TMDS signals conforming to DVI standards The TMDS input corresponds to 1 link 2 To maintain display qual...

Page 17: ...DEO 2 VIDEO 3 Y CB PB L MONO R L MONO R CR PR B CB PB AUDIO 2 DVD1 HD1 AUDIO 3 AUDIO 1 RGB2 DVD2 HD2 EXTERNAL CONTROL REMOTE CONTROL CONTROL LOCK ON OFF SPEAKERS MUST HAVE MORE THAN 7WATT RATING IMPED...

Page 18: ...I Connector The unit is equipped with a type of connector commonly used for both analog and digital Functionally this cannot be used for an analog input TMDS can be used for one link only Pin No 1 2 3...

Page 19: ...on is pressed 2 If the button is not pressed for approximately three seconds the menu turns off DIGITAL ZOOM Digital zoom specifies the picture position and enlarges the picture 1 Press the POINTER bu...

Page 20: ...er has been set press the OFF TIMER button once 2 The remaining time is displayed then turns off after a few seconds 3 When five minutes remain the remaining time appears until it reaches zero OFF TIM...

Page 21: ...e picture has the same size as video pictures with a 4 3 aspect ratio FULL size screen The image is expanded in the horizontal direction Images compressed in the horizontal direction squeezed images a...

Page 22: ...n VGA SVGA 4 3 The image is true resolution FULL size screen The image is expanded in the horizontal and vertical direction When wide signals are input TRUE The image is true resolution FULL Informati...

Page 23: ...perations VIDEO1 RGB PC1 A B VIDEO1 RGB PC1 A B Selecting the input signals to be displayed 1 Press the SELECT button to make the desired picture active 2 Press the RGB PC VIDEO or DVD HD button Each...

Page 24: ...S INFORMATION SEL OK EXIT EXIT PROCEED 2 Press the cursor buttons on the remote control to highlight the menu you wish to enter 3 Press the PROCEED button on the remote control to select a submenu or...

Page 25: ...menu is displayed OSM ADJ Adjusts the vertical and horizontal positions of the menu display 1 Yes POWER MGT Sets the monitor for use as an energy saving display when used with a OFF Yes computer GRAY...

Page 26: ...setting is set and the previous screen reappears 4 Once the adjustment is completed Press the EXIT button to return to the main menu To delete the main menu press the EXIT button once more Note If CA...

Page 27: ...ws when the and buttons are pressed MEMORY THEATER NORMAL RESET PICTURE MODE THEATER Ifneitherthe or buttonispressedwithin5seconds the current selection is set and the previous screen reappears 4 Once...

Page 28: ...FF R G SEL ADJ RETURN EXIT 3 Use the and buttons to select 1 The mode switches as follows when the and buttons are pressed 1 2 3 PRO See page 22 to set PRO COLOR TEMP 1 If neither the or button is pre...

Page 29: ...either the or button is pressed within 5 seconds thecurrentselectionissetandthepreviousscreenreappears 4 Press the PROCEED button The WHITE BALANCE screen appears 5 Use the and buttons to select RED G...

Page 30: ...RETURN EXIT 3 Use the and buttons to select NR 3 The mode switches as follows when the and buttons are pressed OFF NR 1 NR 2 NR 3 NR NR 3 If neither the or button is pressed within 5 seconds the curr...

Page 31: ...CE L R SEL ADJ RETURN EXIT If neither the or button is pressed within 5 seconds thecurrentselectionissetandthepreviousscreenreappears To continue adjusting the sound Repeat from step 2 4 Once the adju...

Page 32: ...image can be adjusted and flickering of the image can be corrected Example Adjusting the vertical position in the normal mode Press the PROCEED button on the remote control to display the MAIN MENU on...

Page 33: ...nu When using the monitor for presentations etc the monitor can be set so that the input source screen mode etc do not appear Example Turning the on screen menu mode off Press the PROCEED button on th...

Page 34: ...ON SEL ADJ RETURN EXIT 1 LONG LIFE RGB3 ADJ RESET LONG LIFE RGB3 ADJ RESET 1 3 To adjust the position Adjust using the and buttons OSM OSM ADJ POWER MGT GRAY LEVEL CINEMA MODE ON 1 OFF 3 ON SEL ADJ R...

Page 35: ...n to return to the main menu To delete the main menu press the EXIT button once more Information Power management function The power management function automatically reduces the monitor s power consu...

Page 36: ...ent from the computer No horizontal and vertical synchronizingsignalsaresentfromthe computer Turning the picture back on Picture already on Operate the keyboard or mouse The picture reappears immediat...

Page 37: ...he function menu Note that this also restores other settings to the factory defaults Setting the picture to suit the movie The film image is automatically discriminated and projected in an image mode...

Page 38: ...In such a case be sure to adjust the position Restoring the factory default settings Select RESET under the function menu Note that this also restores other settings to the factory defaults Reducing b...

Page 39: ...cture adjustments audio settings to the factory default values Refer to page 18 for items to be reset Press the PROCEED button on the remote control to display the MAIN MENU on the screen then 1 Use t...

Page 40: ...formation AUDIO INPUT A single audio input cannot be selected as the audio channel for more than one input terminal Restoring the factory default settings Select RESET under the function menu Note tha...

Page 41: ...n the screen then 1 Use the and buttons to select OPTION then press the PROCEED button The OPTION screen appears 2 Use the and buttons to select RGB SELECT AUDIO INPUT AUDIO1 AUDIO2 AUDIO3 BNC SELECT...

Page 42: ...other settings to the factory defaults Setting high definition images to the suitable screen size Use this procedure to set whether the number of vertical lines of the input high definition image is...

Page 43: ...ON For RGB Input NORMAL and FULL can be selected for Wide Screen switching OFF For RGB Input TRUE and FULL can be selected for Wide Screen switching Restoring the factory default settings Select RESE...

Page 44: ...ting is completed Press the EXIT button to return to the main menu To delete the main menu press the EXIT button once more Information Language settings ENGLISH English DEUTSCH German FRAN AIS French...

Page 45: ...cally detected and the format is set accordingly AUTO1 3 58NTSC 4 43NTSC PAL SECAM PAL60 AUTO2 PAL M PAL N 3 58NTSC PAL B G This is the standard format used mainly in the United Kingdom and Germany SE...

Page 46: ...7FH this indicates that the commands and data of the supported equipment have been received When the lower order 4 bits is BH as in 3BH and 7BH this indicates that unsupported commands and data have...

Page 47: ...H 02H 38 BNC SELECT DFH 8CH 01H 39 RGB Select DFH 8BH 01H 40 HD Select DFH 8AH 01H 41 PICTURE SIZE Select DFH 2AH 01H 42 LANGUAGE Select DFH 5BH 01H 43 COLOR SYSTEM Select DFH 5CH 01H 44 Multi Screen...

Page 48: ...SER PICTURE Gain Flag 01H DATA01 CONTRAST Gain Flag 07H DATA02 CONTRAST Gain CCH 52 FFH 01 00H 0 01H 01 14H 20 ACK 7FH 60H 80H 7FH 02H DATA00 DATA01 CKS DATA00 USER PICTURE Gain Flag 01H DATA01 CONTRA...

Page 49: ...CTURE MODE Select Function The external control equipment sets the picture mode of the plasma monitor Transmission Data DFH 80H 60H 0AH 01H DATA00 CKS DATA00 01H MEMORY 02H THEATER 03H NORMAL 04H RESE...

Page 50: ...03H 17 NR MODE Set Function The external control equipment sets the NR Noise Reduction mode of the plasma monitor Transmission Data DFH 80H 60H C0H 01H DATA00 CKS DATA00 01H NR OFF 02H NR 1 03H NR 2 0...

Page 51: ...0 DATA01 CKS DATA00 USER PICTURE Gain Flag 03H DATA01 V POSITION Gain Flag 01H 23 H POSITION Gain Data Function The external control equipment changes the H POSITION gain data of the plasma monitor Tr...

Page 52: ...a ratiooffrequency division of the plasma monitor Transmission Data DFH 80H 60H 7FH 03H DATA00 DATA01 DATA02 CKS DATA00 USER PICTURE Gain Flag 03H DATA01 CLOCK Gain Flag 04H DATA02 CLOCK Gain C0H 64 F...

Page 53: ...VEL 00H 0 0FH 15 33 CINEMA MODE Set Function The external control equipment switches on or off the CINEMA MODE of the plasma monitor Transmission Data DFH 80H 60H C1H 01H DATA00 CKS DATA00 CINEMA MODE...

Page 54: ...or returns Not Available when selecting the VIDEO1 for AUDIO2 or VIDEO3 after VIDEO1 has been set to AUDIO1 38 BNC SELECT Function The external control equipment sets the BNC SELECT of the plasma moni...

Page 55: ...07H 01H DATA00 CKS DATA00 Multi Screen 00 Single screen 01 Side by side 1 Left screen bigger 02 Side by side 2 Left screen smaller 03 Picture in Picture sub screen L 04 Picture in Picture sub screen R...

Page 56: ...DATA06 00H No signal 01H to 80H RGB signal Identification number of PC mode 81H Video signal 3 58NTSC 82H 4 43NTSC 83H PAL 84H PAL M 85H PAL N 86H PAL60 87H SECAM 88H B W60 89H B W50 A0H HD DVD DTV s...

Page 57: ...ATA03 COLOR Gain E0H 32 COLOR Gain is from 22 EAH to FFH 01 22 16H only during video 00H 0 01H 01 20H 32 DATA04 TINT Gain E0H 32 TINT Gain is from 22 EAH to FFH 01 22 16H only during video 00H 0 01H 0...

Page 58: ...ideo 1 02H Video 2 03H Video 3 05H HD HD1 or DTV or DTV 1 06H HD2 DTV2 07H RGB 1 PC 1 08H RGB 2 PC 2 0CH RGB 3 PC 3 49 Failure Mode Request Function Theexternalcontrolequipmentinquiresthedetectionoffa...

Page 59: ...4 YES 3 YES 4 YES 7 YES 7 TRUE YES YES YES YES YES YES YES YES YES YES YES YES YES YES YES YES YES YES FULL 16 9 YES YES YES YES YES YES YES YES YES YES YES YES YES YES YES YES YES YES YES YES YES YES...

Page 60: ...her screen modes ZOOM and STADIUM are available as well NOTE While the input signals comply with the resolution listed in the table above you may have to adjust the position and size of the picture or...

Page 61: ...side the main unit has become too high and has activated the protector Remedy Leave some space between the display and the connected components Replace both batteries with new ones Plug the monitor s...

Page 62: ...or UP DOWN LEFT RIGHT Pointer Zoom up down Off timer Wireless Wired remote control OSM Functions Picture Contrast Brightness Sharpness Color Tint Picture mode Color temperature Noise reductions Sound...

Page 63: ...Copyright by NEC Corporation...

Page 64: ...57 Printed on recycled paper Printed in Japan 7S800262 NEC Technologies Technologies T Inc 1250 N Arlington Heights Road Suite 500 Itasca Illinois 60143 1248...

Reviews: